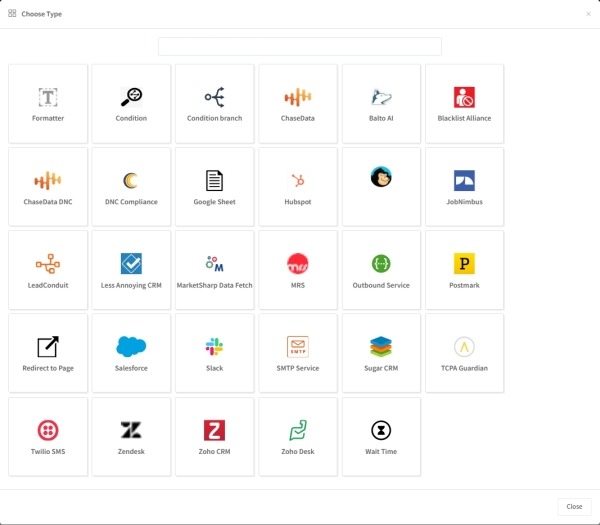
Balto AI
Balto is a call guidance tool for assisting agents with dynamic prompts, compliance checklists, and coaching alerts during customer interactions, to ensure that agents adhere to scripts and handle objections appropriately.
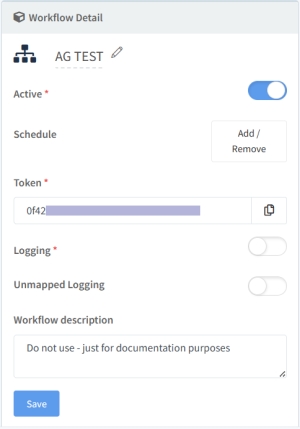
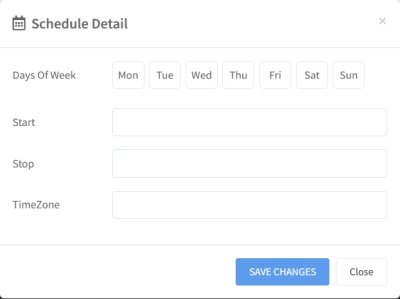
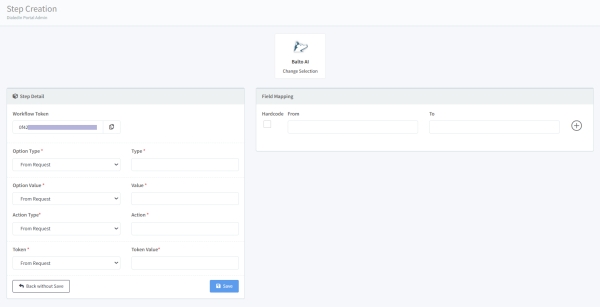
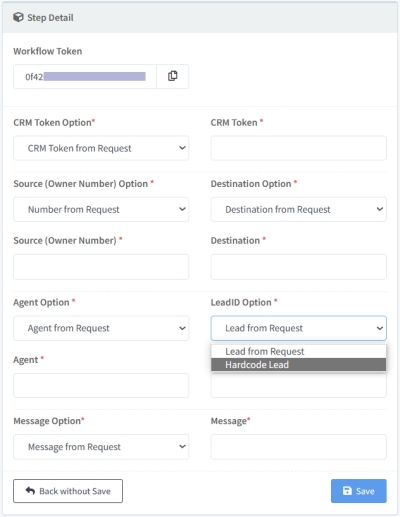
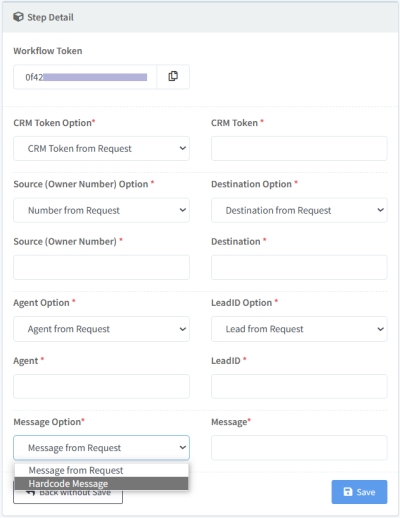
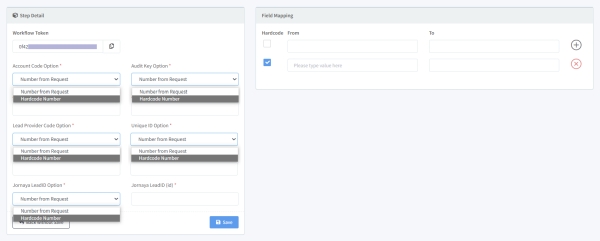
The Workflow Steps for the Balto AI integration include authorization elements, as well as indicators as of whether the request is to start or stop the conversation analysis process for the current audio. Authorization could be on a per-request basis (provided with the request) or based on preset parameters (set at the workflow level, i.e., hardcoded).
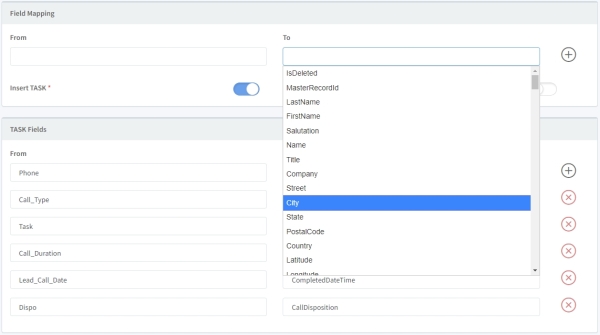
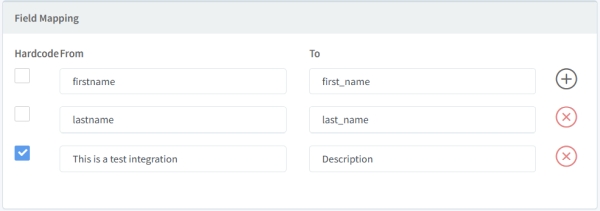
As with other workflow steps, integration allows mapping fields between a Balto AI field or parameter (destination) and a DialedIn value (origin), whether hard-coded or a field reference.
Refer to your Balto AI setup for additional information; actions and mapping are specific to your own scenario and Balto AI implementation.
Back to Table
Blacklist Alliance
The Blacklist Alliance is an organization that provides a compliance and risk management solution for leads used in marketing campaigns, in order to avoid TCPA Predators. This is done through their Litigation Firewall via an API.
Blacklist Alliance's Litigation Firewall provides scores on numbers representing levels of litigation risk.
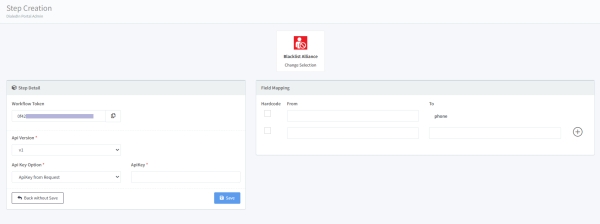
This workflow step allows you to use your Blacklist Alliance API key and a phone number to check numbers against their TCPA plaintiff database. As with other workflow steps, integration allows mapping other fields, whether hard-coded or a field reference.
Back to Table
ChaseData CRM
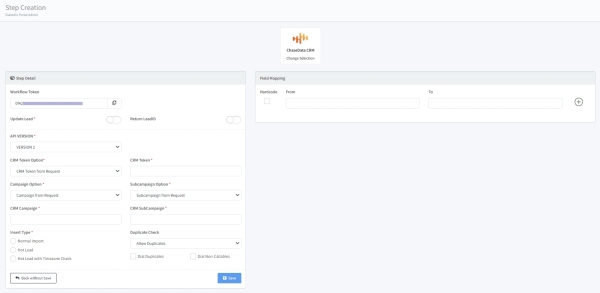
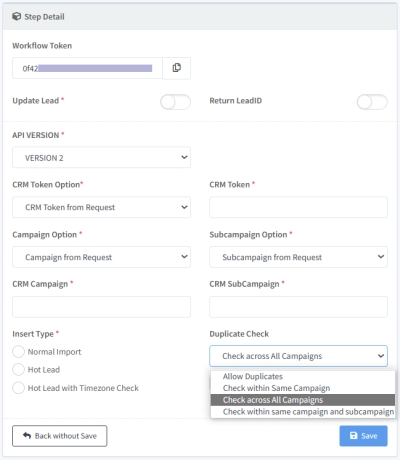
Integration with ChaseData CRM is usually to exchange and/or modify information related to leads/contacts and relate phone calls. This is usually highly tailored to a specific operation, hence varies greatly from implementation to implementation, but it is done at the Campaign level on every instance, and the leads/contacts associated with it.
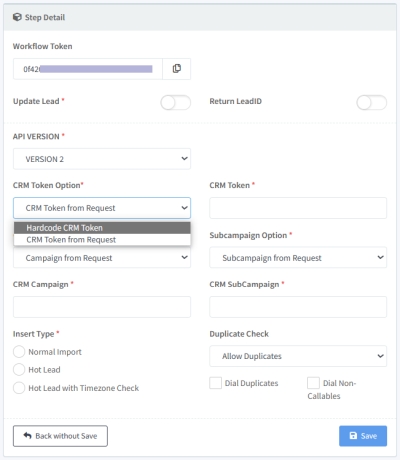
Therefore, the Workflow Steps for ChaseData CRM integration include parameters to determine authentication and authorization to access the corresponding leads and campaigns.
The general concept of these integrations and operations details are documented in another article. Refer to the PHP Integration article in the Knowledge Base for more details:
Integrations - Power-Import PHP Script
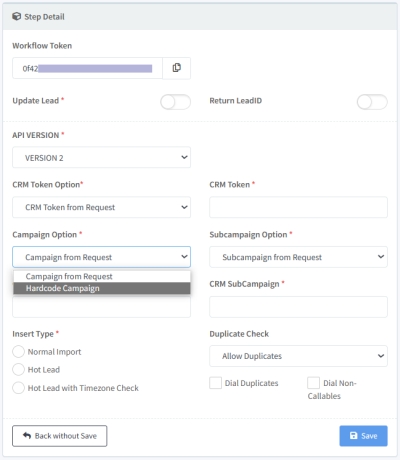
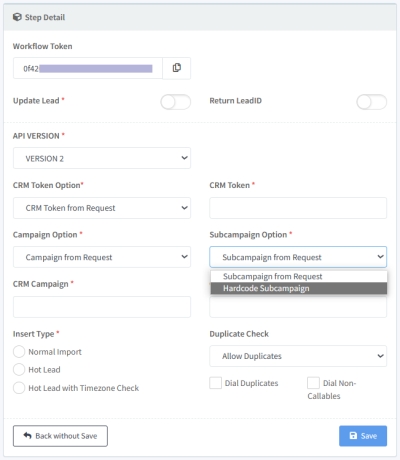
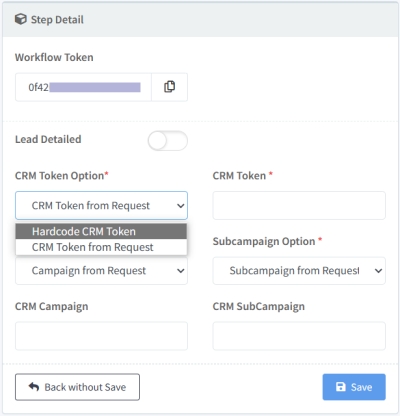
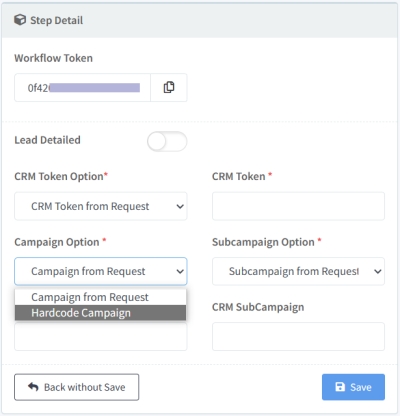
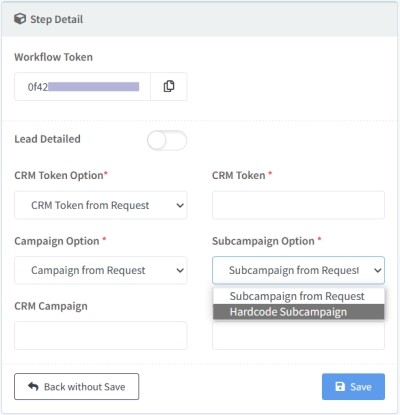
Here, Campaign and sub-Campaign must be specified, which can be coming from the particular request, or preset (hardcoded) at the workflow level. If the option selecetd is 'hardcoded', then the hardcode value must also be included. Other parameters are dependent on the type of request, as described in the link above.
The mapping section defines any fields that you may want to map from request (or hardcoded) to the ChaseData CRM.
Back to Table
ChaseData DNC
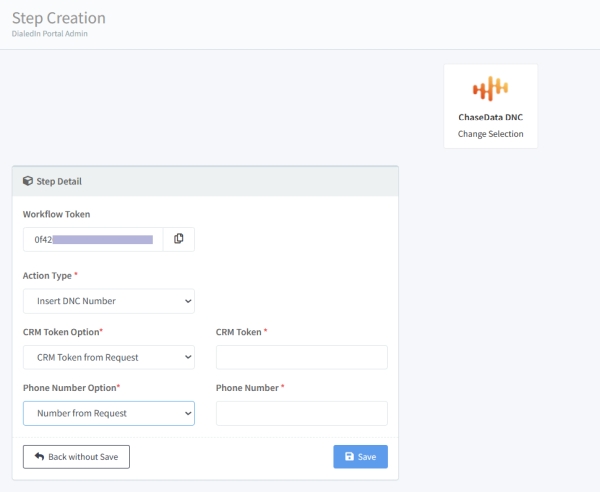
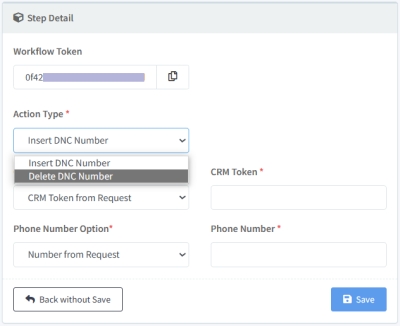
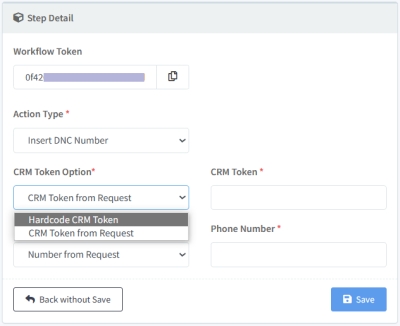
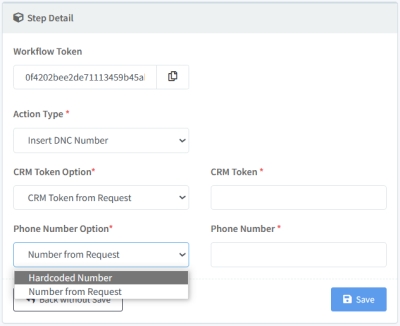
This integration allows adding or removing a number from the corresponding internal ChaseData Do Not Call (DNC) list. The token and phone number can be passed on the request, or hard-coded within the step definition.
Back to Table
ChaseData Email
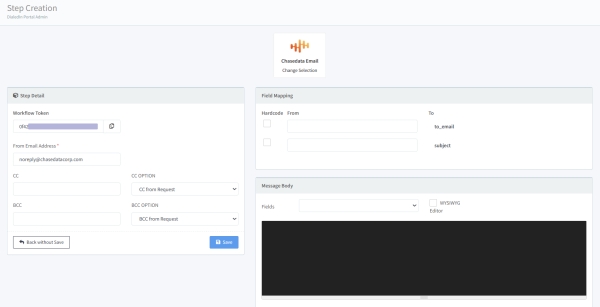
This integration workflow can be used to request an email to be sent from the ChaseData email host to an individual or small group. For example, an alert or notification. The email will generally show to be sent from noreply@chasedatacorp.com.
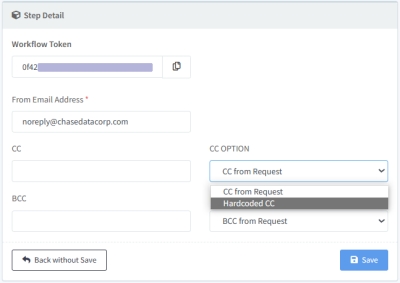
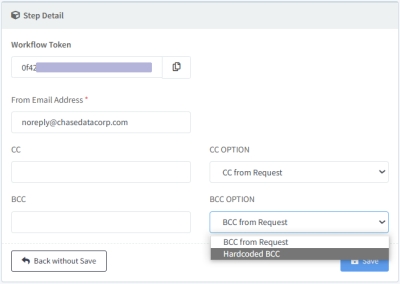
As usual, to be able to use this integration, an authorized application token must be used. The email destination and email subject are obtained by indicating the fields to be mapped, whether hard-coded or from a request field. The email can be copied (CC and/or BCC) to recipients specified in the request (by specifying the corresponding request fields or hard-coding them).
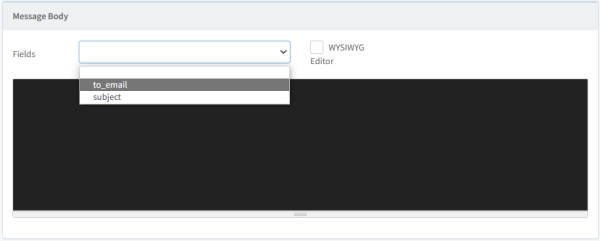
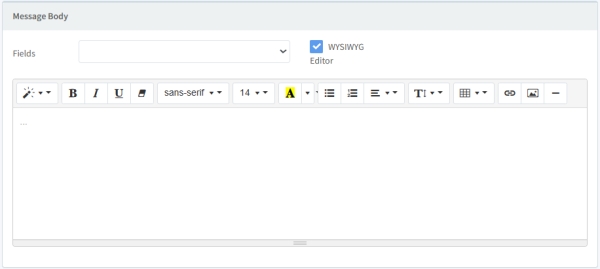
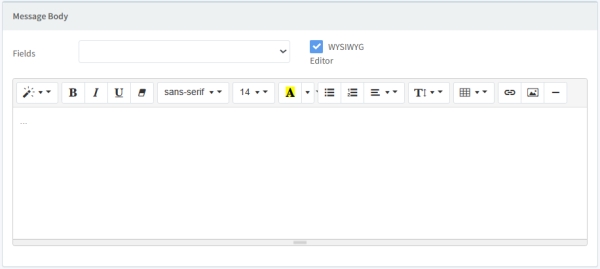
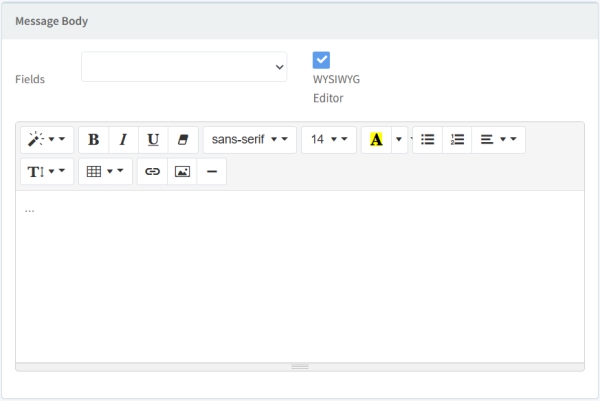
The message body can be an HTML construct, or WYSIWYG by clicking on the appropiate box, which adds formatting icons to the editing window. Certain variables, or fields, can be added to the message body by selecting them from the Fields drop down menu in order to insert the selected field in the current position of the message body.
Back to Table
ChaseData Lead Search
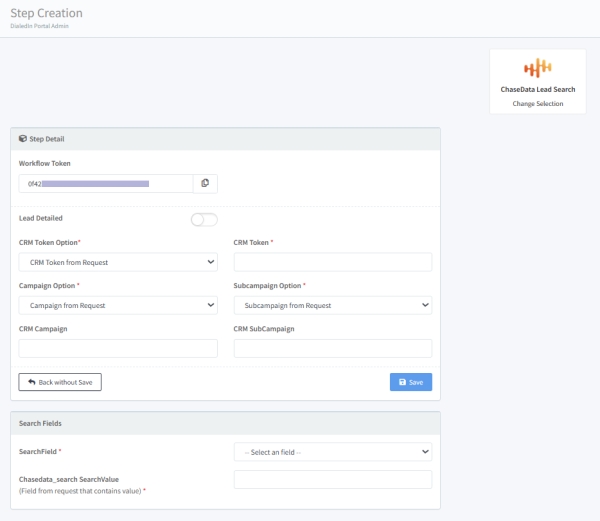
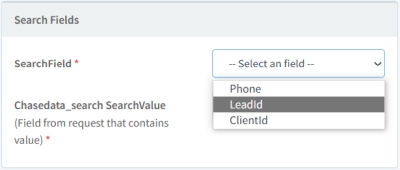
This integration workflow can be used to search for lead/contact record in the ChaseData database. You need to specify what field to use for the search, which can be Phone, LeadId, or ClientId. The Campaign and Sub-Campaign can be specified to filter the search, which can be passed in the request or hard-coded here.
As usual, to be able to use this integration, an authorized application token must be used.
Back to Table
ChaseData SMS
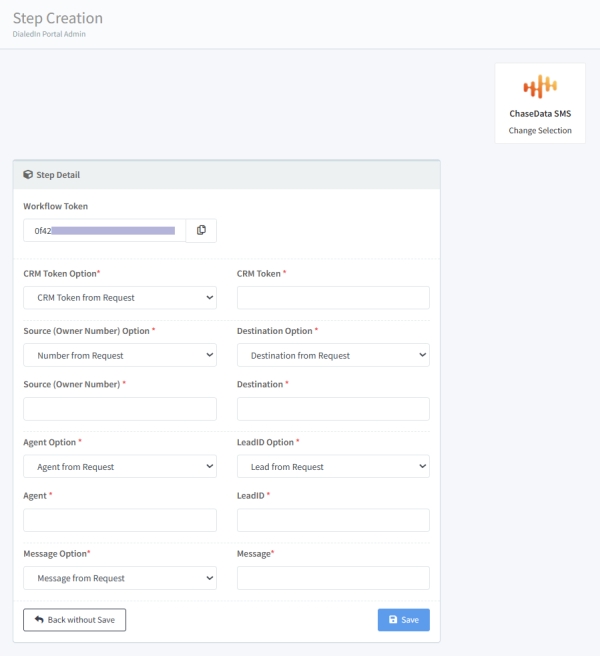
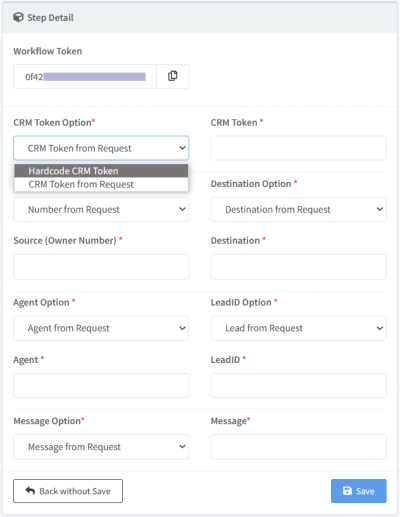
This integration options requests the ChaseData system to initiate an SMS (text) message from a valid DID number to the specified destination.
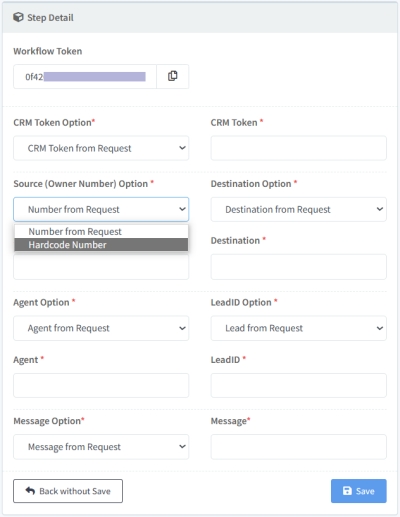
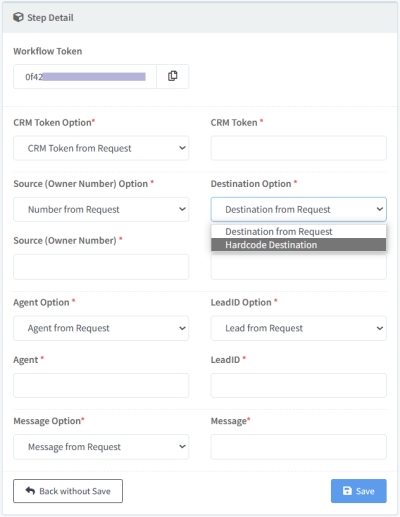
Both the source and destination need to be specified, either by providing a hard-coded value, or by indicating the field in the request that contains the value. In the case of source, it must be a valid, assigned and enabled DID number of the account (i.e., owned). The format of the number in both cases is 10 numeric digits (no spaces or any other characters).
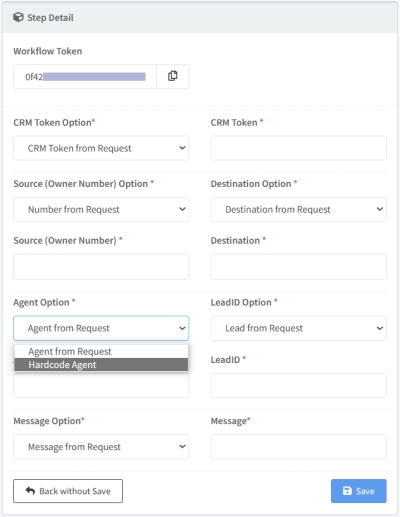
The Agent associated with the message, and Lead (ID) associated with the destination of this message must also be specified, either hard-coded or by specifying the field in the request that contains the corresponding value. The text message (body) can also be hard-coded or obtained from the specified field in the integration request message.
Keep in mind that all SMS that are sent are tracked for proper billing.
Back to Table
Condition
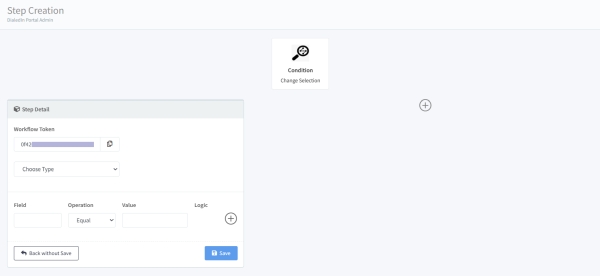
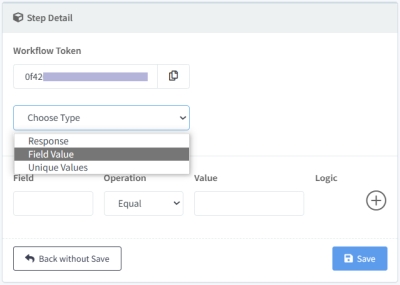
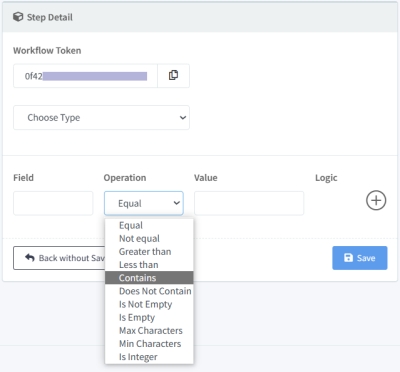
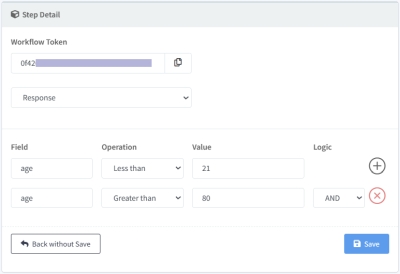
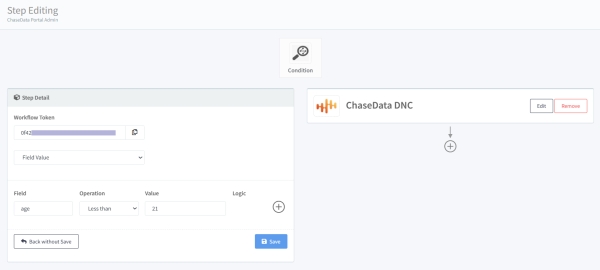
With a Condition Workflow Step you can group one or more two steps that are executed only if the condition evaluates to TRUE. This condition can test an element of the response from the previous workflow step, a field value, or the uniqueness of a value. Multiple conditions can be included using AND/OR operators.
Back to Table
Condition branch
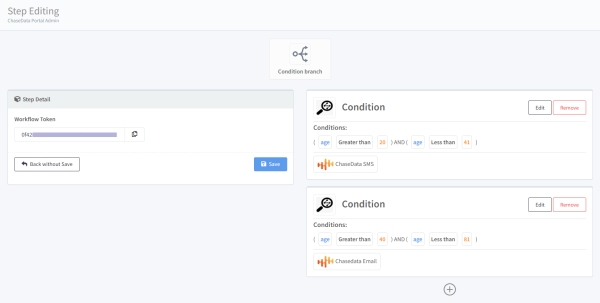
With a Condition Branch Workflow Step you can define a series of conditions that allow you to branch into a group of one or more steps for the condition that evaluates to TRUE. This condition can test an element of the response from the previous workflow step, a field value, or the uniqueness of a value. The Condition for each branch is defined using a Condition Step.
Back to Table
DNC Compliance
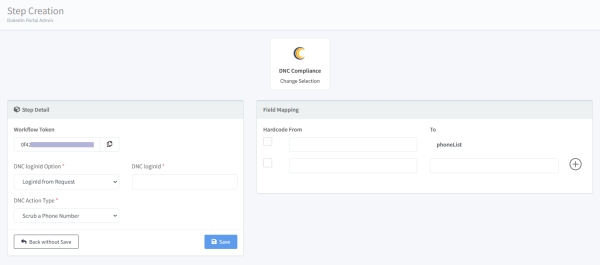
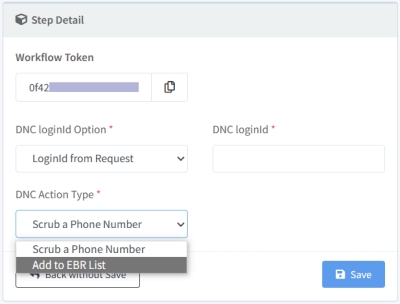
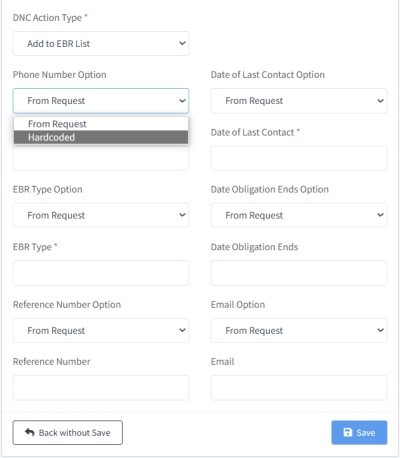
Contact Center Compliance (DNC.com) is an organization that helps adhere to the latest Telephone Consumer Protection Act (TCPA) and Do Not Call List (DNC) regulations by using their DNC list scrubber. Using this API, you can scrub a number or add it to the EBR List (Established Business Relationships).
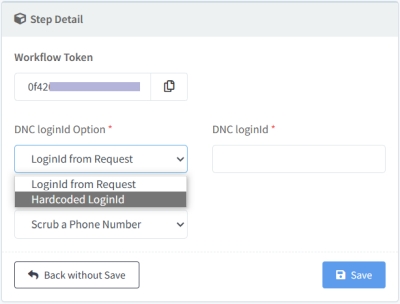
You need to provide the LoginId for your DNC.com account, as well as a phone number list, whether hard-coded or using field references.
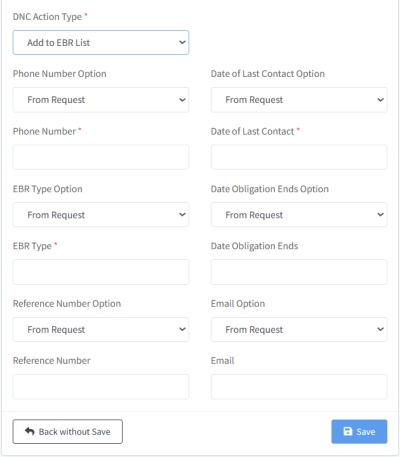
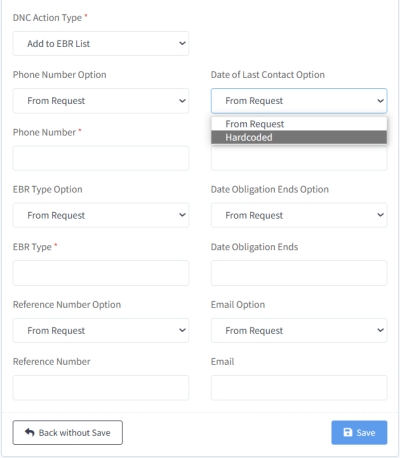
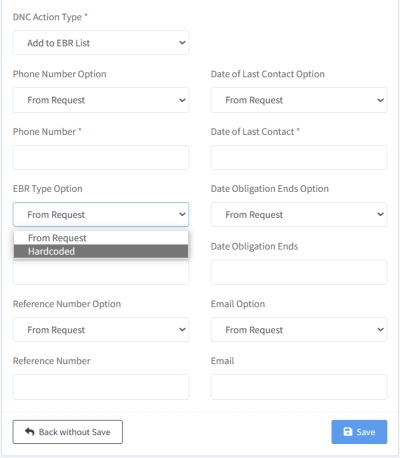
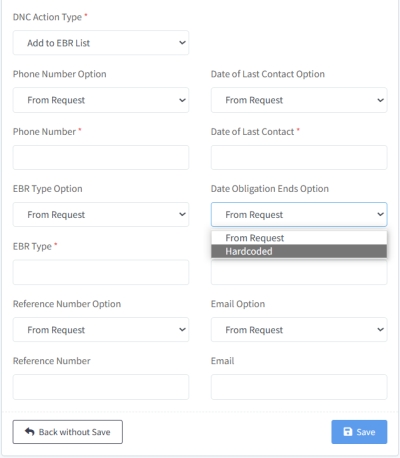
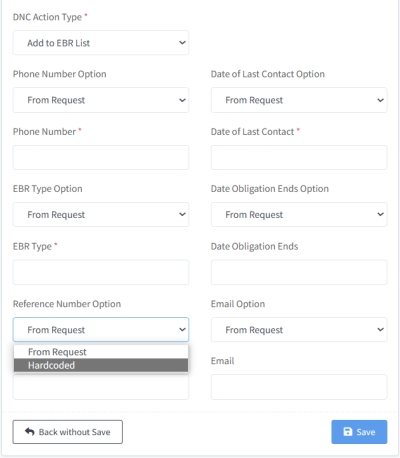
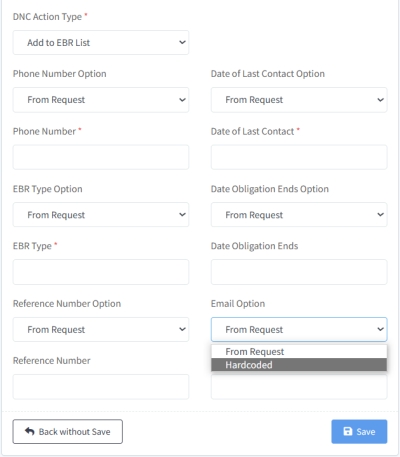
When selecting to Add to EBR List, additional information is required, as depicted below.
Back to Table
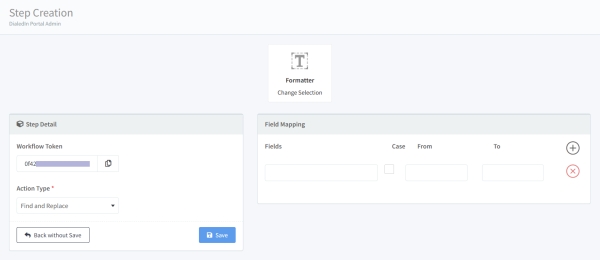
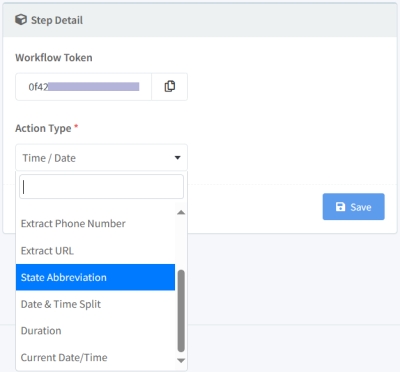
This Worflow Step is used to re-format the value received from a previous step. It tries to match the specified field name to those received from the corresponding API request, and, where matches are found, applies the specified format to the value it contains.
As it can be seen in the following pictures, Action Type indicates the type of field that is expected, where each type provides different options on how to specify that.
Back to Table
Google Sheet
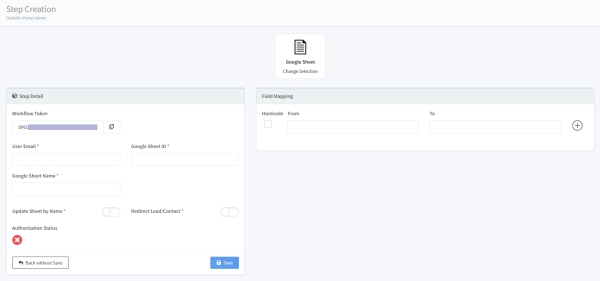
The Google Sheet integration allows changing values in the specified Google Sheet, whether using the value of a field or just providing a hard-coded value. Setting up this Workflow Step triggers an authorization process with Google via the provided email address, which needs to happen before it can effectively be used; the status of the authorization attempt will be shown in the Step Detail part.
Back to Table
Hubspot
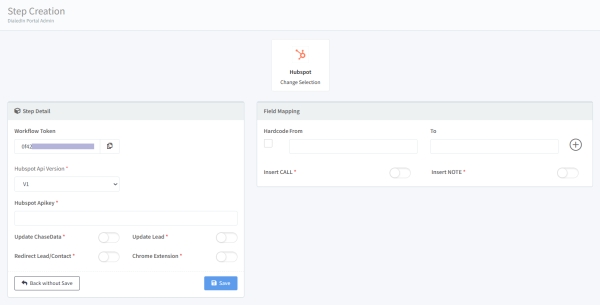
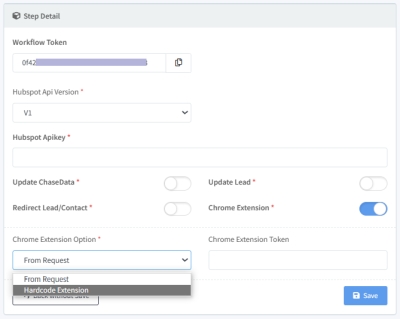
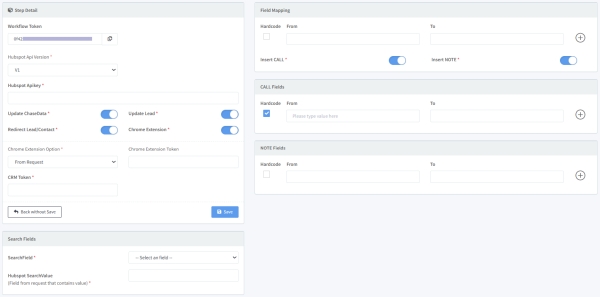
The Hubspot workflow step performs integration with Hubspot for updating lead/contact information on either side (DialedIn and/or Hubspot) and/or redirect a user to a lead/contact in Hubspot, as well as perform field mappings in the process. There are multiple actions possible, per Hubspot integration guidelines, which can be combined in the same workflow step.
For this to work, you must provide your Hubspot API credentials and version.
Update ChaseData gets the lead/contact ID from Hubspot and copies it to a corresponding field in the ChaseData system through a pre-defined CRM Token.
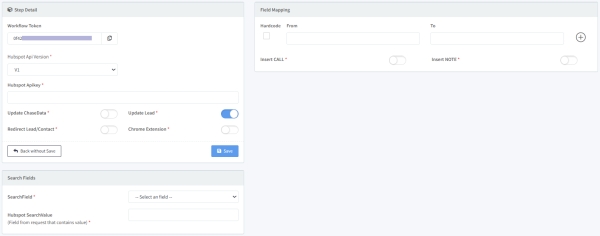
Update Lead> updates a corresponding record in Hubspot, or create one if it doesn’t exist. You can specifify what field (and corresponding value) to request Hubspot to search for a record. Hubspot record is then updated or created with the values provided in the request, including any Field Mappings, which provide values for Hubspot, whether from a DialedIn field or hard-coded.
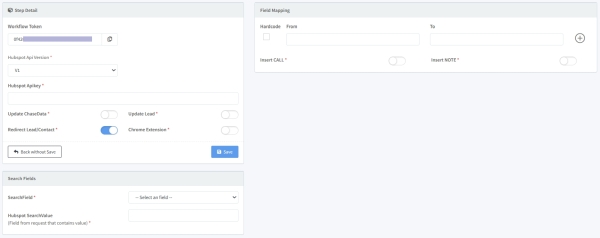
Redirect Lead/Contact is used to redirect the requesting user to the lead/contact within Hubspot, which is determined by the Search field type and value. In addition, one or more fields can be mapped, or passed along, using either a DialedIn field or hard-coded value.
Chrome Extension is used to open the lead/contact in a linked Chrome browser using a Chrome extension token, which can be passed in the request or hard-coded here.
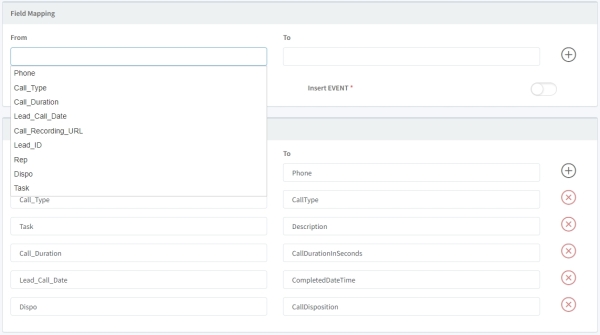
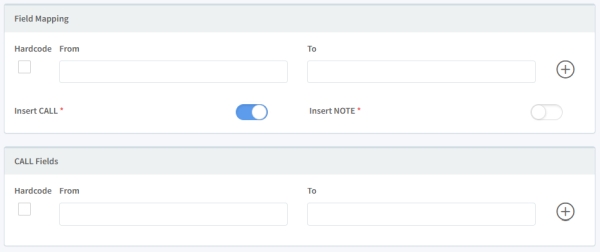
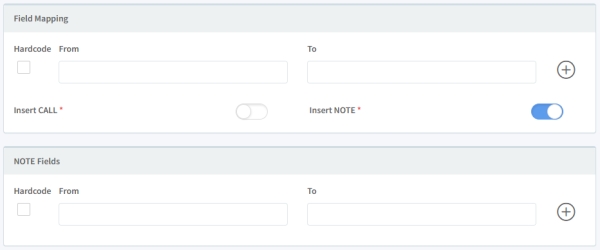
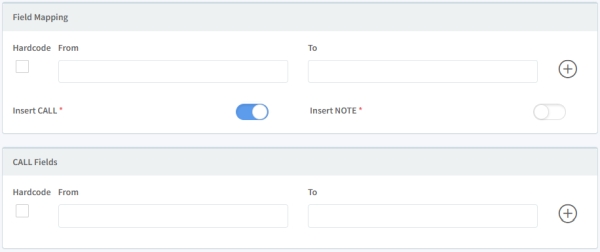
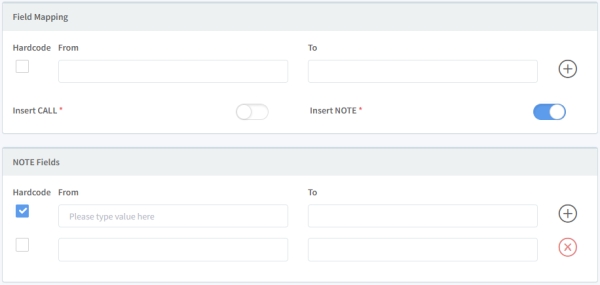
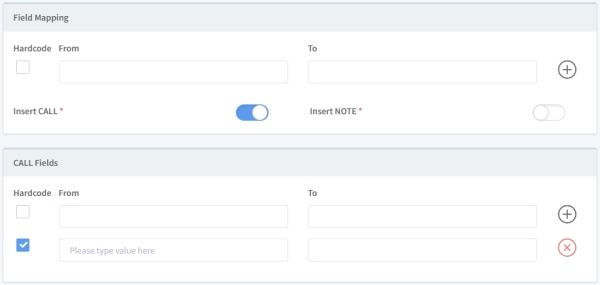
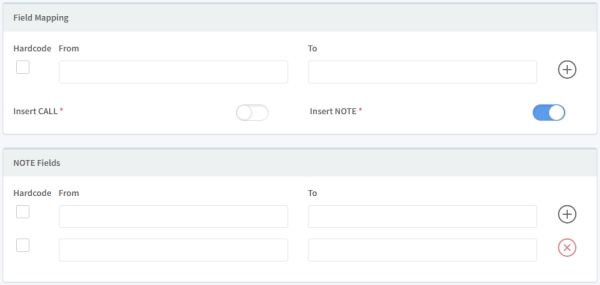
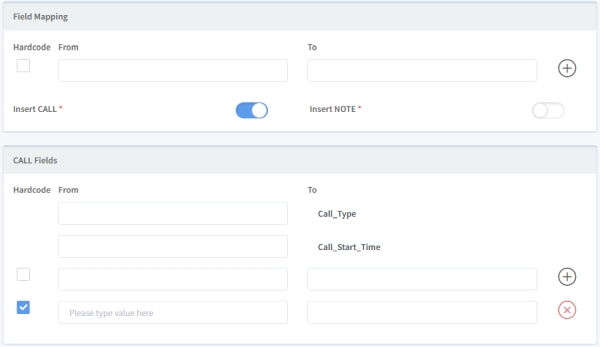
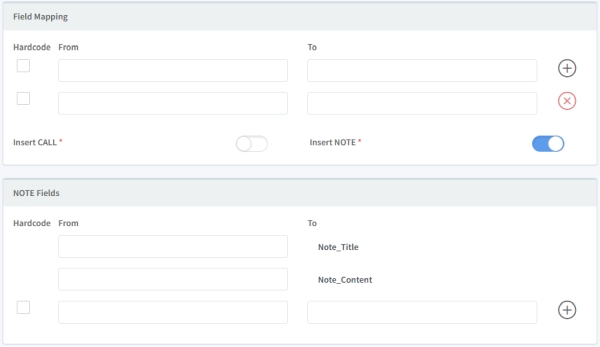
As usual, Field Mapping can be used to include additional information in the request, whether by indicating a DialedIn lead/contact field or hard-coding the value. In addition, by enabling Insert CALL, mapping can be done from call record, and by enabling Insert NOTE, mapping can be done from Notes records.
Back to Table
JobNimbus
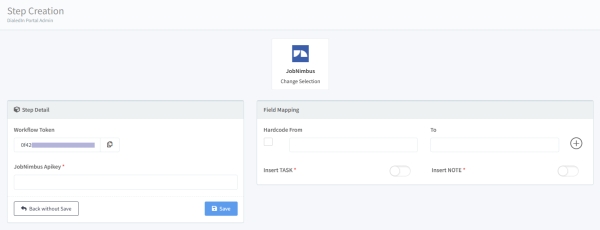
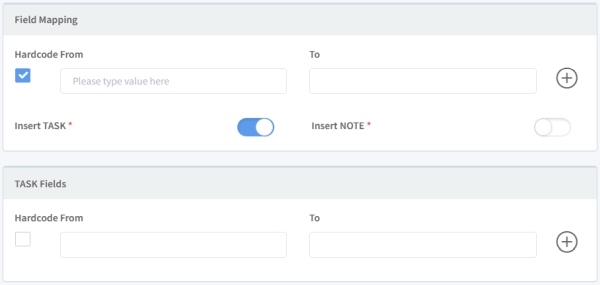
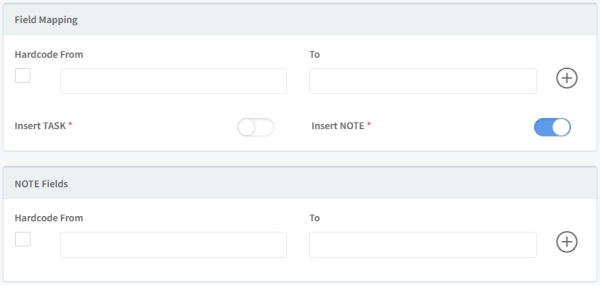
This workflow step allows integration with the JobNimbus contractor management tool to insert a task and/or insert a note field to the lead/contact. Additional fields can be mapped, passing values either from fields or hard-coded.
Back to Table
LeadConduit
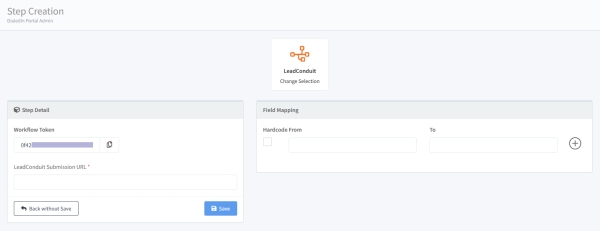
This workflow step allows integration with the LeadConduit lead management system for marketing and lead qualification. Allows you to insert items specified in the Fields Mapping section, each of which can be mapped from a field, or hard-coded. The integration requires your specific LeadConduit integration point and knowledge of your LeadConduit implementation in order to know what can be mapped/passed along.
Back to Table
Less Annoying CRM
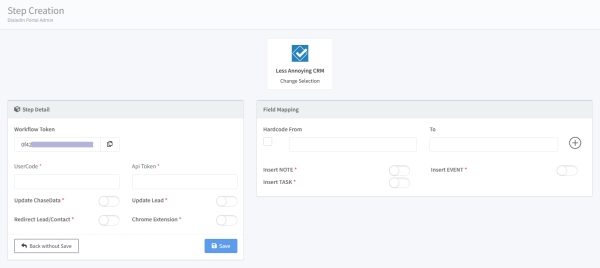
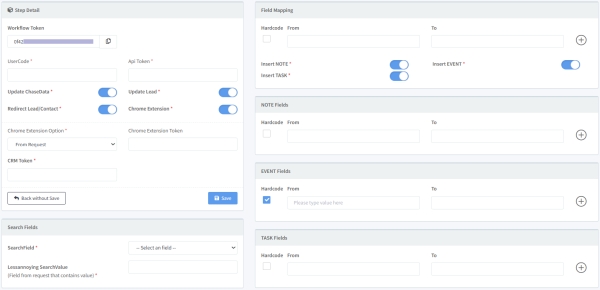
The Less Annoying CRM workflow step performs integration with Less Annoying CRM for updating lead/contact information on either side (DialedIn and/or Less Annoying CRM) and/or redirect a user to a lead/contact in Less Annoying CRM, as well as perform field mappings in the process. There are multiple actions possible, per Less Annoying CRM integration guidelines, which can be combined in the same workflow step.
For this to work, you must provide your Less Annoying CRM API credentials and version.
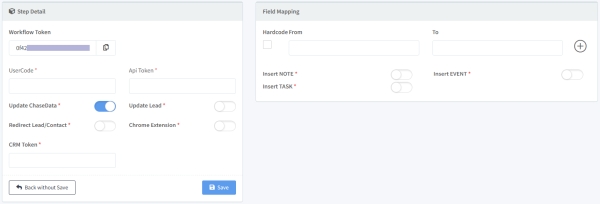
Update ChaseData gets the lead/contact ID from Less Annoying CRM and copies it to a corresponding field in the ChaseData system through a pre-defined CRM Token.
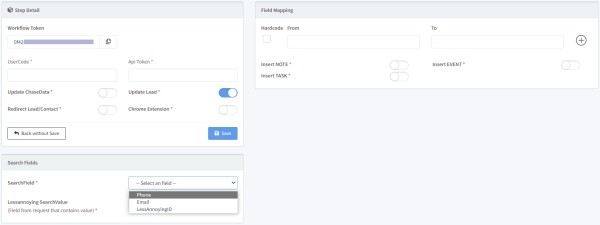
Update Lead updates a corresponding record in Less Annoying CRM, or create one if it doesn’t exist. You can specifify what field (and corresponding value) to request Less Annoying CRM to search for a record. Less Annoying CRM record is then updated or created with the values provided in the request, including any Field Mappings, which provide values for Less Annoying CRM, whether from a DialedIn field or hard-coded.
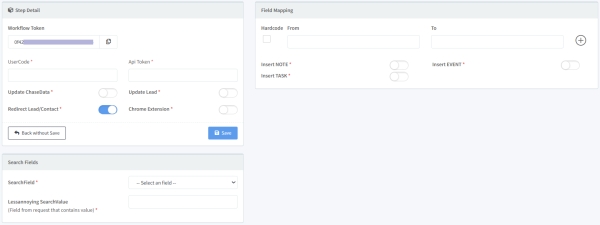
Redirect Lead/Contact is used to redirect the requesting user to the lead/contact within Less Annoying CRM, which is determined by the Search field type and value. In addition, one or more fields can be mapped, or passed along, using either a DialedIn field or hard-coded value.
Chrome Extension is used to open the lead/contact in a linked Chrome browser using a Chrome extension token, which can be passed in the request or hard-coded here.
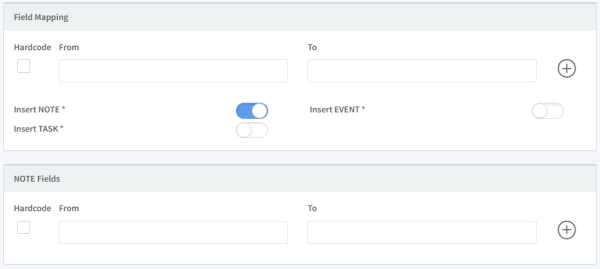
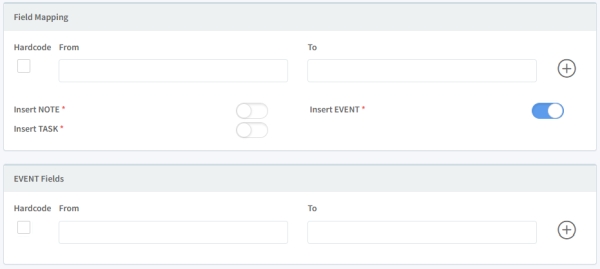
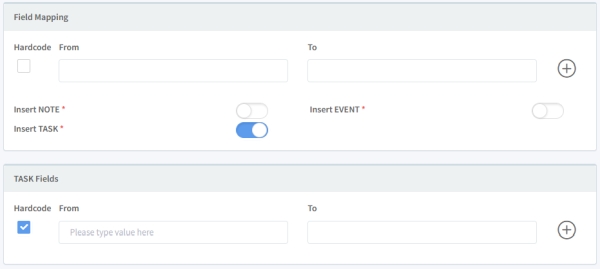
As usual, Field Mapping can be used to include additional information in the request, whether by indicating a DialedIn lead/contact field or hard-coding the value. In addition, by enabling Insert NOTE, mapping can be done from Notes record, by enabling Insert EVENT, mapping can be done from Call records, and by enabling Insert TASK, mapping can be done from relevant records.
Back to Table
MarketSharp
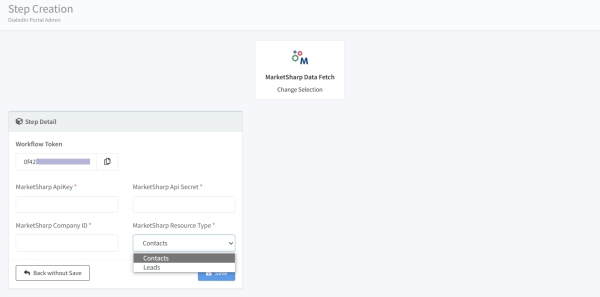
This Workflow Step allows integration with the MarketSharp Home Improvement & Remodeling CRM system. Allows you to pull information from either MarketSharp Contacts or Leads into DialedIn, based on a pre-defined (not set here) mapping.
Back to Table
MRS
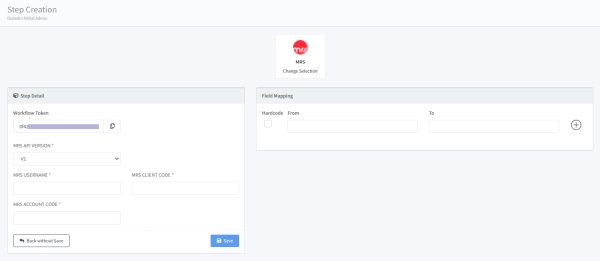
This Workflow Step allows integration with an MRS system. Allows you to insert items specified in the Fields Mapping section, each of which can be mapped from a field, or hard-coded. The integration requires setting proper identification and authorization information for your MRS account.
Back to Table
Outbound Service
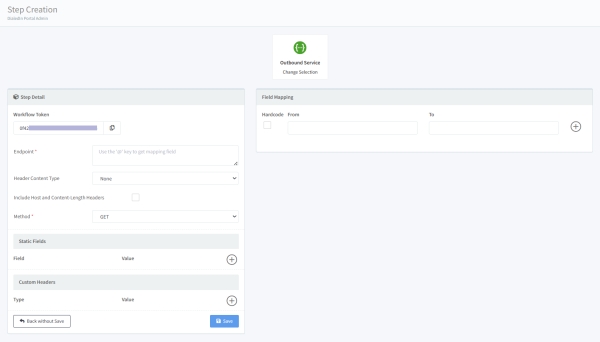
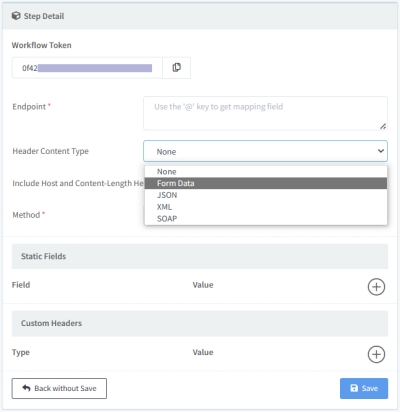
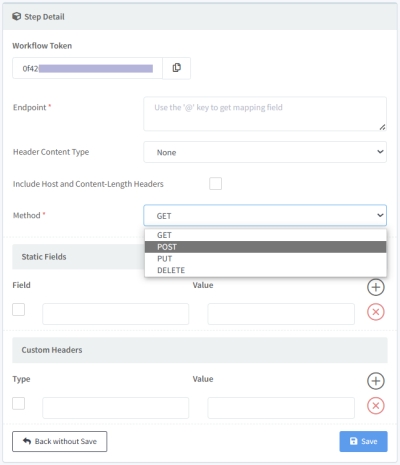
The Outbound Service workflow step provides a generic integration point for any system that can use the available content types and methods, per the choices shown below, in order to pull or push data accordingly. Methods that can be used are GET, POST, PUT, and DELETE.
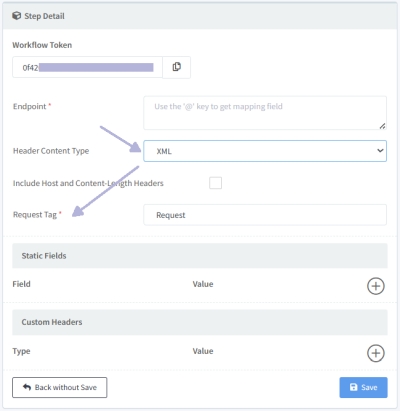
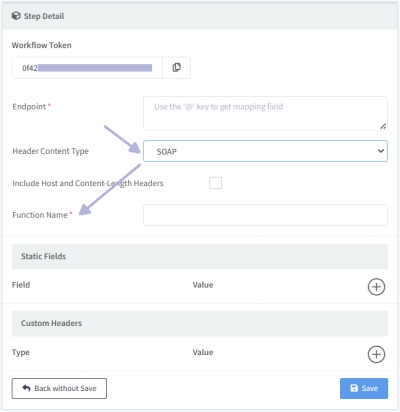
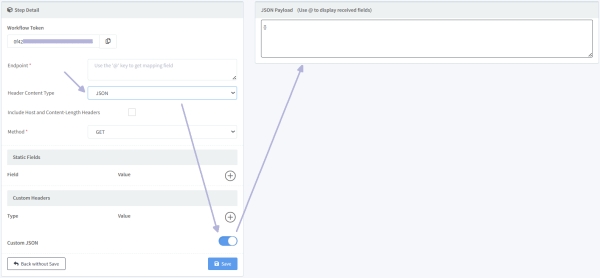
It allows using and specifying Form Data, JSON, XML, and SOAP, including custom headers, with the option to use static fields, as well, if static tokens are required for authorization with the integrating system. Mapping of data is also available, both from a field or hard-coded value.
Refer to https://developer.mozilla.org/en-US/docs/Web/HTTP/Headers/Content-Type for technical background.
Back to Table
Postmark
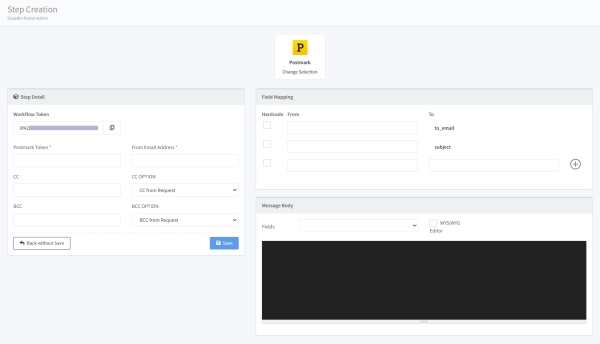
The Postmark workflow step allows integration with the Postmark email delivery service for email sending automation. You must have obtain an appropriate Postmark token for verification and authorization.
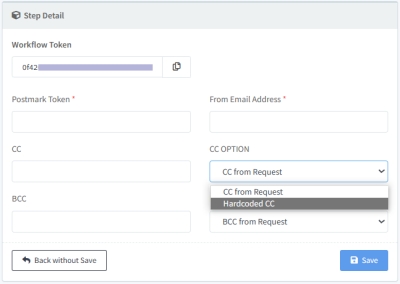
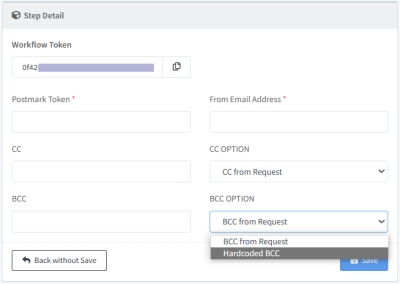
The email destination and email subject are obtained by indicating the fields to be mapped, whether hard-coded or from a request field. The email can be copied (CC and/or BCC) to recipients specified in the request (by specifying the corresponding request fields or hard-coding them). Additional field mapping can also be added.
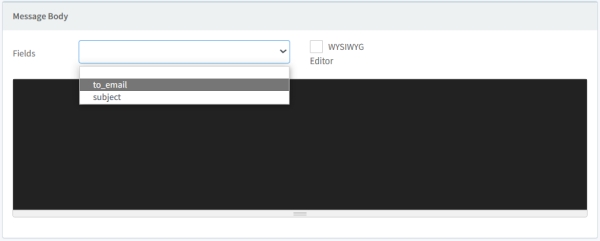
The message body can be an HTML construct, or WYSIWYG by clicking on the appropiate box, which adds formatting icons to the editing window. Certain variables, or fields, can be added to the message body by selecting them from the Fields drop down menu in order to insert the selected field in the current position of the message body.
Back to Table
Redirect to Page
This integration option performs a user redirection to any URL. It is very useful as a subsequent step to a previous action to perform non pre-defined integrations with external systems, by using a resulting value from a previous step to pinpoint the redirection (e.g., information about a lead of customer handled in a previous step).
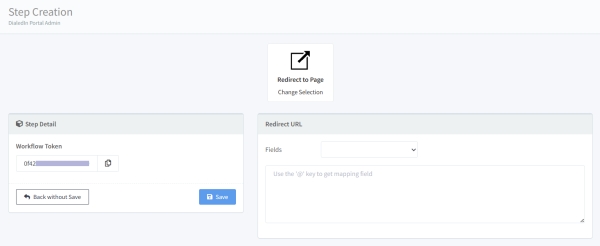
The Redirect URL is free-form but must be a valid URL address. There are two ways to insert a variable (field) coming from a previous workflow step into the redirect URL. The first one is to select one from the Fields drop-down menu, which will be inserted in the current cursor position. The second one is to use ‘@’ at the desired cursor position, which will present the same list of Fields in order to select one. A list of fields is only presented if relevant ones are available from a previous workflow step.
Back to Table
Salesforce Data Fetch
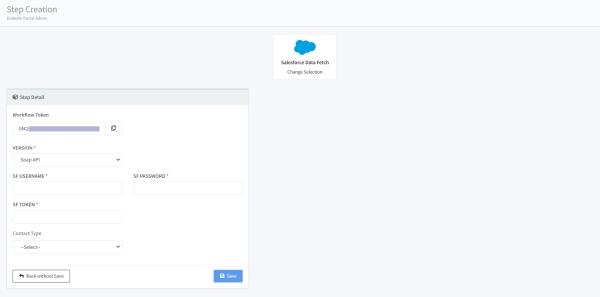
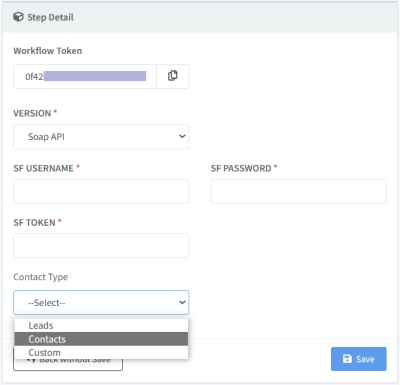
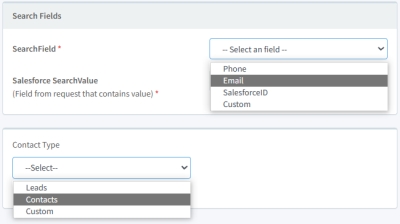
The Salesforce Data Fetch workflow step is used for integration with Salesforce for the purpose of pulling lead/contact records from Salesforce, per Salesforce integration guidelines. You can pull information for either Leads or Contacts, but also other type of records by selecting Custom as the type and providing the Salesforce type along with that.
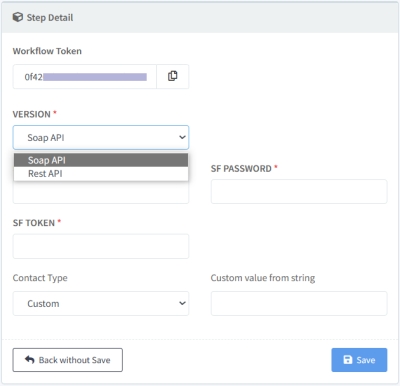
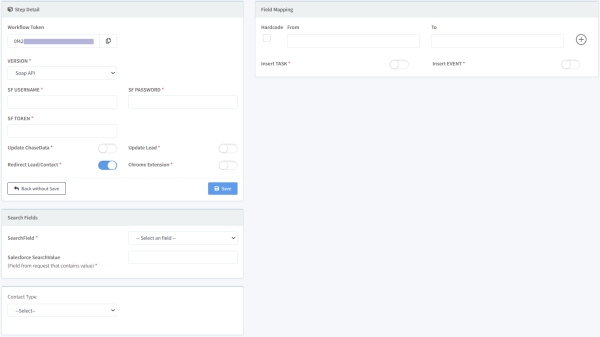
For authentication, you must provide appropriate Salesforce as shown below, including API type to use.
Back to Table
Salesforce Data Push
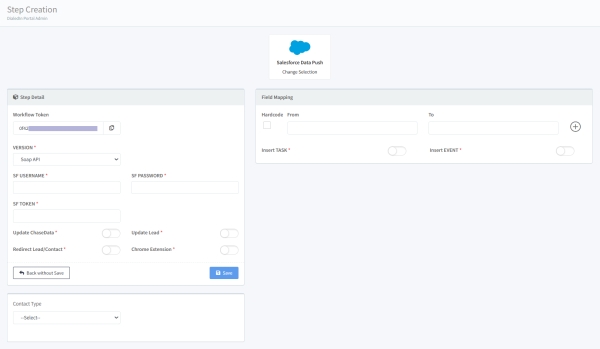
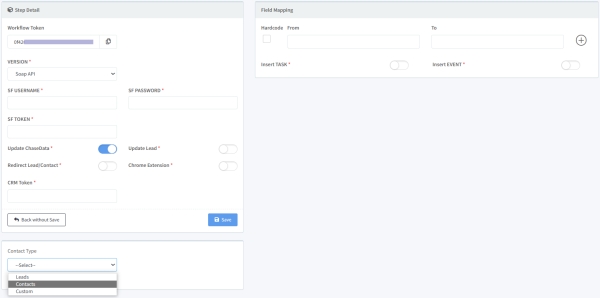
The Salesforce Data Push workflow step is used for integration with Salesforce for the purpose of Pushing lead/contact records to Salesforce, per Salesforce integration guidelines. You can update either Leads or Contacts, but also other type of records by selecting Custom as the type and providing the Salesforce type along with that.
For authentication, you must provide appropriate Salesforce as shown below, including API type to use.
Mapping of data is also available, both from a field or hard-coded value. Multiple actions can be performed, as shown further below, which can be combined in the same workflow step.
One of the additional actions can be to Update ChaseData, which updates the corresponding record in the DialedIn system. This requires a valid CRM token for the DialedIn system.
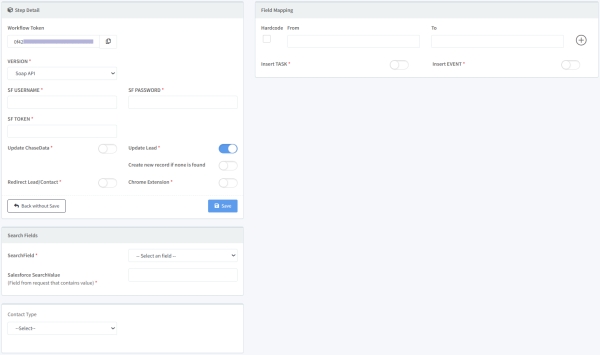
Another action can be to Update Lead, which updates the corresponding record in Salesforce; or create one if it doesn’t exist. You must provide a Salesforce search field and indicate the type of record to be searched.
Another possible action is to Redirect Lead/Contact, which redirects the user to the lead/contact in Salesforce. You must provide a Salesforce search field and indicate the type of record to be redirected to.
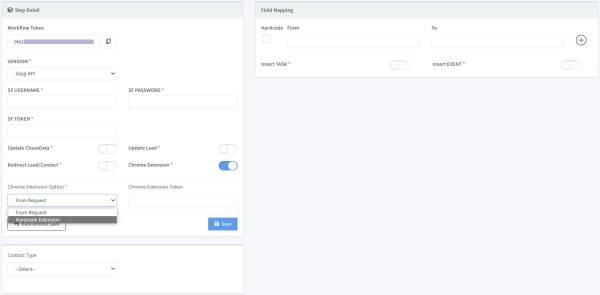
Finally, you can also request to open the lead/contact in a linked Chrome extension browser. A valid Chrome extension token is required for this.
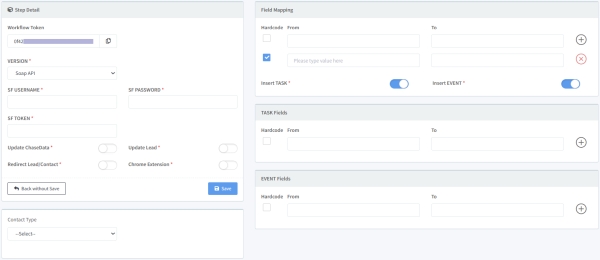
On top of field-to-field mappings, there are speific options to insert tasks and events, as shown below.
Back to Table
Slack
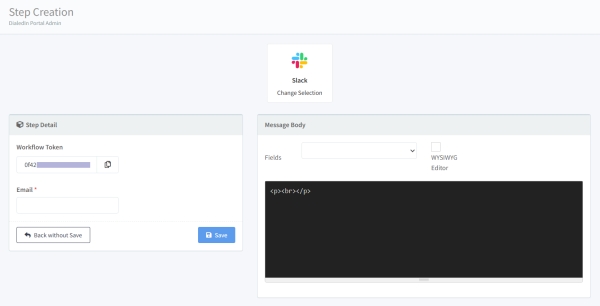
The Slack Workflow Step allows sending a message to a Slack user, identified by an e-mail address.
The message body can be an HTML construct, or WYSIWYG by clicking on the appropiate box, which adds formatting icons to the editing window. Certain variables, or fields, can be added to the message body by selecting them from the Fields drop down menu in order to insert the selected field in the current position of the message body.
Back to Table
SMTP Service
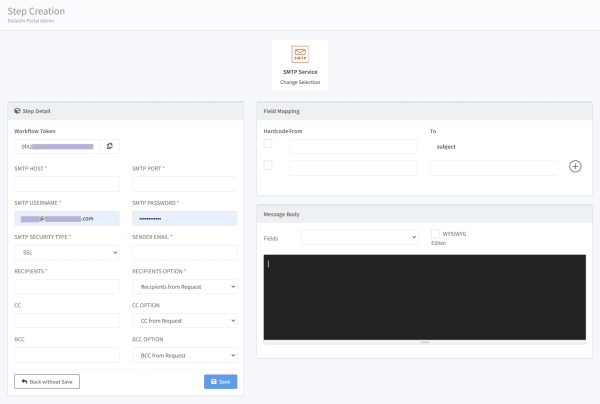
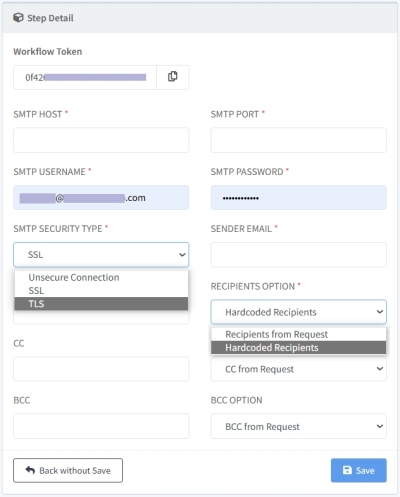
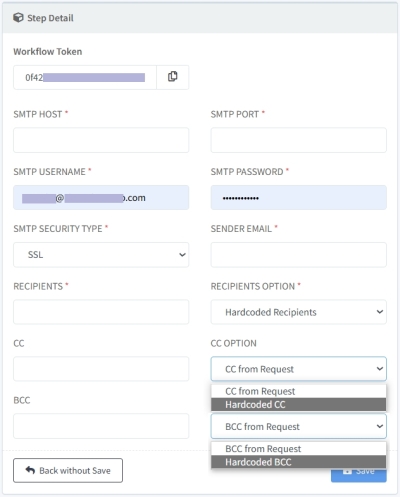
The SMTP Service step provides a generic integration point with an SMTP server for sending emails.
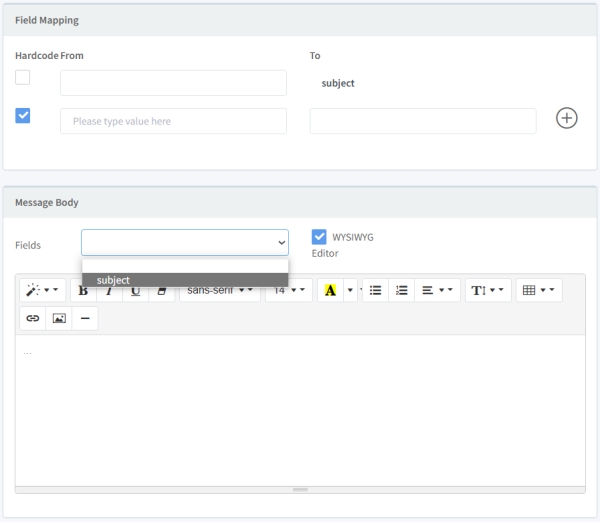
Message parameters can be specified by mapping of data, both from a field or hard-coded value. The message body can be an HTML construct, or WYSIWYG by clicking on the appropiate box, which adds formatting icons to the editing window. Certain variables, or fields, can be added to the message body by selecting them from the Fields drop down menu in order to insert the selected field in the current position of the message body.
Back to Table
Sugar CRM
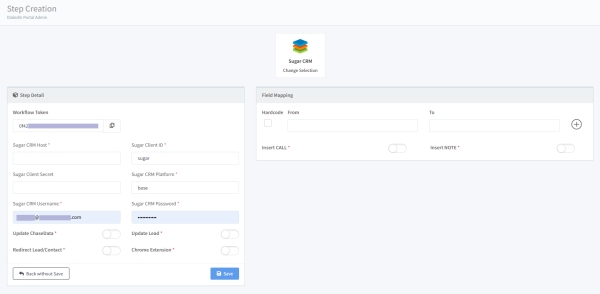
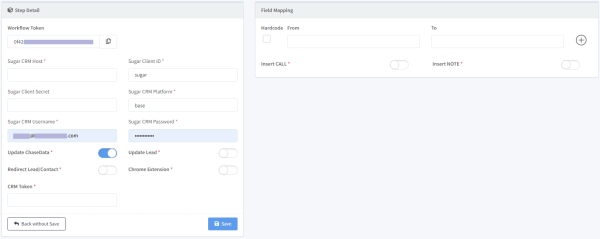
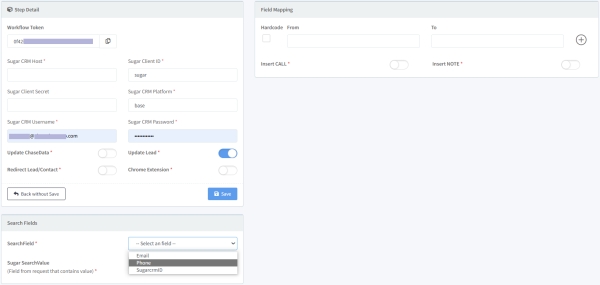
The Sugar CRM workflow step performs integration with Sugar CRM for updating lead/contact information on either side (DialedIn and/or Sugar CRM) and/or redirect a user to a lead/contact in Sugar CRM, as well as perform field mappings in the process. There are multiple actions possible, per Sugar CRM integration guidelines, which can be combined in the same workflow step.
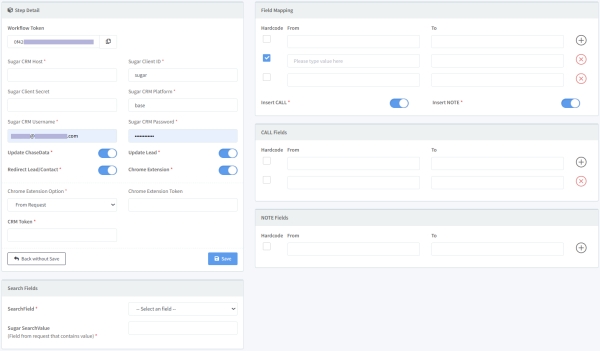
For this to work, you must provide your Sugar CRM access information, as depicted below.
Update ChaseData gets the lead/contact ID from Sugar CRM and copies it to a corresponding field in the DialedIn system through a pre-defined CRM Token.
Update Lead updates a corresponding record in Sugar CRM, or create one if it doesn’t exist. You can specifify what field (and corresponding value) to request Sugar CRM to search for a record. Sugar CRM record is then updated or created with the values provided in the request, including any Field Mappings, which provide values for Sugar CRM, whether from a DialedIn field or hard-coded.
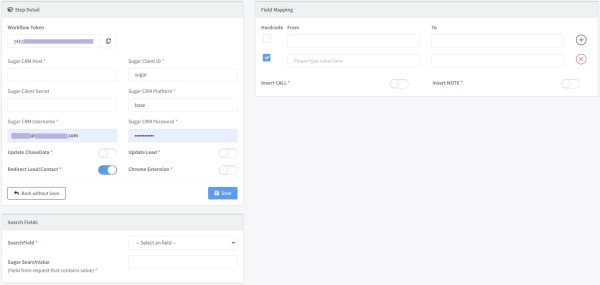
Redirect Lead/Contact is used to redirect the requesting user to the lead/contact within Sugar CRM, which is determined by the Search field type and value. In addition, one or more fields can be mapped, or passed along, using either a DialedIn field or hard-coded value.
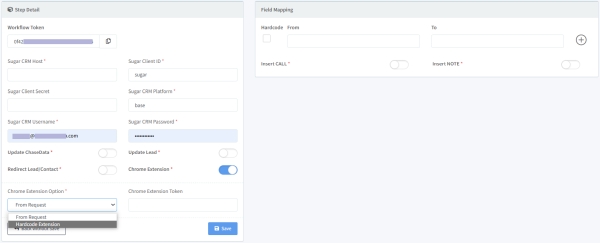
Chrome Extension is used to open the lead/contact in a linked Chrome browser using a Chrome extension token, which can be passed in the request or hard-coded here.
As usual, Field Mapping can be used to include additional information in the request, whether by indicating a DialedIn lead/contact field or hard-coding the value. In addition, by enabling Insert CALL, mapping can be done from Call records, and by enabling Insert NOTE, mapping can be done from Notes record.
Back to Table
TCPA Guardian
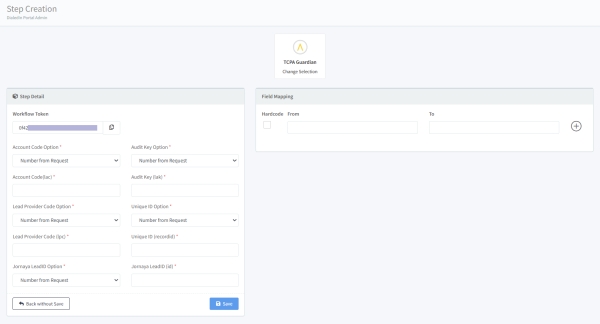
TCPA Guardian is a solution from Jornaya (Verisk) that verifies TCPA consent in real-time so brands can confidently market to consumers.
This workflow step allows you to use your Jornaya account and credentials, and specify a LeadiD token to check the lead against their TCPA Guardian database. As with other workflow steps, integration allows mapping other fields, whether hard-coded or a field reference.
Reference:
https://marketing.verisk.com/docs/tcpa-guardian-3rd-party-api
Back to Table
Twilio SMS
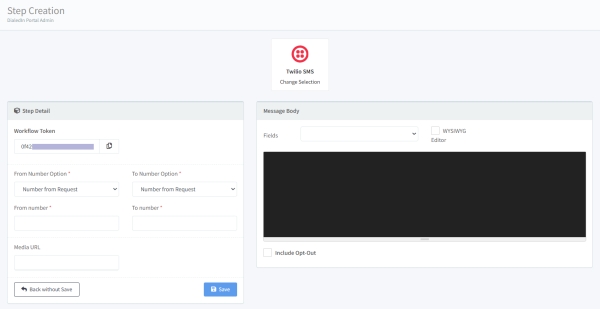
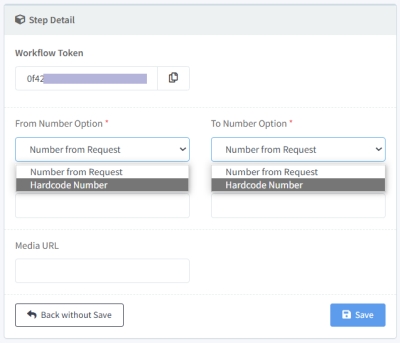
The Twilio SMS Workflow Step allows sending SMS via Twilio. You configure both the number from which the SMS is to be sent, and the number to which the SMS is to be sent, either using a field in the request or hard-coded. By specifying a Media URL, you can send an MMS, instead.
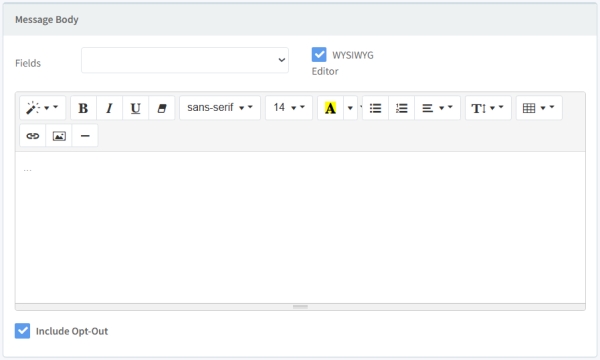
The message body can be an HTML construct, or WYSIWYG by clicking on the appropiate box, which adds formatting icons to the editing window. Certain variables, or fields, can be added to the message body by selecting them from the Fields drop down menu in order to insert the selected field in the current position of the message body.
If you check Include Opt-Out, and option is added to the message for aloowing the recipient to Reply to Opt-out.
Back to Table
Zendesk
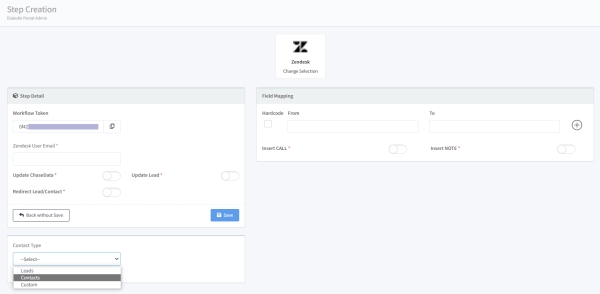
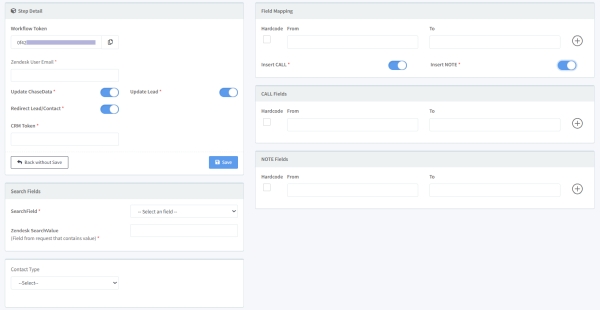
The Zendesk workflow step performs integration with Zendesk for updating lead/contact information on either side (DialedIn and/or Zendesk) and/or redirect a user to a lead/contact in Zendesk, as well as perform field mappings in the process. All actions must be per Zendesk integration guidelines for which you are authorized.
For this to work, you must provide an e-mail address associated with Zendesk.
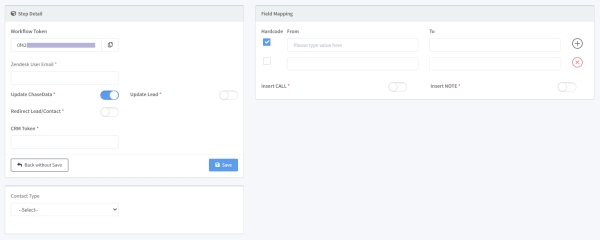
Update ChaseData gets the lead/contact ID from Zendesk and copies it to a corresponding field in the DialedIn system through a pre-defined CRM Token.
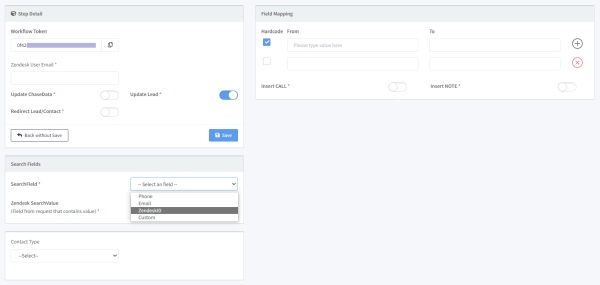
Update Lead updates a corresponding record in Zendesk, or create one if it doesn’t exist. You can specifify what field (and corresponding value) to request Zendesk to search for a record. Zendesk record is then updated or created with the values provided in the request, including any Field Mappings, which provide values for Zendesk, whether from a DialedIn field or hard-coded.
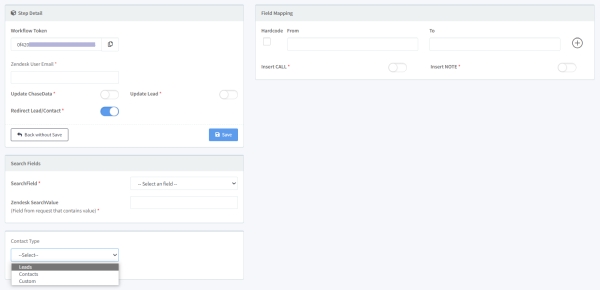
Redirect Lead/Contact is used to redirect the requesting user to the lead/contact within Zendesk, which is determined by the Search field type and value. In addition, one or more fields can be mapped, or passed along, using either a DialedIn field or hard-coded value.
As usual, Field Mapping can be used to include additional information in the request, whether by indicating a DialedIn lead/contact field or hard-coding the value. In addition, by enabling Insert CALL, mapping can be done from Call records, and by enabling Insert NOTE, mapping can be done from Notes record.
Back to Table
Zoho CRM
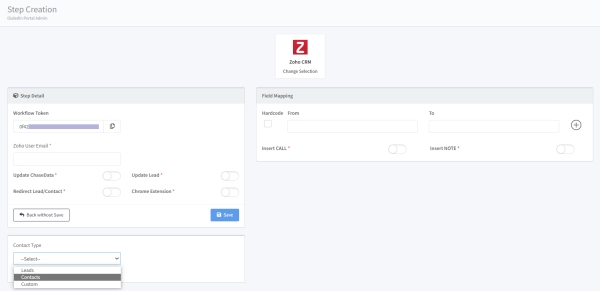
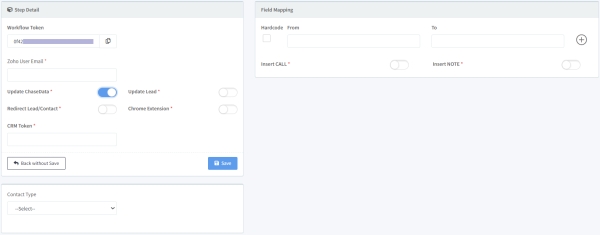
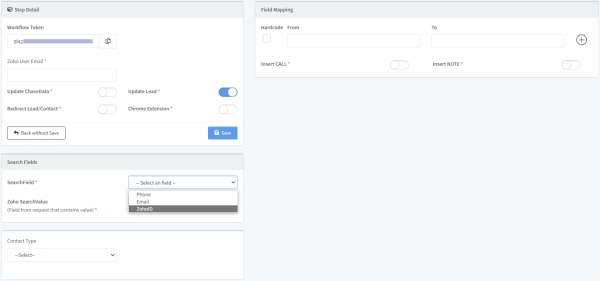
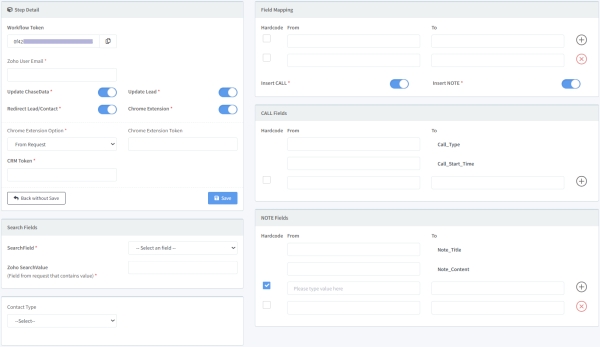
The Zoho CRM workflow step performs integration with Zoho CRM for updating lead/contact information on either side (DialedIn and/or Zoho CRM) and/or redirect a user to a lead/contact in Zoho CRM, as well as perform field mappings in the process. You must indicate the contact type with which the integration is to work with. All actions must be per Zoho CRM integration guidelines for which you are authorized.
For this to work, you must provide an e-mail address associated with Zoho CRM.
Update ChaseData gets the lead/contact ID from Zoho CRM and copies it to a corresponding field (ZohoID) in the DialedIn system through a pre-defined CRM Token.
Update Lead updates a corresponding record in Zoho CRM, or create one if it doesn’t exist. You can specifify what field (and corresponding value) to request Zoho CRM to search for a record. The Zoho CRM record is then updated or created with the values provided in the request, including any Field Mappings, which provide values for Zoho CRM, whether from a DialedIn field or hard-coded.
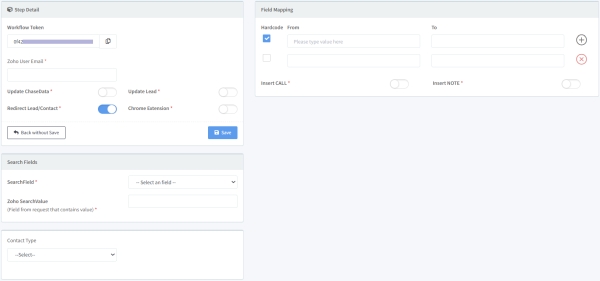
Redirect Lead/Contact is used to redirect the requesting user to the lead/contact within Zoho CRM, which is determined by the Search field type and value. In addition, one or more fields can be mapped, or passed along, using either a DialedIn field or hard-coded value.
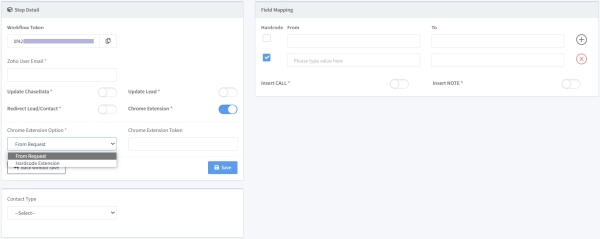
Chrome Extension is used to open the lead/contact in a linked Chrome browser using a Chrome extension token, which can be passed in the request or hard-coded here.
As usual, Field Mapping can be used to include additional information in the request, whether by indicating a DialedIn lead/contact field or hard-coding the value. In addition, by enabling Insert CALL, mapping can be done from Call records, and by enabling Insert NOTE, mapping can be done from Notes record.
Back to Table
Zoho Desk
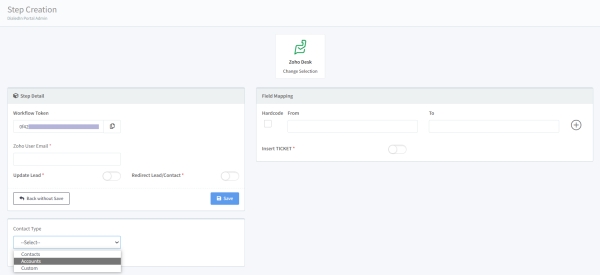
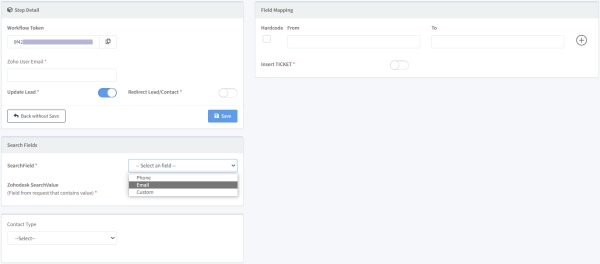
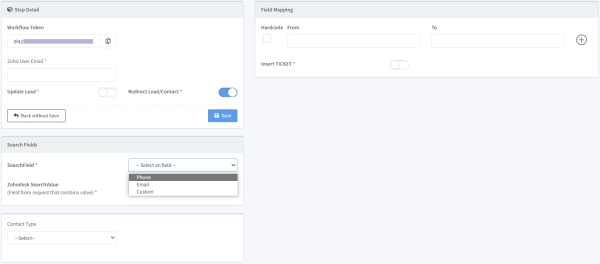
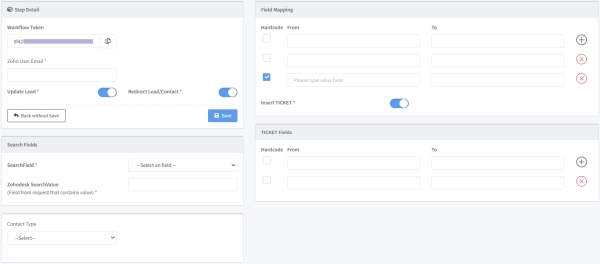
The Zoho Desk workflow step performs integration with Zoho Desk for updating lead/contact information on either side (DialedIn and/or Zoho Desk) and/or redirect a user to a lead/contact in Zoho Desk, as well as perform field mappings in the process. You must indicate the contact type with which the integration is to work with. All actions must be per Zoho Desk integration guidelines for which you are authorized.
For this to work, you must provide an e-mail address associated with Zoho Desk.
Update Lead updates a corresponding record in Zoho Desk, or create one if it doesn’t exist. You can specifify what field (and corresponding value) to request Zoho Desk to search for a record. The Zoho Desk record is then updated or created with the values provided in the request, including any Field Mappings, which provide values for Zoho Desk, whether from a DialedIn field or hard-coded.
Redirect Lead/Contact is used to redirect the requesting user to the lead/contact within Zoho Desk, which is determined by the Search field type and value. In addition, one or more fields can be mapped, or passed along, using either a DialedIn field or hard-coded value.
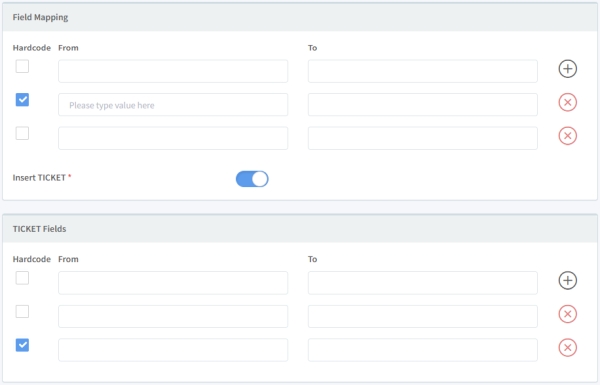
As usual, Field Mapping can be used to include additional information in the request, whether by indicating a DialedIn lead/contact field or hard-coding the value. In addition, by enabling Insert TICKET, mapping can be done from appropriate DialedIn records.
Back to Table

