In order to use the system, accounts must be created and configured. Accounts are of two types, Admin and Agent. An Admin account is needed to login to the Management Console application, and an Agent account is needed to login to the Agent client application. If one person needs access to both client applications, that person requires separate Admin and Agent accounts.
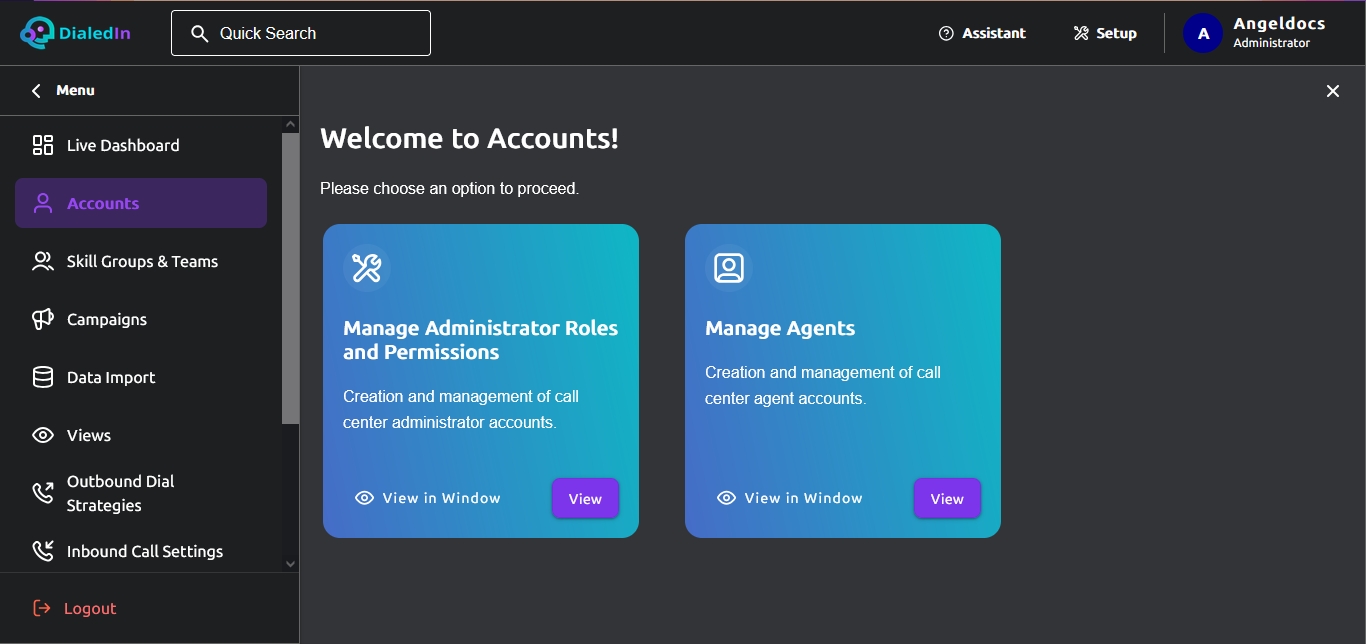
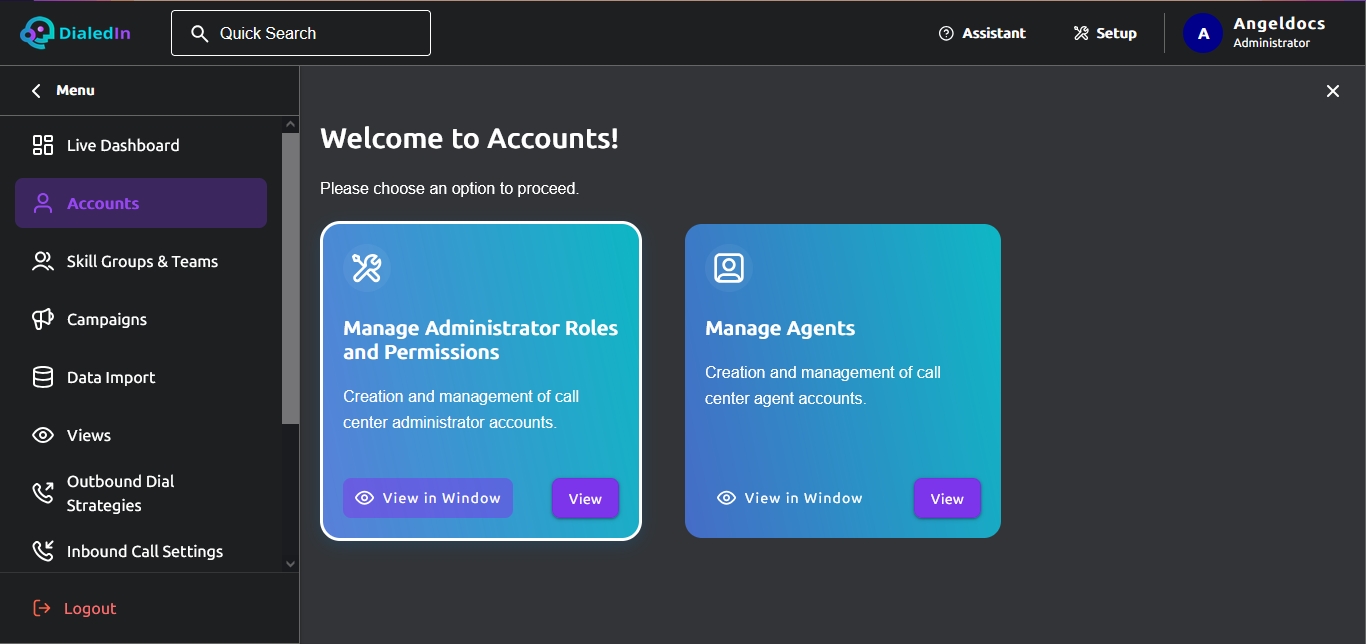
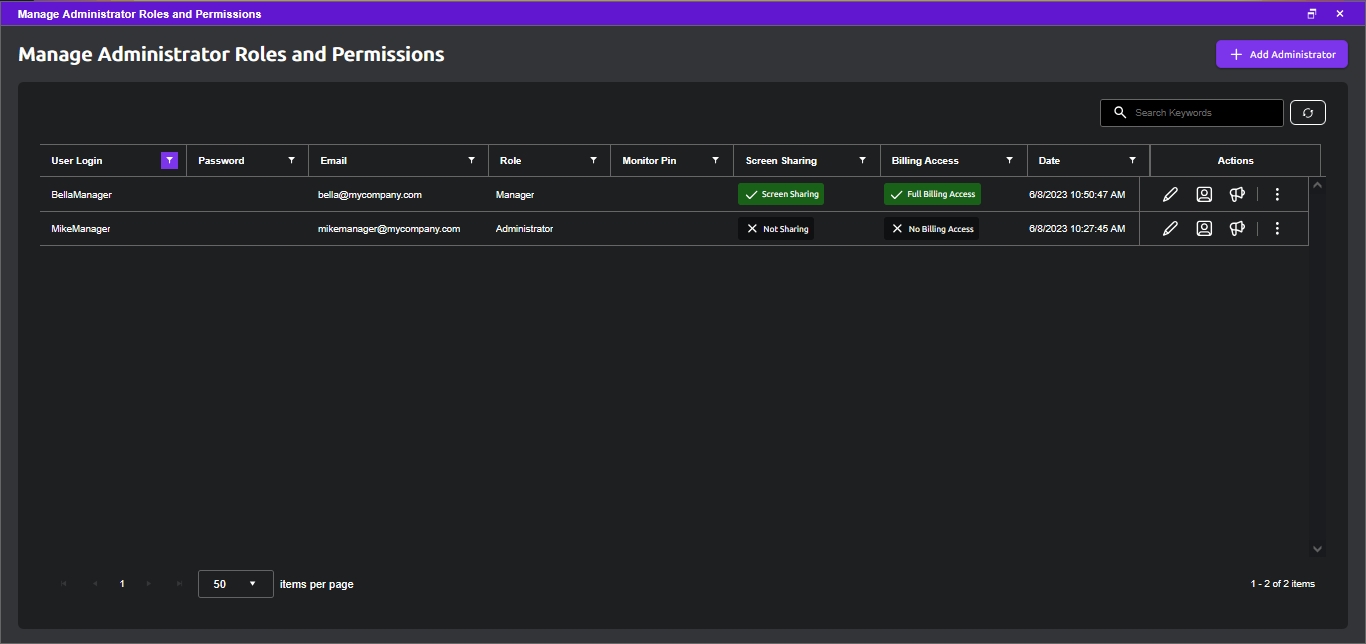
To create or modify an Admin account go to the main menu area on the left and click on Accounts. On the right, click View in the selection box for Manage Administrator Roles and Permissions. After the list of accounts is presented, you may Add Administrator or select an item to open the corresponding details pane where you can review and modify as needed. Refer to the following picture.
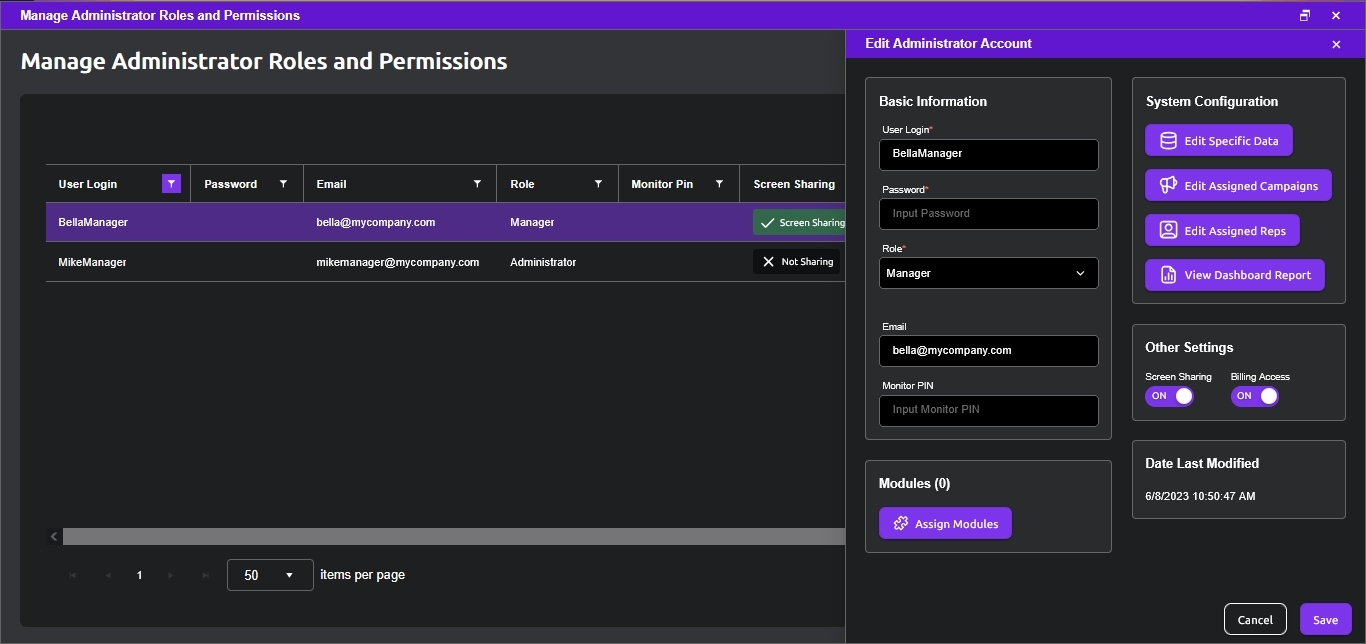
An Admin account has the following configurable characteristics:
| User Login | Case‐sensitive name or identifier for the account |
|---|---|
| Password | Case-sensitive login password |
| Role | Type of Admin account that defines the extent of access and permissions. See descriptions further in this section. |
| User email | |
| Monitor PIN | A PIN that the system requests and uses to authorize an Admin to listen/coach/barge from a landline or mobile phone; this is done by calling the number assigned to the server and entering the PIN when requested. The following monitoring codes are available after being connected: Listen: 77 + extension Coach: 88 + extension Barge: 99 + extension Stop monitoring: 0 Monitoring via PIN requires that the agent extension is properly configured and marked as Fixed (see Extensions) |
| Modules | Allows overriding role-based access permissions by selecting specific ones. |
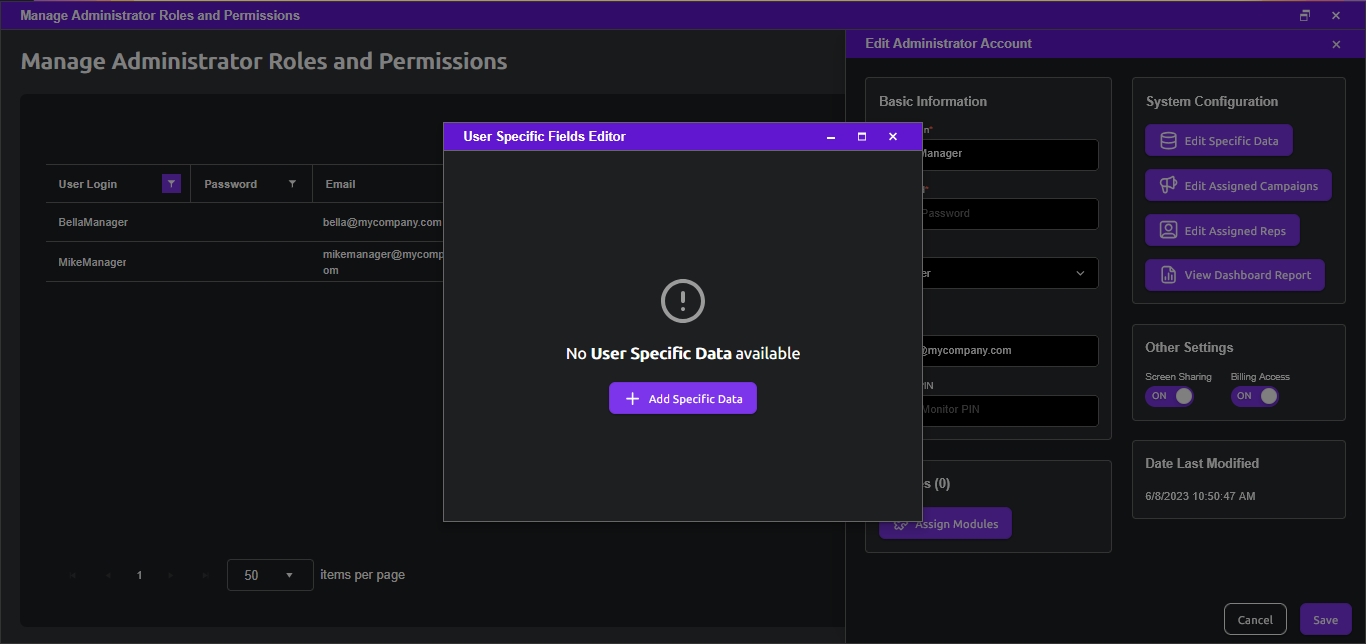
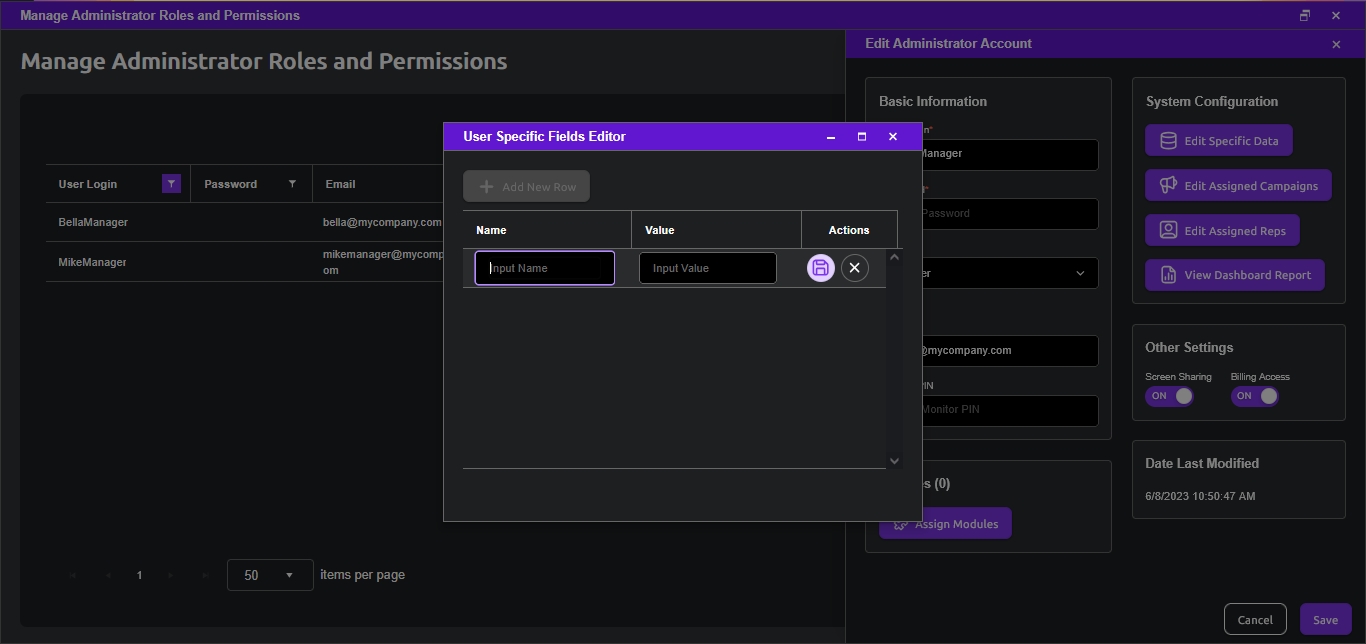
| Specific Data | Custom fields (name‐value pairs) that can be referenced in other places, such as screen scripts |
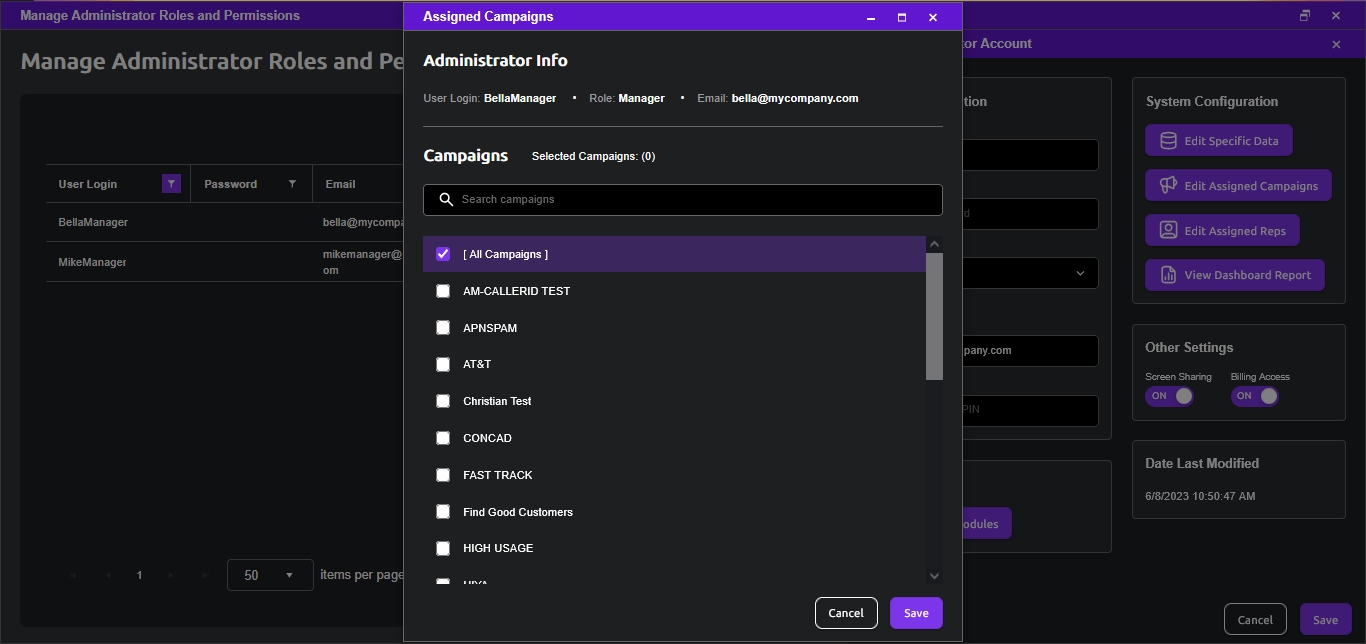
| Assigned Campaigns | Campaigns to which the user has access to in their reports and on Live Dashboard; if Assigned Reps are assigned, this must be set to All Campaigns |
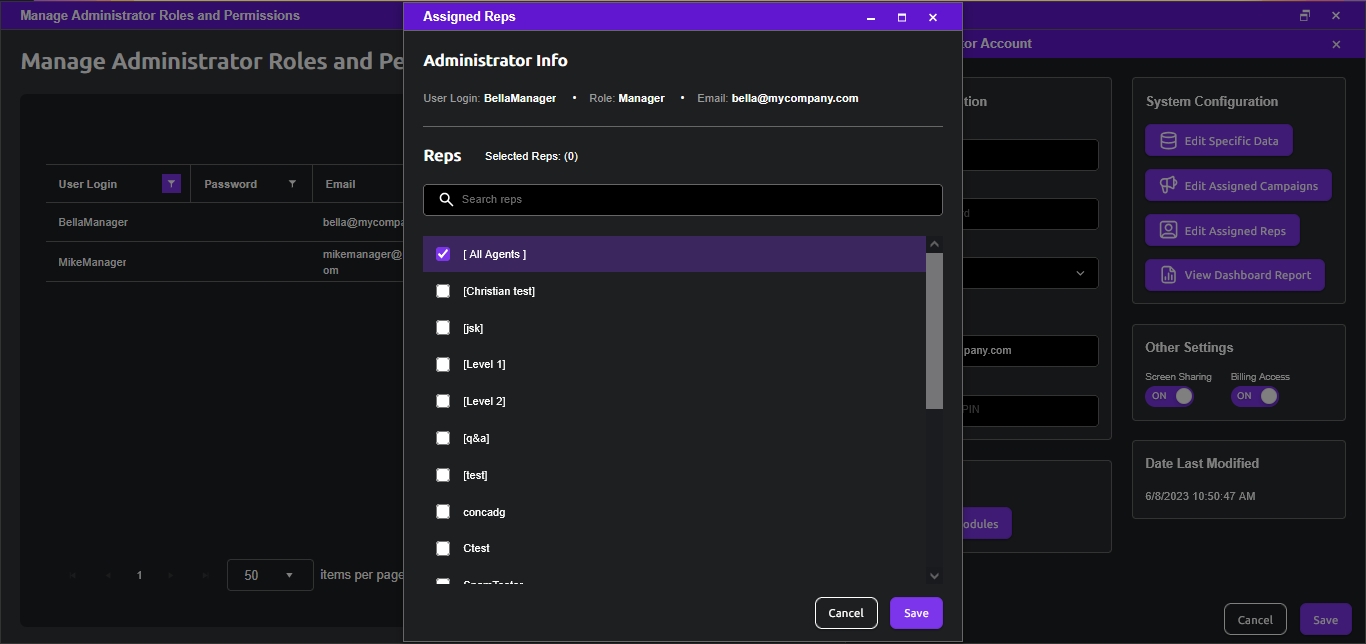
| Assigned Reps | Agents to which the user has access to; if Assigned Campaigns are assigned, this must be set to All Agents |
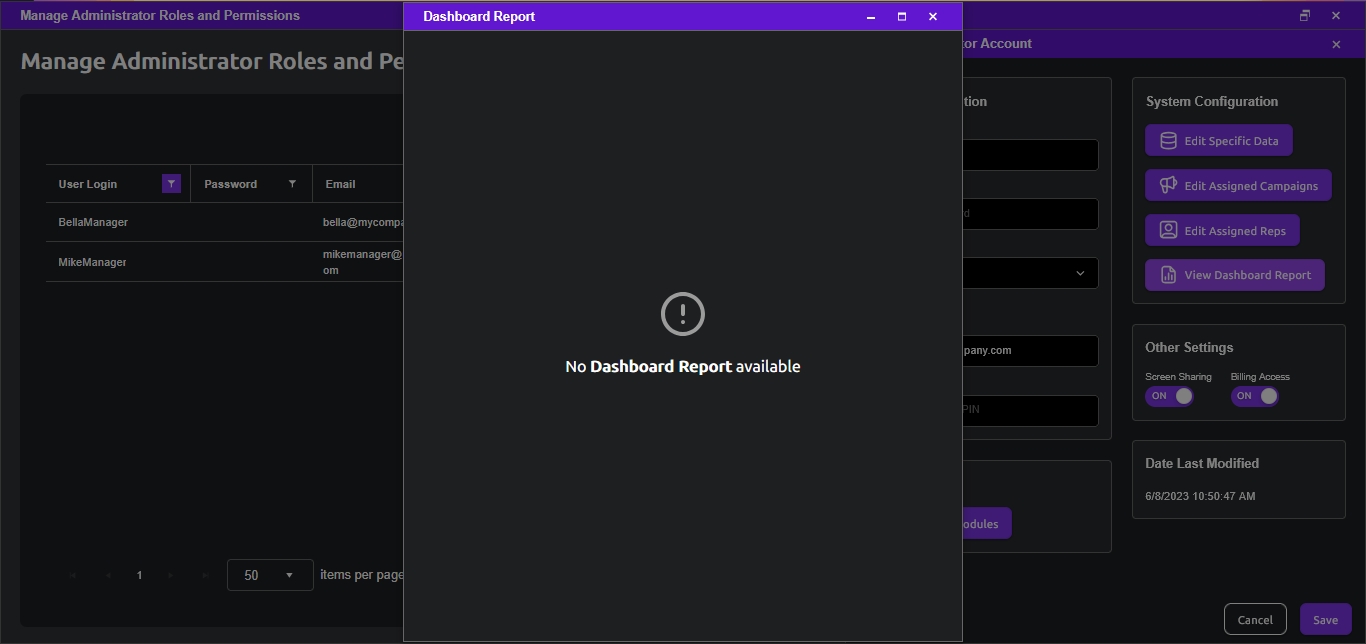
| Dashboard Reports | Pops up a window listing any Custom Reports available to be docked into the Dashboard (refer to picture below) |
| Screen Sharing | Allow the Admin user to view Agents screens (this is usually done by right-clicking on an Agent name from Live Dashboard) |
| Billing Access | Allow the Admin user to access DialedIn billing information |
| Date Last Modified | Creation/modification date (automatically generated and not modifiable) |
Following is a list of the different Admin account Roles available, together with what each can access:
| Administrator | Access to everything; can export and delete campaigns and leads; can create other Admin accounts |
|---|---|
| Manager | Live Dashboard; Accounts (Agents); Campaigns; Data Import (Leads, DNC); Outbound; Search; Inbound; Recordings; Reports; Scripts; Skills; Settings; Tools (all); Appointment Manager; Support |
| Junior Manager | Live Dashboard; Accounts (Agents); Data Import (DNC); Outbound; Search; Recordings; Reports; Tools (Duplicate Check, DNC, Instant Message, Cell Scrubber); Appointment Manager; Support |
| Supervisor | Live Dashboard; Data Import (DNC); Recordings; Reports; Tools (DNC, Instant Message, Cell Scrubber); Support |
| Junior Supervisor | Live Dashboard; Reports; Tools (Instant Message); Support |
| Monitor | Live Dashboard; Recordings; Tools (Instant Message); Support |
| Monitor-Agents | Live Dashboard; Tools (Instant Message); Support |
| Salesman | Live Dashboard; Tools (Instant Message); Appointment Manager; Support |
| Script Editor | Limited to accessing Scripts, e.g. to create and edit them |
| Trainee | Live Dashboard; Recordings; Tools (Instant Message); Support |
Apart from admin role, the admin user's access permission can be customized by selecting items after clicking on the Assign Modules button, which overrides default role permissions. To keep default permissions for the assigned role, none of these items should be selected. Refer to the following picture.
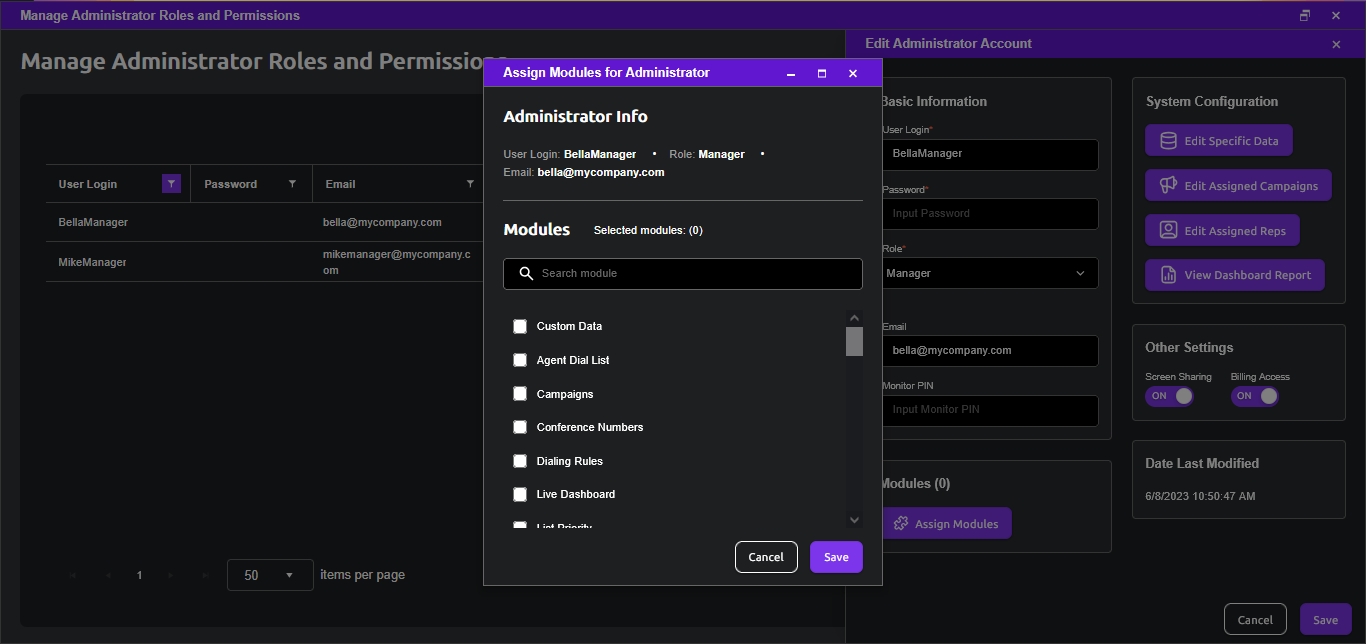
The list of customized permissions available in the Modules pull-down menu include the following:
| Agent Dial List |
|---|
| Assign Queues |
| Campaigns |
| Conference Numbers |
| Custom Data |
| Dialing Rules |
| DNC (Do Not Call) |
| Duplicate Check |
| Firewall |
| Greetings, Announcements, Call Routing |
| Import DNC |
| Import Leads |
| Integration |
| IVR Call Flows & Call Queues |
| List Priority |
| Live Dashboard |
| Manage Agents |
| Manage Users |
| My CallerID |
| Network Test |
| No Call States |
| Playlist |
| Recordings |
| Recycle |
| Reports |
| Route by Call Source |
| Scripts |
| Skill Groups & Teams |
| Skill Priority |
| System Info |
| Views |
| Voice Settings |
| VoIP Test |
| What's New |
| Wrap Up Codes |
The following pictures show the other items that can be configured, per previous explanations.
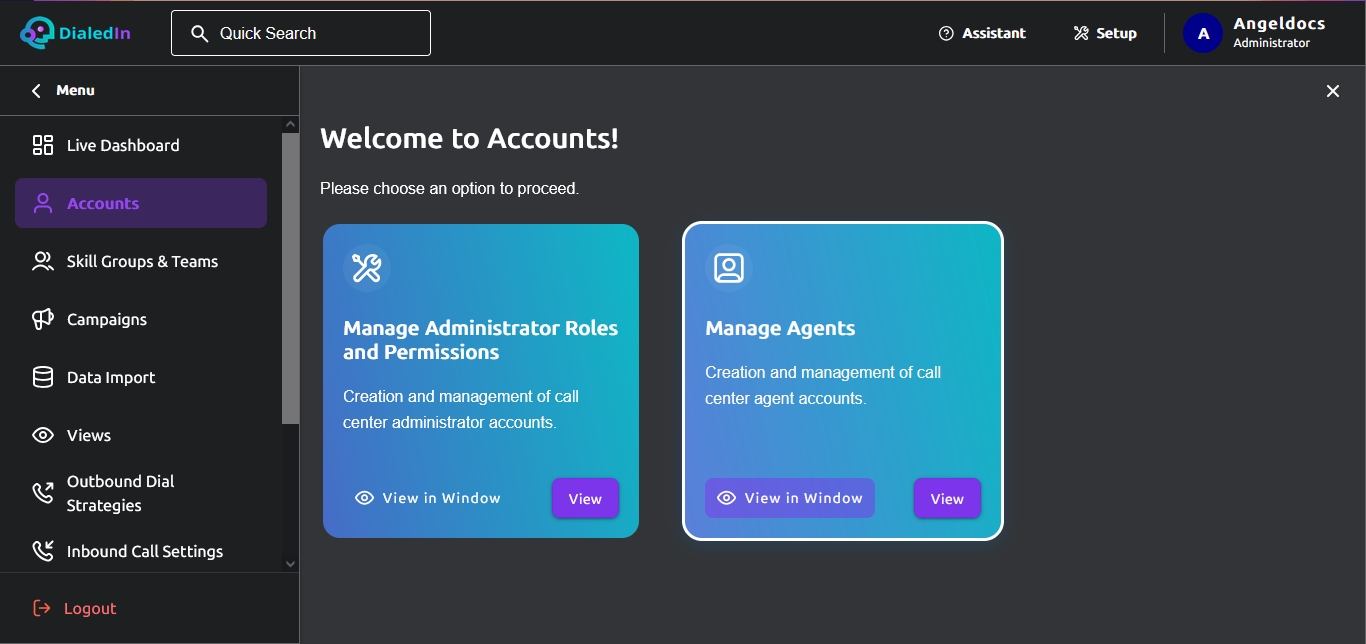
To create or modify an Agent account go to the main menu area on the left and click on Accounts. On the right, click View in the selection box for Manage Agents. After the list of accounts is presented, you may Add Agent or select an item to open the corresponding details pane where you can review and modify as needed. Refer to the following picture.
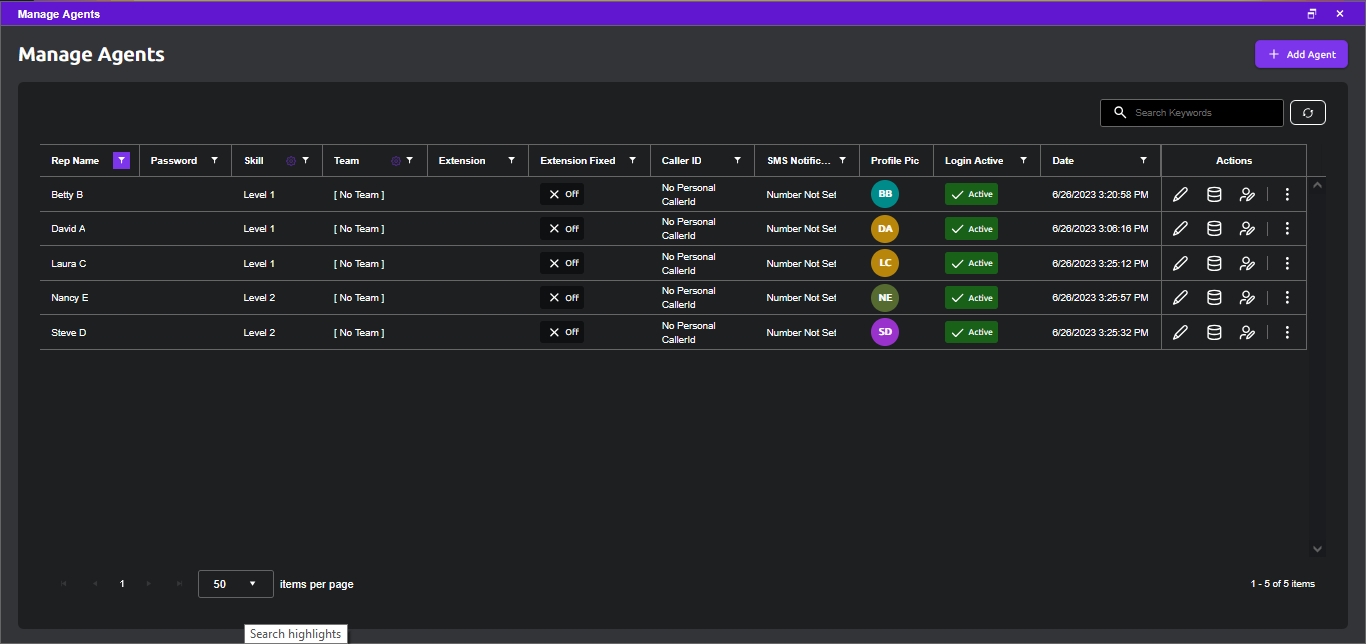
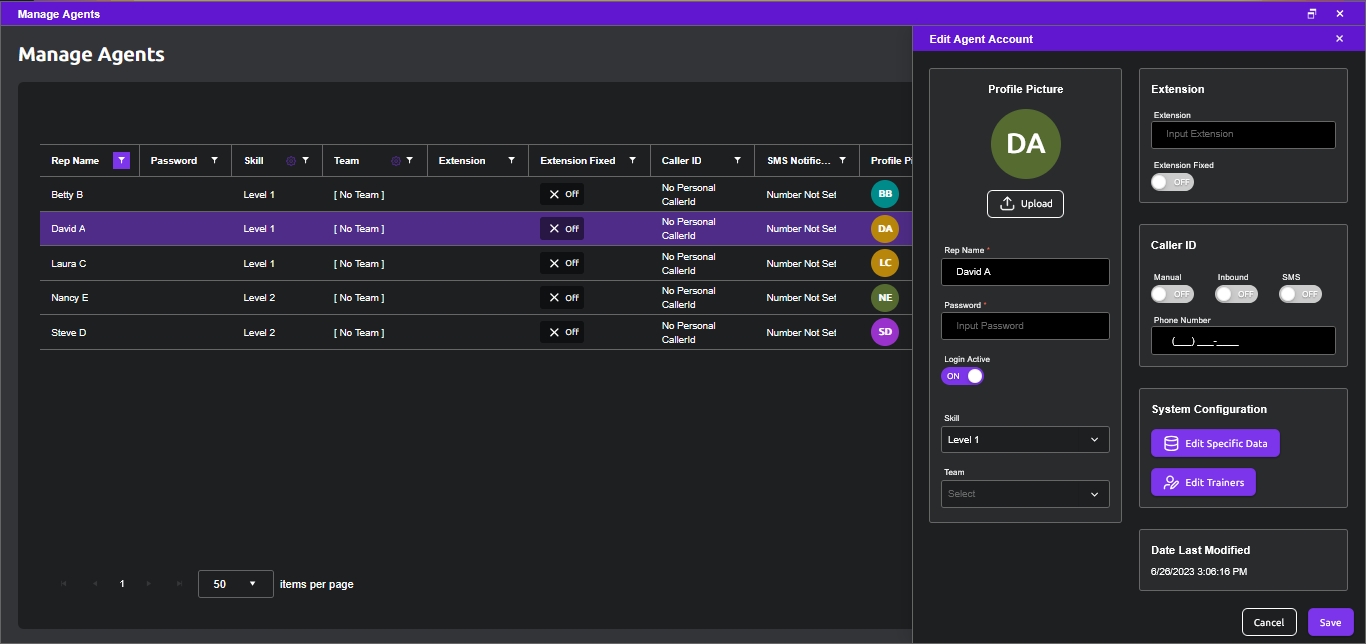
An Agent account has the following characteristics:
| Profile Pic | Optional picture icon; after clicking on Upload, a file dialog comes up to manage select an image file |
|---|---|
| Rep Name | Case‐sensitive name or identifier for the account |
| Password | Case‐sensitive login password |
| Login Active | SWitch to set the Agents active; can also uncheck to deactivate an Agent without deleting it (and its history/statistics) |
| Skill | Drop‐down menu selection of pre-defined and custom Skills as described in the Skills section; a Skill indicates access and action permissions |
| Team | Optional Team assignment |
| Extension | Optional 4‐digit unique call-center extension number |
| Extension Fixed | Switch to activate the Extension above |
| CallerId | Optional custom caller ID for this Agent; when editing this field, switches are presented to enable each of the personal caller ID for Manual calls, Inbound calls, and SMS; when the corresponding switch is enabled, incoming calls and SMS for this number will be assigned to the Agent |
| SMS Notifications | Placeholder (currently not configurable) for telephone number where the Agent can receive SMS notifications; this is to support features such as VM Transcriptions |
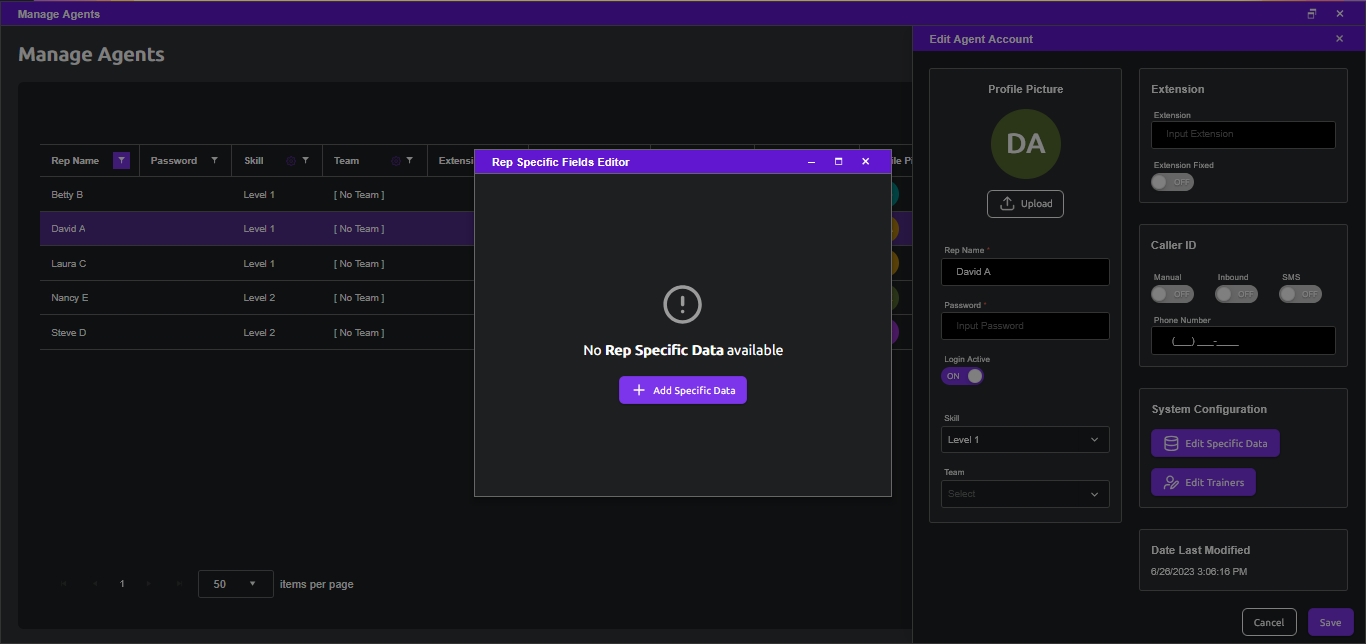
| Specific Data | Custom fields (name-value pairs) that can be referenced in other places, such as screen scripts |
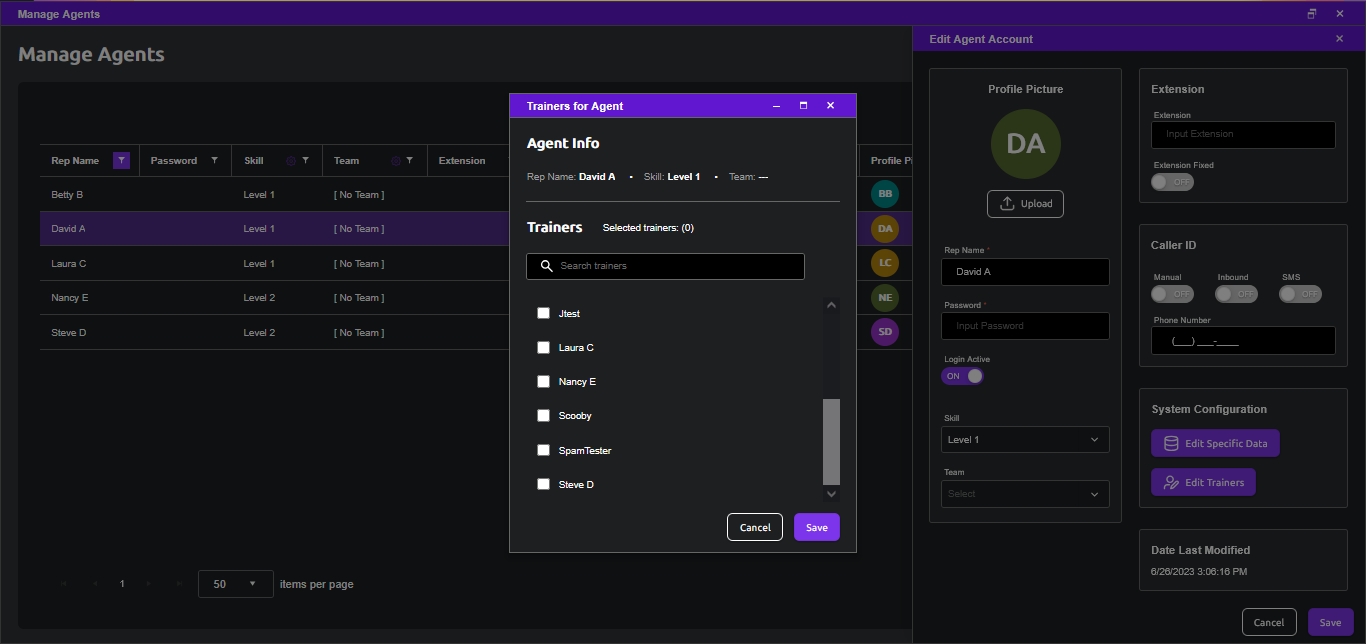
| Trainers | Trainers for the agent; when clicking, a list of other Agents is displayed and for those selected, the Agent being configured will be allowed to listen to and to view the trainer Agent’s screen |
| Date Last Modified | Creation/modification date (automatically generated and not modifiable) |
A Team allows you to group agents by Skill Group, so you can filter certain activities such as managing agents or their dial lists.
To create or modify Teams go to the main menu area on the left and click on Skill Groups & Teams. On the right, click View in the selection box for Build and Manage Teams.
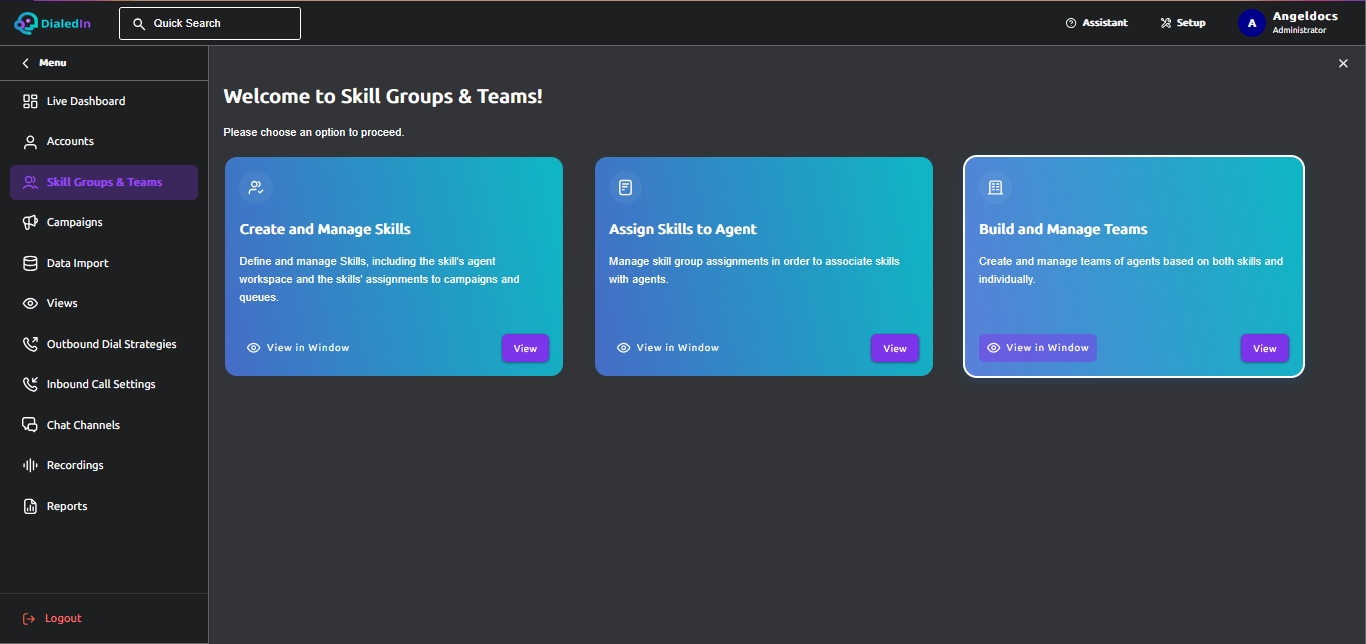
Select an existing Team or create a new one. This will present you a list of Skill Groups, which can be expanded to see Agents assigned that Skill Group. You can then drag and drop Skill Groups and/or individual Agents from the Available side to the Assigned side, and vice versa. Refer to the following pictures.
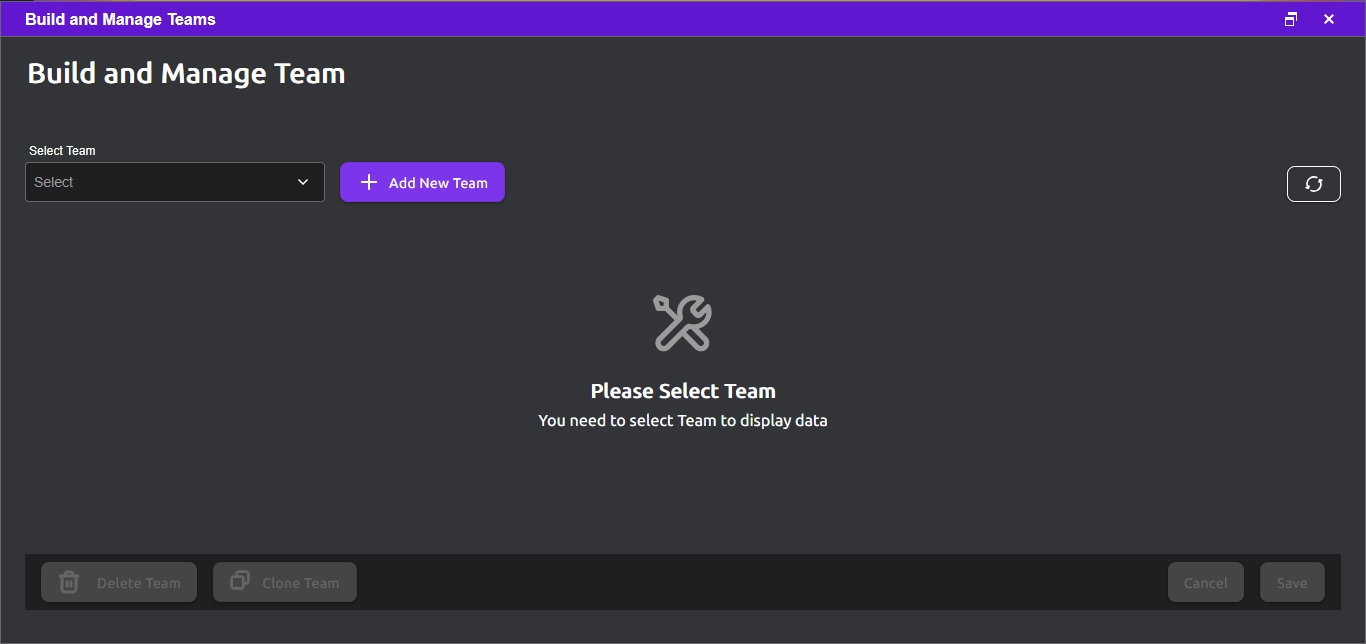
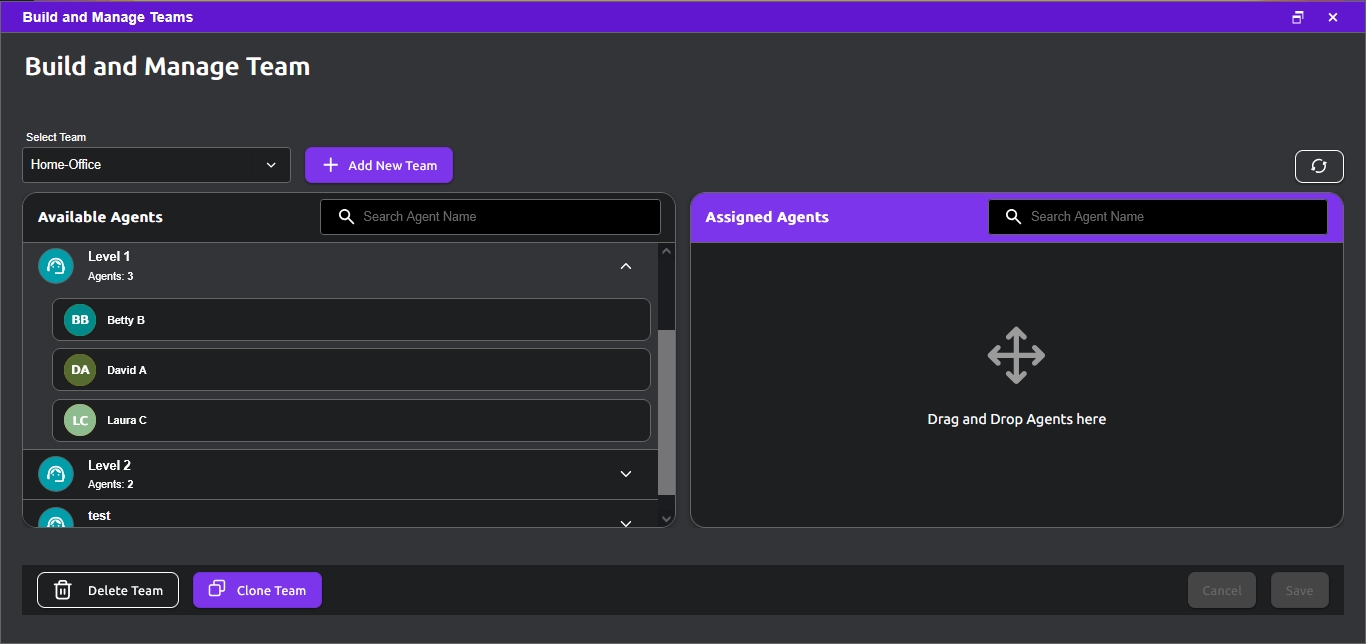
It is very important to define Agent Skills and Skill Groups and carefully consider each of the options, as they are a key tool for the system to determine how to assign, route, and distribute calls, as well as to decide what to display or make available to Agents.
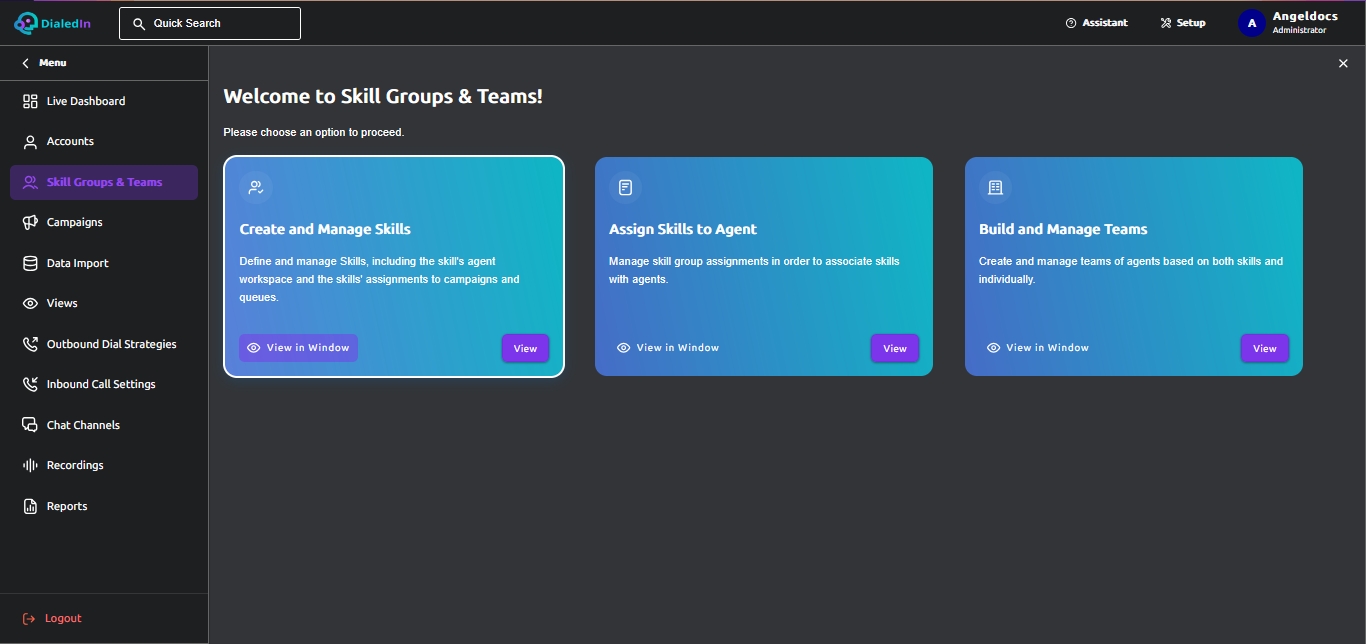
To create or modify Skills / Skill Groups go to the main menu area on the left and click on Skill Groups & Teams. On the right, click View in the selection box for Create and Manage Skills.
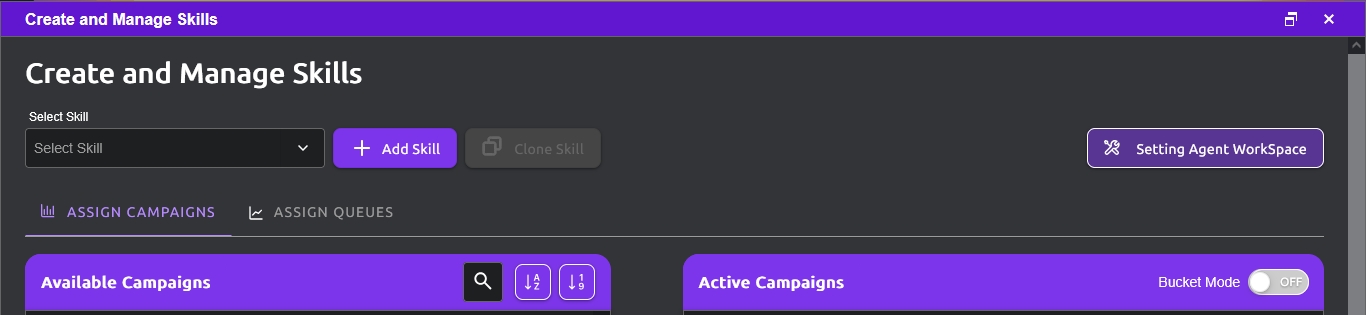
In addition, further below you can make Skill Groups active on a Campaign by selecting the Campaign from the Available list and move it to the Active list. That interface allows you to just scroll through the full list of available Campaigns, filter the list, or even search for a specific Campaign by typing a search string in the search field.
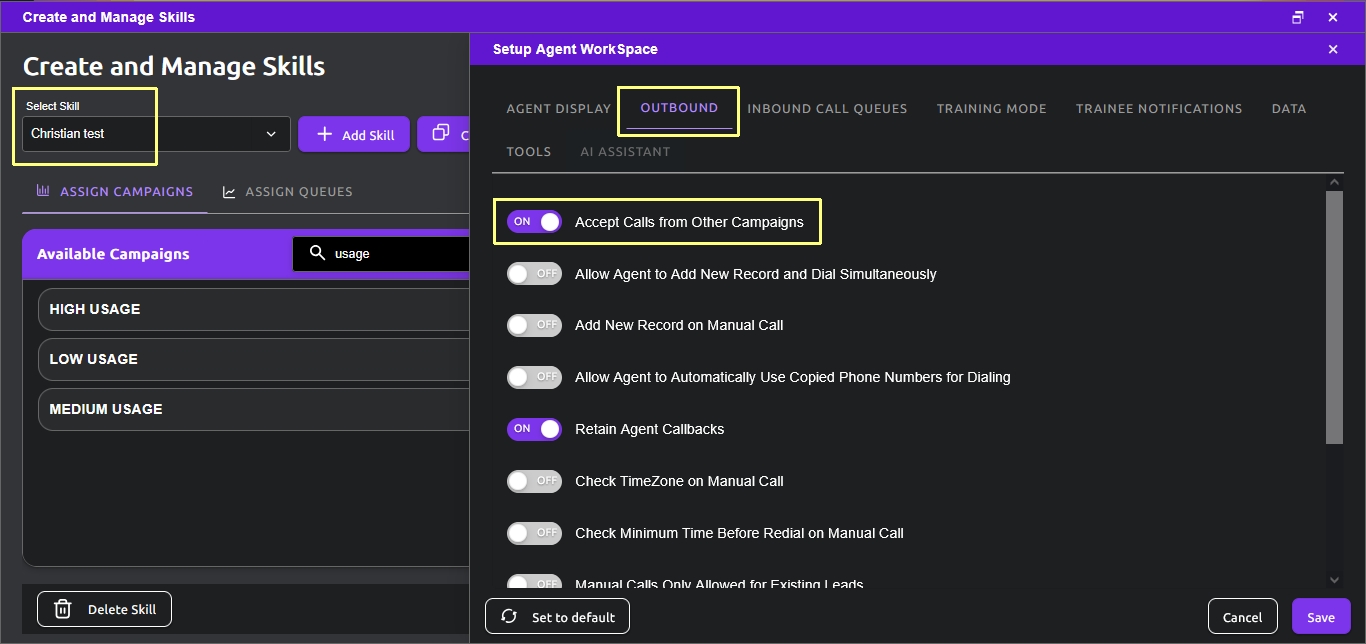
Let's start by switching to Setting Agent Workspace to assign roles and permissions to agents with a particular Skill. There’s an extensive set of capabilities that can be turned on and off for Agents via their assigned Skills. They’re grouped as follows: Agent Display, Outbound, Inbound Call Queues, Training Mode, Trainee Notifications, Data, and Tools. Let’s look at them one by one.
Refer to the following pictures.
The first group is AGENT DISPLAY; let's look at that.
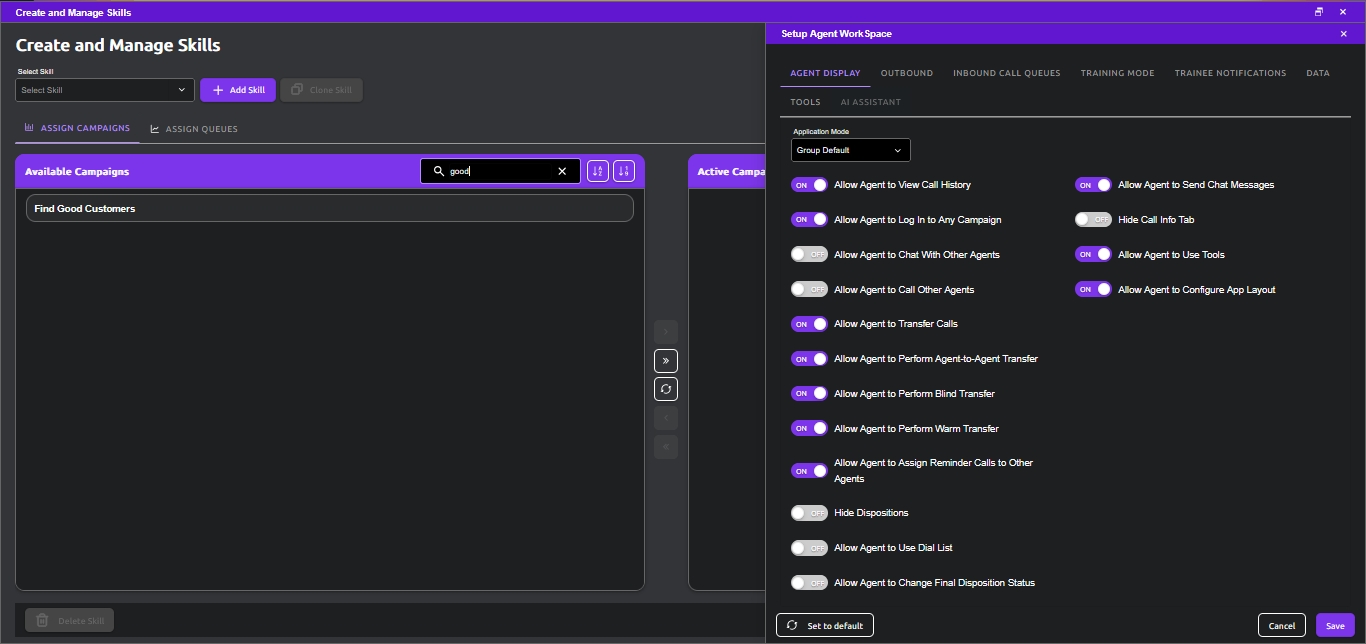
Here's a description of each Agent Display option:
| Application Mode | Pull‐down menu to select the look and feature extent of the Agent Client GUI, either the more inclusive Call Center GUI, or the (superseded) Telemarketing GUI; or you can just select Group Default so everyone in the organization uses the same mode. Note: some options in the following lists are only available if the Application Mode is Call Center. |
|---|---|
| Allow Agent to View Call History | Checkbox to enable displaying the lead/contact call history (pull-down menu) on Agent screen when receiving or making a call |
| Allow Agent to Log In to Any Campaign | Checkbox to allow the agent to work with any campaigns, even if the Skill associated with a Campaign is a different one |
| Allow Agent to Chat With Other Agents | Checkbox to allow the agent to chat with other agents, and not just Supervisors |
| Allow Agent to Call Other Agents | Checkbox to allow the Agent to internally make calls to other agents |
| Allow Agent to Transfer Calls | Checkbox to allow the Agent to transfer calls |
| Allow Agent to Perform Agent-to-Agent Transfer | Checkbox to allow the Agent to transfer a call to another logged in agent, who gets a proper notification with the option to accept or reject the call |
| Allow Agent to Perform Blind Transfer | Checkbox to allow the Agent to blind transfer a call, which is when the call is immediately put on the corresponding queue, and the original agent is disconnected |
| Allow Agent to Perform Warm Transfer | Checkbox to allow the Agent to warm transfer a call, which is when the original agent stays in the call, with the option to drop at any time |
| Allow Agent to Assign Reminder Calls to Other Agents | Checkbox to allow the Agent to set an agent-specific Callback and assign it to another agent |
| Hide Dispositions | Checkbox to disable the ability for the Agent to set the disposition of a call (by hiding the mechanism to perform the action); this is typically done when a call disposition is to be performed via a Script, or through a third-party system (into the ChaseData system) |
| Allow Agent to Use Dial List | Checkbox to allow the Agent to use a Dial List to perform calls; Dial Lists can be defined by a Manager or Administrator on the Management Console (see Agent Dial List under Outbound Call Management), or received through an API |
| Allow Agent to Change Final Disposition Status | Checkbox to reset the disposition of a Contact from one that has the attribute Final (which normally prevents further action) to another one; the Agent must be the one that had previously set the Final disposition |
| Allow Agent to Send Chat Messages | Checkbox to enable the chat module for this Agent |
| Hide Call Info Tab | Checkbox to disable displaying the system-default Call Info tab |
| Allow Agent to Use Tools | Check box to enable the agent access to the Tools menu. |
| Allow Agent to Configure App Layout | Check box to give the agent freedom to tailor the UI to his/her like. |
Now let’s go to the next tab to access the OUTBOUND capabilities; refer to the following picture.
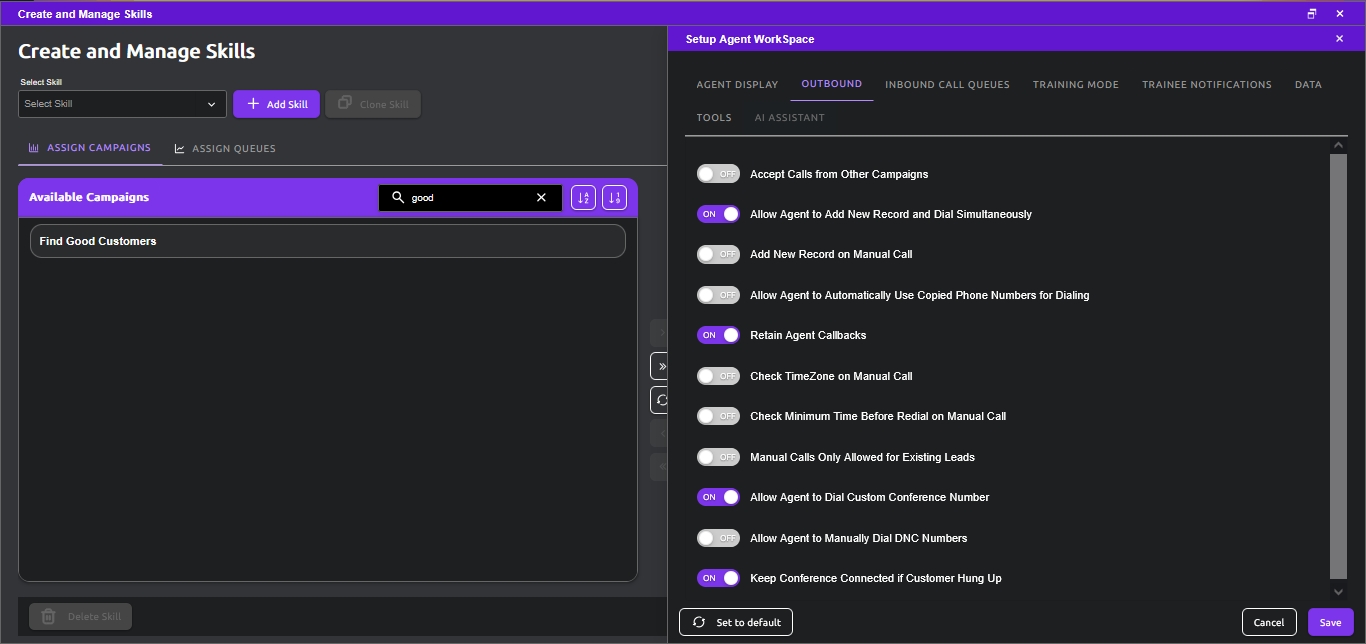
Here's a description of each Outbound option:
| Accept Calls from Other Campaigns | Checkbox to enable the agent to accept calls from another campaign that has no agents available; instead of just dropping calls, that campaign looks for agents with this setting enabled. It’s important to be aware that when an agent handles a call from another campaign, the agent will temporarily be working within the context of that other campaign (Contact record, Custom Fields, Wrap-Up Codes, etc.) |
|---|---|
| Allow Agent to Add New Record and Dial Simultaneously | Checkbox to enable the agent the option to add a lead/contact record at the time that a number is being dialed manually, so to be able to save the call information (e.g. status, form-captured data) |
| Add New Record on Manual Call | Similar to the previous one, except that instead of being an option, a new record is always added on a manual call |
| Allow Agent to Automatically Use Copied Phone Numbers for Dialing | Checkbox to enable the agent to be able to paste a copied phone number (e.g. from a file or website), instead of having to dial it digit by digit on the pad |
| Retain Agent Callbacks | Checkbox to set the system to retain the Callback status of a record when the Agent receives a call from, or makes a manual call to the corresponding number (otherwise those actions would have removed the Callback status of the record) |
| Check TimeZone on Manual Call | Checkbox to set the system, on a manual call attempt by the Agent, to check the customer time zone and the Campaign, to make sure the call is within calling hours |
| Check Minimum Time Before Redial on Manual Call | Checkbox to set the system, on a manual call attempt by the Agent, to check the corresponding record to make sure that the minimum time to redial that number has been met before allowing the call |
| Manual Calls Only Allowed for Existing Leads | Checkbox to set the system, on a manual call attempt by the Agent, to check system-wide that a record already exists for that lead before allowing the call |
| Allow Agent to Dial Custom Conference Number | Checkbox to allow the agent to use a number other than the default conference number |
| Allow Agent to Manually Dial DNC Numbers | Checkbox to allow the agent to manually call a number even if it is in the DNC list |
| Keep Conference Connected if Customer Hung Up | Checkbox to not disconnect all parties when the customer hangs up, and just keep the call open. |
Next let’s go to the next tab to access the Inbound Call Queues capabilities; refer to the following picture.
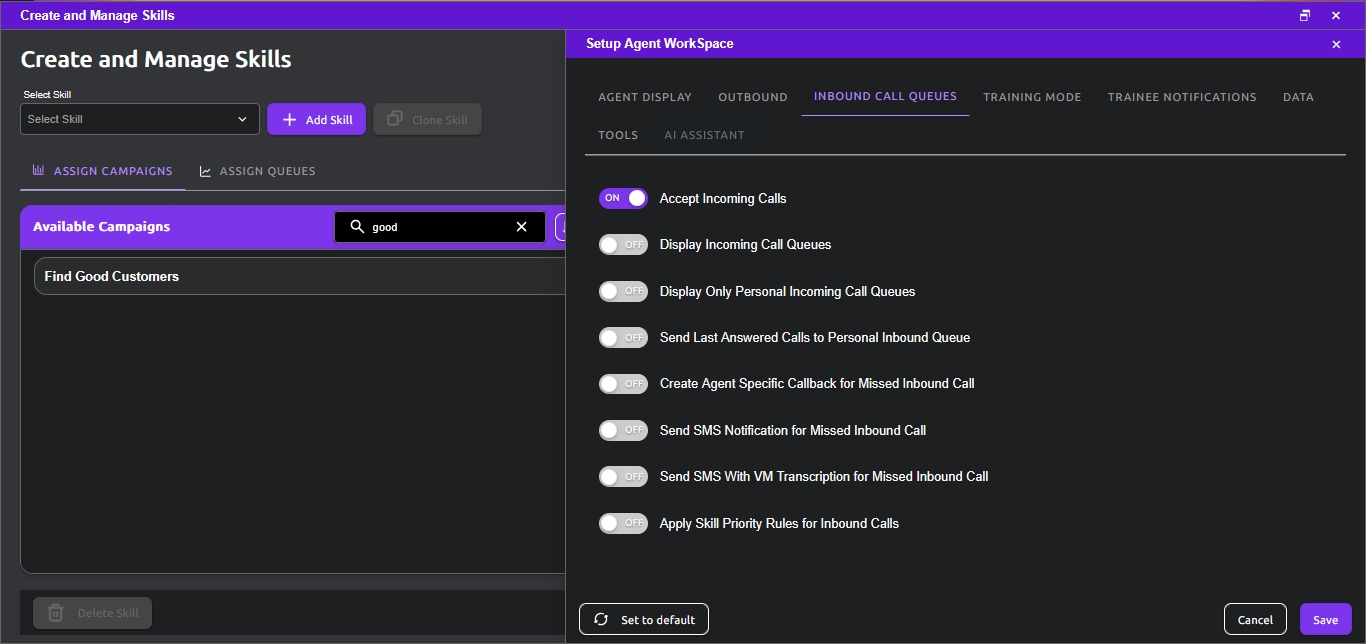
Here's a description of each Inbound Call Queues option:
| Accept Incoming Calls | Checkbox to enable the agent to handle Inbound calls; this is a Master setting -even if the Agent is associated with an inbound campaign, the agent must be enabled through this setting to be able to accept calls |
|---|---|
| Display Incoming Call Queues | Checkbox to set the system to display the current inbound call queue (calls ringing) in a special area of the Agent screen (refer to Agent Client); the inbound calls are displayed until an Agent answers it |
| Display Only Personal Incoming Call Queues | Checkbox to set the system to display the current inbound call queue (calls ringing), but only the personal one, in a special area of the Agent screen (refer to Agent Client); the inbound calls are displayed until an Agent answers it |
| Send Last Answered Calls to Personal Inbound Queue | Checkbox to set the system to assign an inbound call to the Agent’s personal queue if the Agent was the last one to answer a previous call from the same contact (record), then wait for this Agent to answer; note that there is a similar Campaign setting (last active agent), except that in that case the call is not moved to the personal queue (it will go to the next agent, if this agent is not available and doesn’t have this checkbox enabled) |
| Create Agent Specific Callback for Missed Inbound Call | Checkbox to set the system to include this Agent as one that can be assigned Callbacks for abandoned calls; when this occurs, the system is to notify the assigned Agent of the new Callback so the Agent can initiate it (refer to Agent Client) |
| Send SMS Notification for Missed Inbound Call | Checkbox to set the system to send an SMS notification to the Agent in the case of a missed inbound call, which includes both Hang Up and Voicemail cases; the Agent must have a valid telephone number configured for SMS Notifications (refer to Agent Accounts) |
| Send SMS With VM Transcription for Missed Inbound Call | Checkbox to set the system to send an SMS notification to the Agent in the case of a missed inbound call generating a voicemail message; the notification includes the VM Transcription; the Agent must have a valid telephone number configured for SMS Notifications (refer to Agent Accounts); this applies only if Allow Customer to Access VM Transcription has been enabled by ChaseData. |
| Apply Skill Priority Rules for Inbound Calls | Checkbox to enable Skill Priority for inbound calls. |
Next let’s go to the next tab to access the Training Mode capabilities; refer to the following picture.
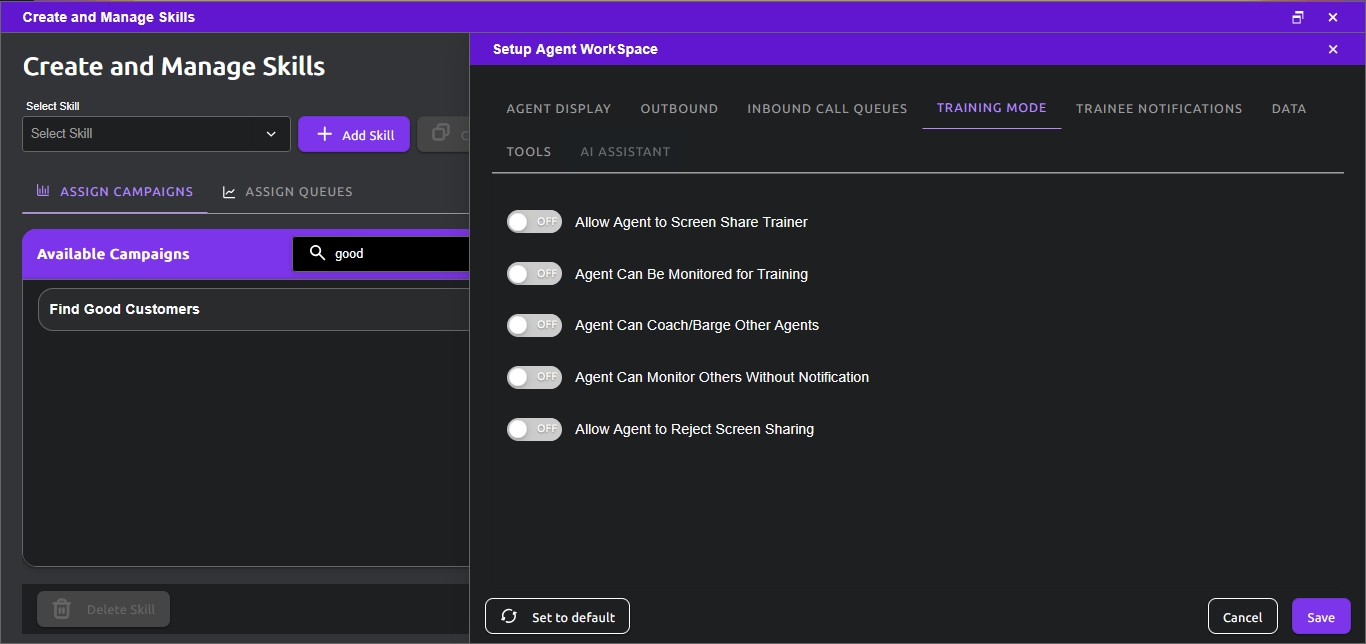
Here's a description of each Training Mode option:
| Allow Agent to Screen Share Trainer | Checkbox to enable the Agent to be able to view the shared screen of another agent that is set as trainer (and is allowing his/her screen to be shared) |
|---|---|
| Agent Can be Monitored for Training | Checkbox to enable the (trainer) Agent‘s audio for monitoring; while a trainee Agent could view the trainer screen, the trainee Agent would not be able to hear the audio of the trainer unless this setting is enabled for that trainer Agent |
| Agent Can Coach/Barge Other Agents | Checkbox to enable the Agent to be able not just to audio monitor another Agent, but also to participate with audio |
| Agent Can Monitor Others Without Notification | Checkbox to enable the Agent to be able to monitor another agent without the need to notify and receive consent of the Agent to be monitored |
| Allow Agent to Reject Screen Sharing | Checkbox to allow a trainer Agent to deny/block an attempt to get his/her screen shared. |
Next let’s go to the next tab to access the Trainee Notifications capabilities; refer to the following picture.
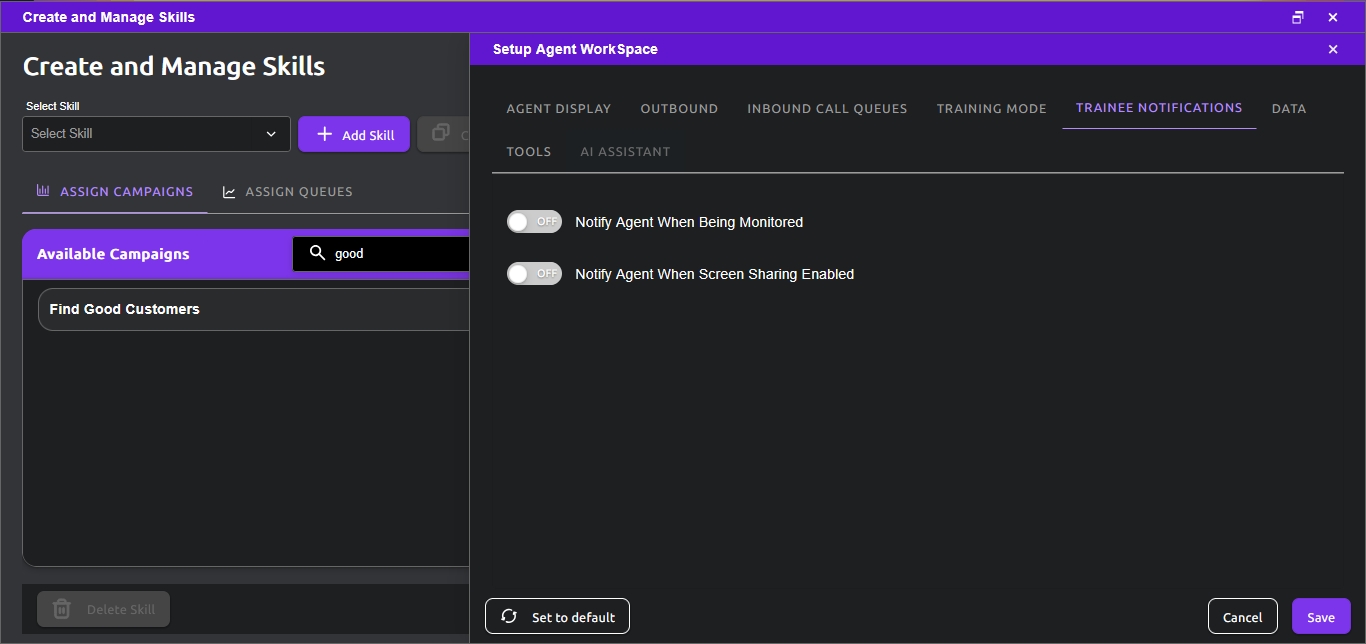
Here's a description of each Trainee Notifications option:
| Notify Agent When Being Monitored | Checkbox to set the system to notify an Agent (trainer) that is going to be (audio) monitored |
|---|---|
| Notify Agent When Screen Sharing Enabled | Checkbox to set the system to notify an Agent (trainer) that his/her screen is going to be shared. |
Next let’s go to the next tab to access the Data capabilities; refer to the following picture.
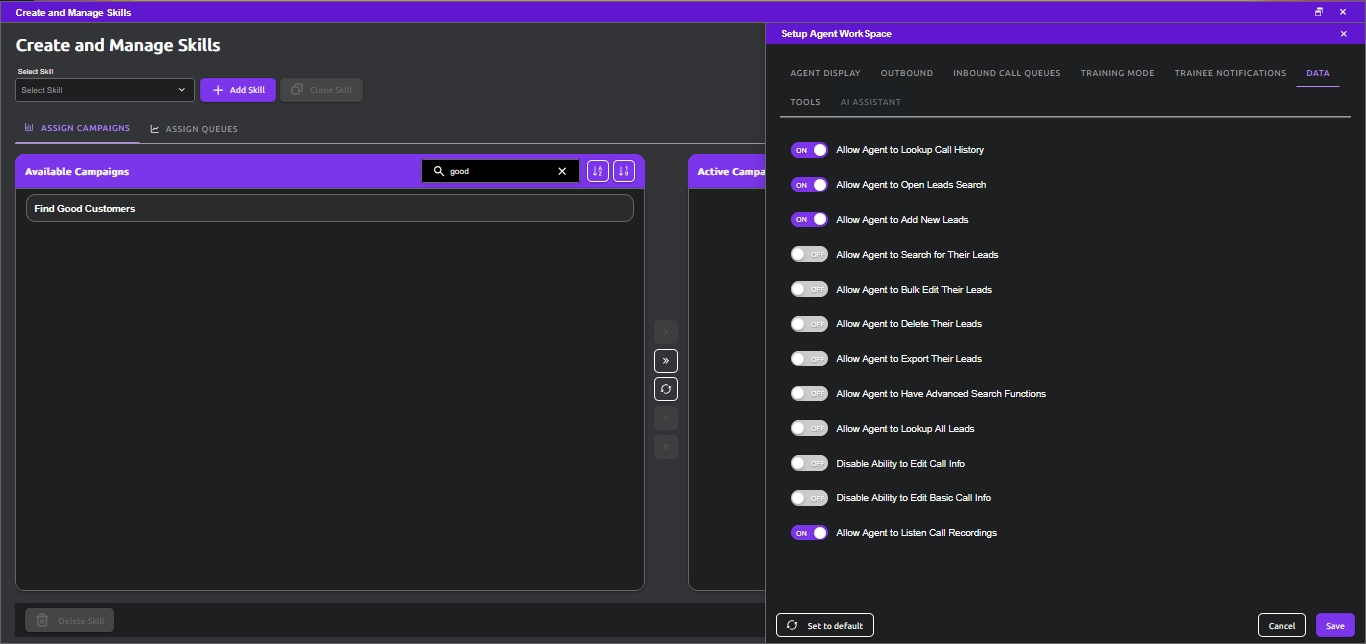
Here's a description of each Data option:
| Allow Agent to Lookup Call History | Checkbox to allow the Agent to expand a searched & found record and therefore see the lead’s call history |
|---|---|
| Allow Agent to Open Leads Search | Checkbox to enable the search tool for the Agent, so to be able to perform lead/contact searches |
| Allow Agent to Add New Leads | Checkbox to enable the Agent to be able to create a new lead/contact without having to call the lead; otherwise when an Agent creates a new lead, it must immediately call the lead |
| Allow Agent to Search for Their Leads | Checkbox to enable the Agent to be able to search for the lead/contact records most recently called/handled |
| Allow Agent to Bulk Edit Their Leads | Checkbox to enable the Agent to be able to group-edit searched & found leads/contacts |
| Allow Agent to Delete Their Leads | Checkbox to enable the Agent to be able to delete leads/contacts assigned to the Agent |
| Allow Agent to Export Their Leads | Checkbox to enable the Agent to be able to export leads/contacts searched; export is to a local file (where the Agent App runs) |
| Allow Agent to Have Advanced Search Functions | Checkbox to enable the Agent with the ability to use advanced search functions (beyond the normal basic search) |
| Allow Agent to Lookup All Leads | Checkbox to enable the Agent to be able to perform system-wide lead/contact searches; otherwise, the search is restricted to leads assigned to the Agent |
| Disable Ability to Edit Call Info | Checkbox to disable the Agent’s ability to update any of the call info displayed, whether built-in fields or custom fields; all fields will be read-only in this case |
| Disable Ability to Edit Basic Call Info | Checkbox to disable the Agent’s ability to update the basic (built-in) call info displayed; built-in fields will be read-only, while custom fields will be read-write |
| Allow Agent to Listen Call Recordings | Checkbox to enable the Agent to be able to access and listen to call recordings. |
Next let’s go to the next tab to access the Tools capabilities; refer to the following picture.
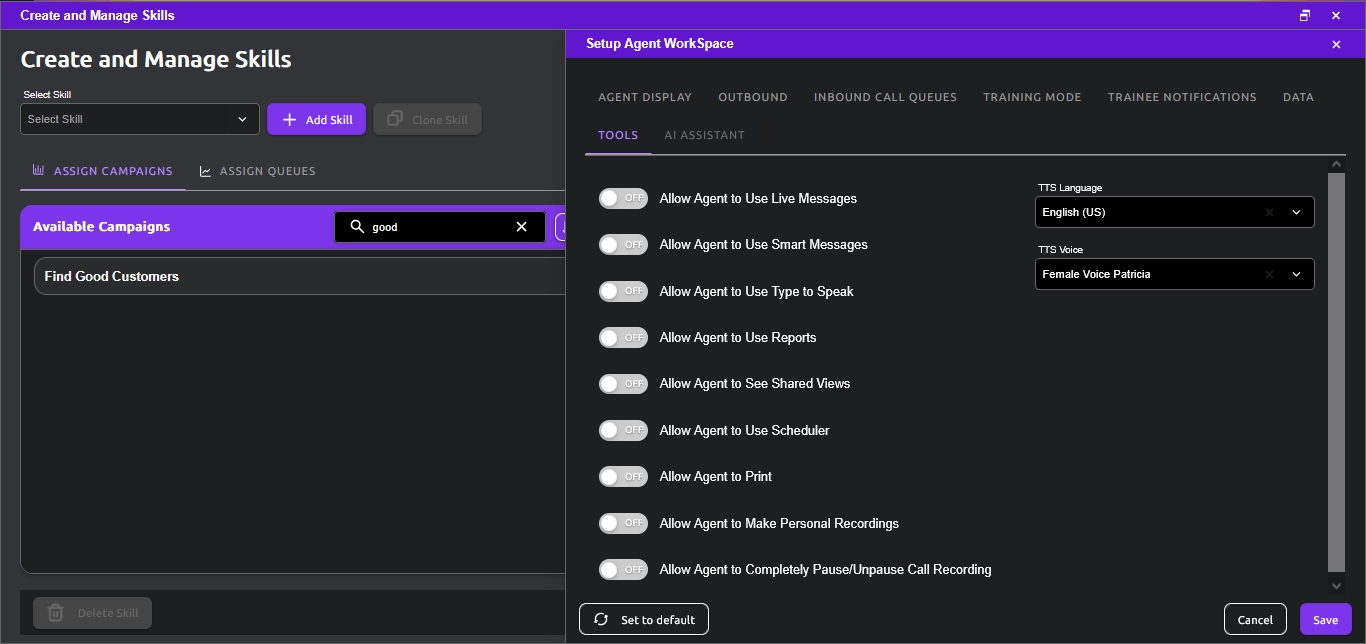
Here's a description of each Tools option:
| TTS Language | Pull‐down menu to set the language to be used for interpreting text and translating it to speech |
|---|---|
| TTS Voice | Pull‐down menu to set the type of voice to be generated by TTS engine; depending on language, options may include different male and female voices with their own intonation characteristics |
| Allow Agent to Use Live Messages | Checkbox to allow the Agent to use (on-the-fly selection and playback of) Live Messages (pre-recorded) |
| Allow Agent to Use Smart Messages | Checkbox to allow the Agent to use Smart Messages (pre-recorded) to leave on answering machines |
| Allow Agent to Use Type to Speak | Enable the Agent to use TTS making use of the TTS Language and TTS Voice configured in these settings; the Agent is therefore able to type a word or sentence for the TTS engine to convert it to speech |
| Allow Agent to Use Reports | Checkbox to enable the Reports tool on the Agent screen |
| Allow Agent to See Shared Views | Checkbox to allow the Agent to be able see a view shared by a Manager or Administrator during a search for Contacts |
| Allow Agent to Use Scheduler | Checkbox to enable the Scheduler tool on the Agent screen |
| Allow Agent to Print | Checkbox to enable the Print option in the Agent GUI |
| Allow Agent to Make Personal Recordings | Checkbox to enable the Agent to record personal snippets of a call (enables the option in the GUI), in addition to the master recording always taking place |
| Allow Agent to Completely Pause/Unpause Call Recording | Checkbox to enable the Agent to Pause and Resume the master recording of a call. |
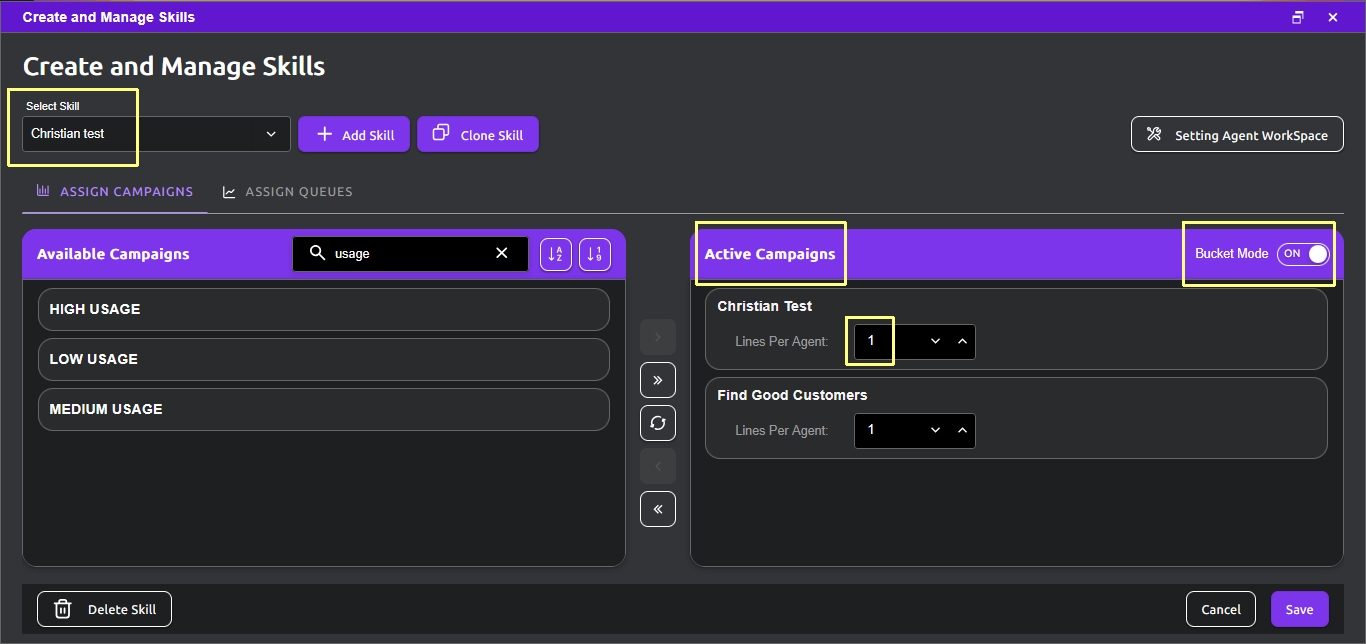
The DialedIn solution to provides the option to allow certain agents to be assigned outbound calls (dial out) from multiple Campaigns. This can be done by enabling the Bucket Mode option for a Skill Group.
If the Bucket Dialing option is not set, the agent will typically be assigned calls only from the Campaigns selected at log in time (or any campaign switched to thereon), i.e., from one single Campaigns.
Following are the conditions for and the effects of the Bucket Dialing option:
It should be noted that the benefits of Bucket Dialing go beyond the feature by itself. As we stated above, Bucket Dialing works along other features that may be configured individually for each Campaign or group of Sub-Campaigns thus offering a wealth of possibilities.
To give perspective to this flexibility, think about a Bucket Dialing setup that includes multiple Campaigns, where each one has its own Playlists and/or Dial Priorities. Or, even more interesting, when Skill Priority is involved, in which case some of the Campaign’s Sub-Campaigns will be affected by the priority corresponding to the Skill alongside the Bucket Dialing rules.
Keep in mind that flexibility usually adds complexity to a setup process, which in turn requires additional planning. Therefore, it is important to think over and plan the strategy carefully, so the end result of any rule combination is clearly understood and matches the intended result.
Setting up Bucket Dialing is done through Skill Group configuration, as shown in the following pictures.
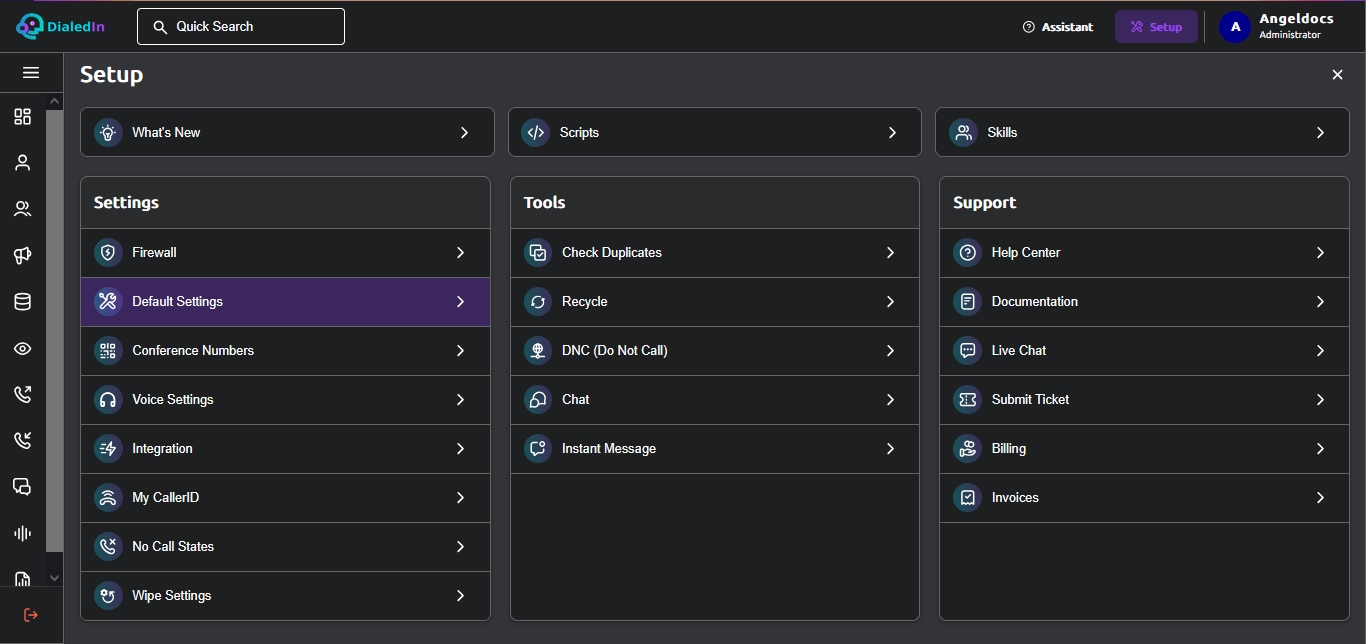
To make provisioning more efficient, the system allows for the definition of Default Settings (system defaults), which provide a set of system‐wide default values; some are general system settings, some are default campaign settings, some are default agent settings, etc. Note that there are additional Default Settings that are only available to DialedIn personnel and may not be shown here.
There are two ways to access the default settings:
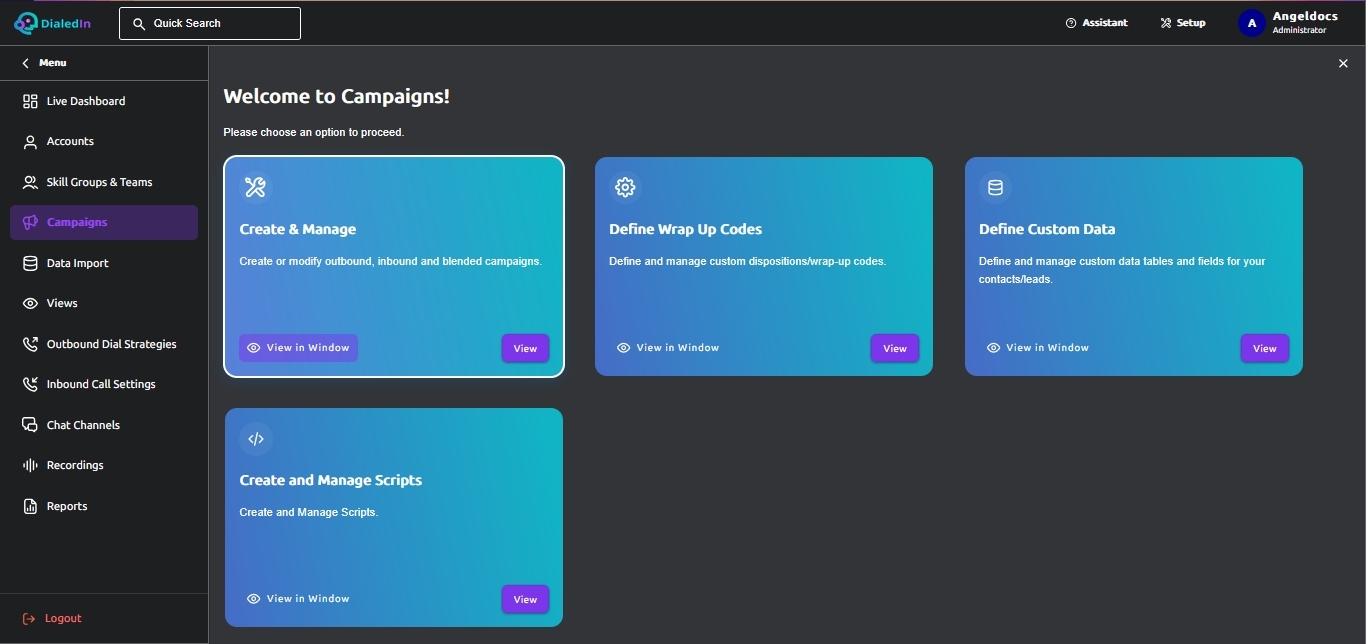
As with Campaigns Settings, the Default Settings configuration area is divided in four major groups, which can be expanded and contracted as needed for better visibility.
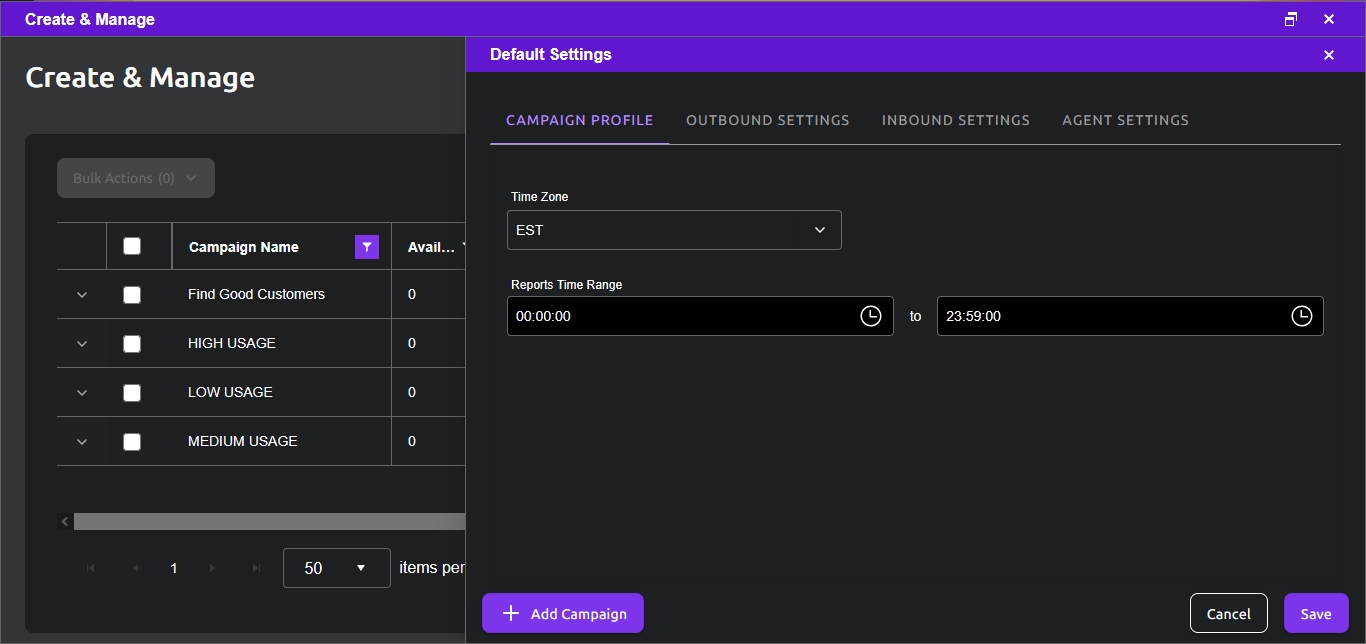
The following settings are included:
| Time Zone | The default time zone to use for all activities |
|---|---|
| Reports Time Range | The default time band for all reports. |
Refer to the following picture.
The following settings are included:
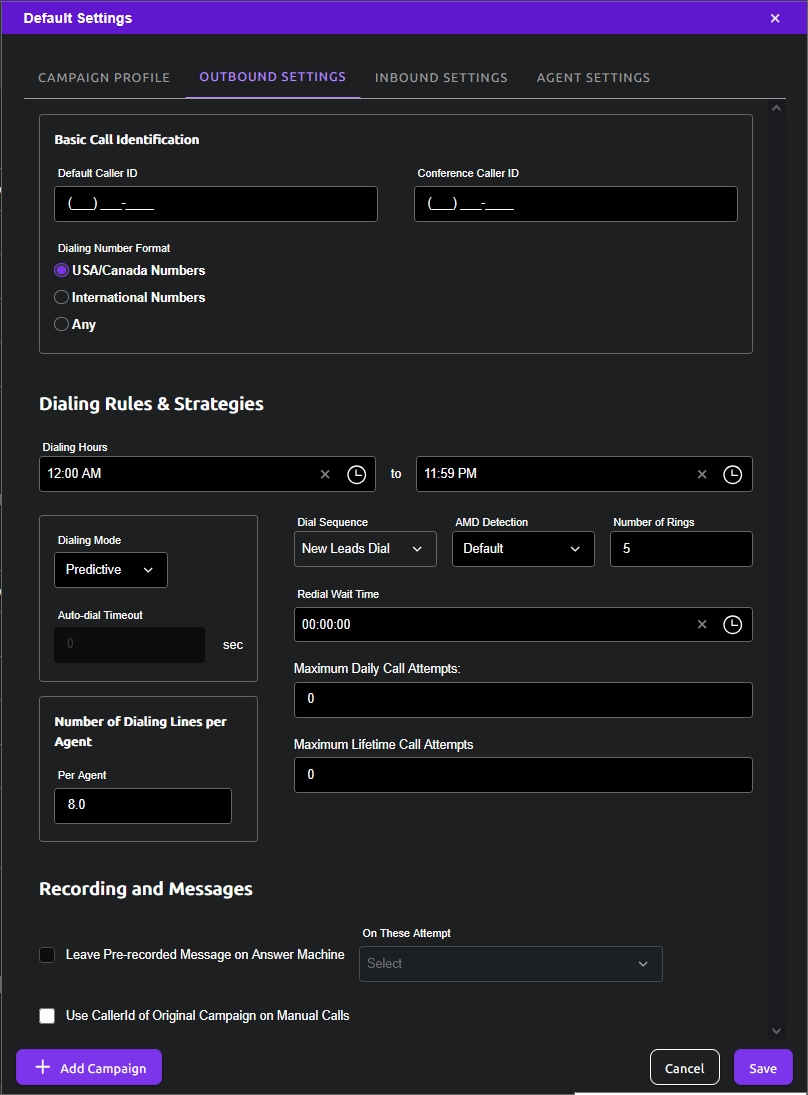
| Default Caller ID | The default number to be displayed as Caller ID to called parties |
|---|---|
| Conference Caller ID | The default number to be displayed as Caller ID to called parties of a conference call |
| USA/Canada Numbers | Only NANP numbers are expected |
| International Numbers | Only international numbers are expected |
| Any | Any number format may be used |
| Dialing Hours | Default Start-time and End-time for dialing activity; time zone is based on the Contact phone number |
| Dialing Mode | Pull‐down menu to indicate what method to use by default to initiate outbound calls: Predictive, Preview, Progressive, Available |
| Number of Dialing Lines per Agent | The default number of lines that the system will attempt to use for dialing (constrained by agreement with DialedIn) per agent (i.e. a rate) |
| Dial Sequence | Pull‐down menu to indicate in which order are Contacts called (outbound calls) by default: List Order (chronological, oldest first and in the order they were imported), Random Order (with weight on least number of dial attempts), Last Name (A to Z), New Leads Dialed First (chronological, most recent first). |
| AMD Detection | Pull‐down menu to indicate the level of Answering Machine Detection (AMD) accuracy to be used by default: Accurate, Default, None. This helps determine at what point to either leave a message or disconnect (Recording and Messages settings) |
| Number of Rings | Default number of telephone rings after which the call is determined to be not answered |
| Redial Wait Time | Default amount of time that the system must wait before attempting to call again to this number, or redialing (previously Minimum Time Before Redial); redialing occurs based on configured number of attempts and last call disposition / wrap up code |
| Maximum Daily Call Attempts | Maximum number of calls attempted by default, including redials, on a number on any given day |
| Maximum Lifetime Call Attempts | Maximum number of calls attempted by default, including redials, on a number for the totality of the Contact record life |
| Leave Pre-recorded Message on Answer Machine | This indicates whether to Leave a Pre-recorded Message on Answer Machine by default |
| On These Attempts | Indicates the default call attempts to the Contact that a voice message drop is attempted; see options below |
| Use Caller ID of Original Campaign on Manual Calls | Option for On a Manual Call, Lookup the Number in other Campaigns; it instructs to, in addition, use the Caller ID configured for the Campaign where the Contact record was found. |
Refer to the following picture.
The following settings are included:
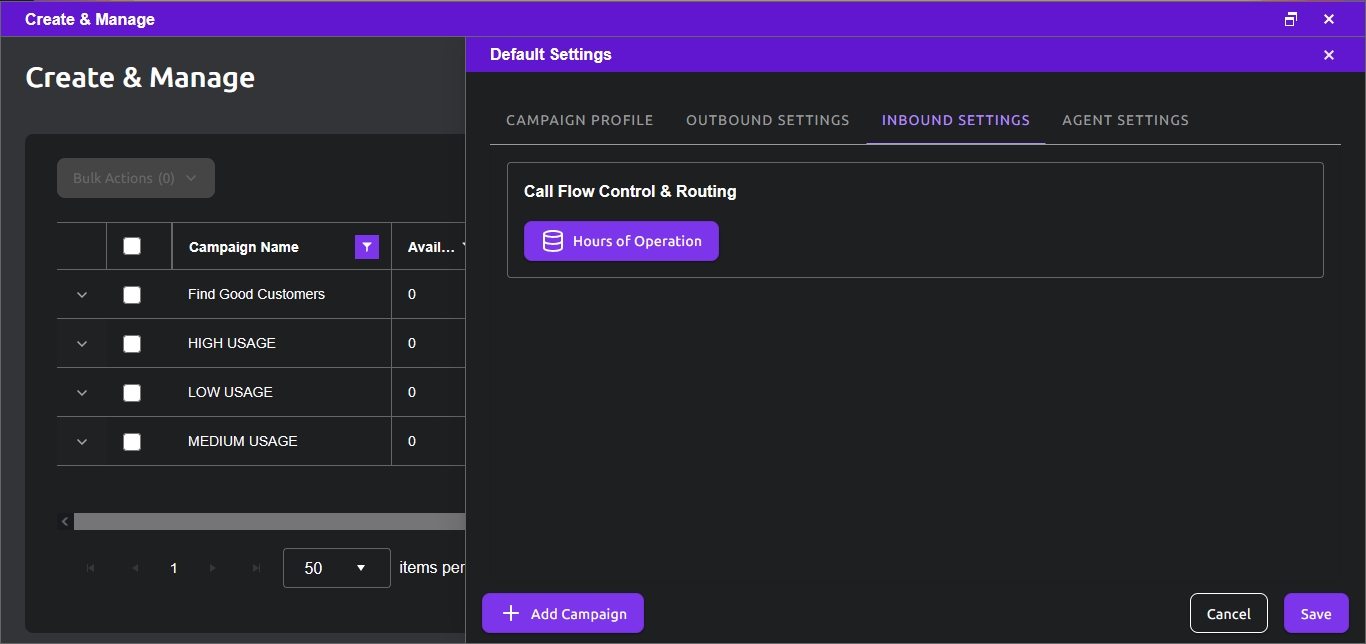
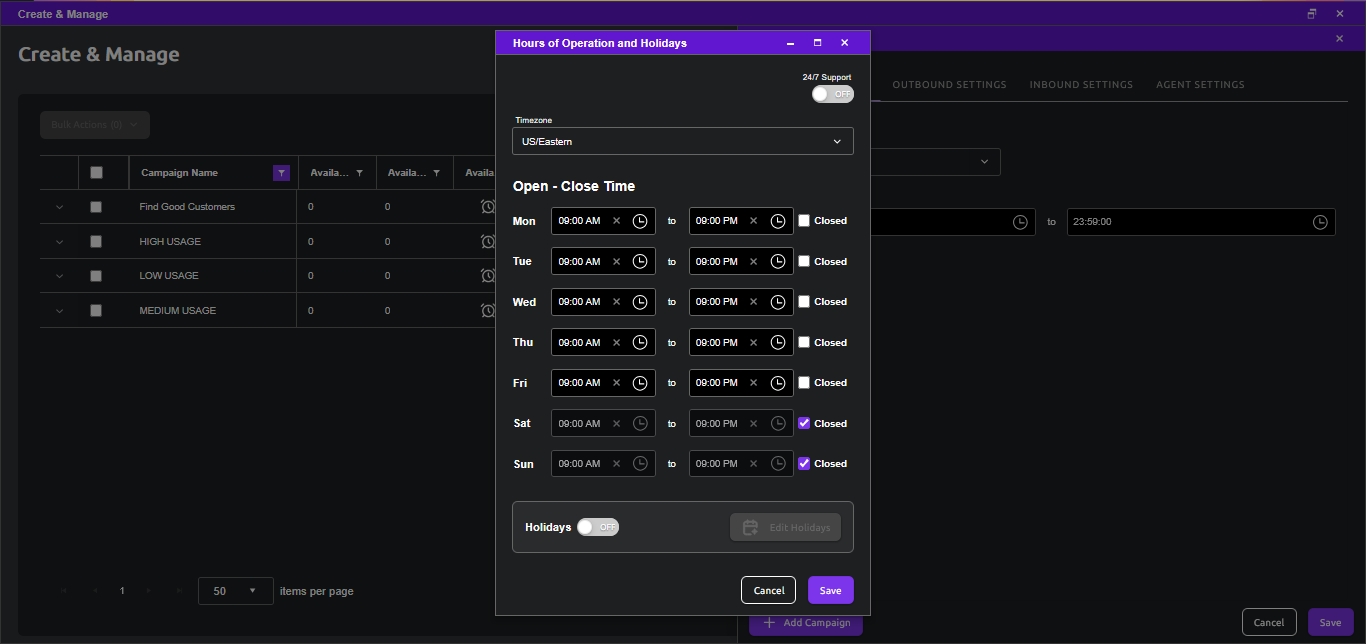
| Hours of Operation | Opens a pop-up window to define hours of operations for the Campaign, which is used for Call and Agent management; the Hours of Operation window includes an option to define Holidays, as well, which opens another pop-up window; refer to pictures that follow. |
|---|
Refer to the following pictures.
The following settings are included:
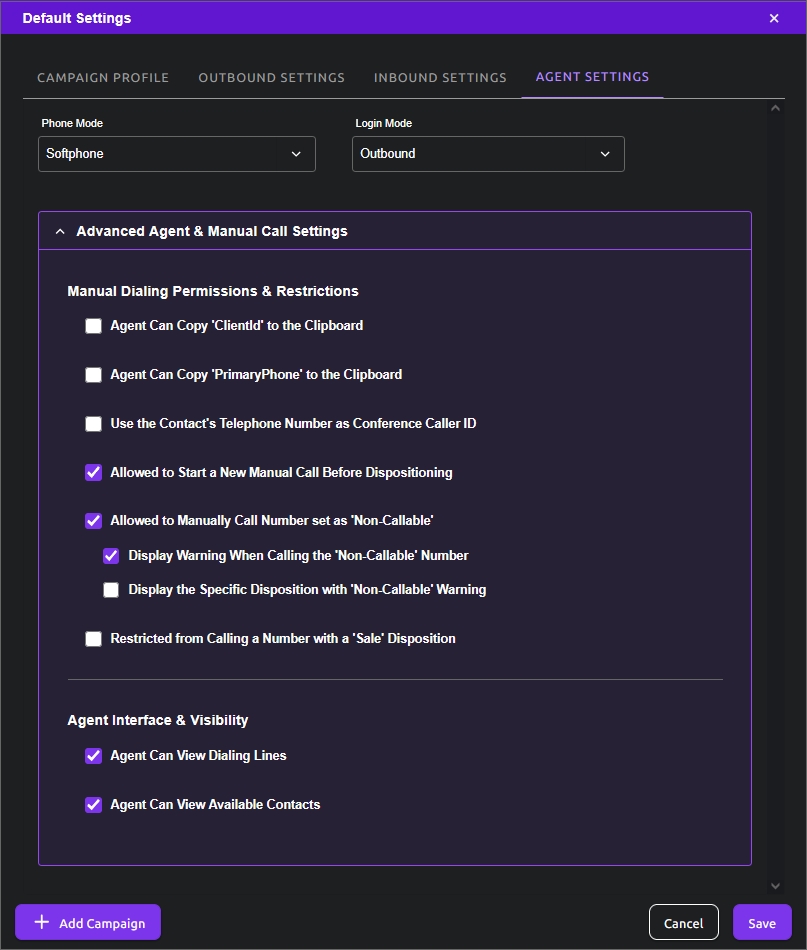
| Phone Mode | Type of telephone system used for calls; options are Softphone (internal), External Phone (3rd party softphone), and Mixed (agent can choose either one) |
|---|---|
| Login Mode | Type of activities that Agents are allowed on login; options are Outbound, Inbound, and Mixed (agents can perform both Outbound and Inbound activities, unless overridden by a Campaign or Sub-Campaign) |
| Agent Can Copy ‘ClientId’ to the Clipboard | By default, the Agent can copy the ClientId related to the current call; available in case it needs to be pasted into another application (e.g. CRM) |
| Agent Can Copy ‘PrimaryPhone’ to the Clipboard | By default, the Agent can copy the PrimaryPhone related to the current call; available in case it needs to be pasted into another application (e.g. CRM) |
| Use the Contact’s Telephone Number as Conference Caller ID | When conferencing in another party, by default use the customer telephone number (PrimaryPhone field) as the caller ID |
| Allowed to Start a New Manual Call Before Dispositioning | By default, allows Agents to initiate a manual call to another lead without having to first set the disposition for the immediately preceding call that the Agent was connected to; it is not a recommended option for normal operations since it goes against typical outbound call management, but it’s provided for flexibility |
| Allowed to Manually Call Number set as ‘Non‐Callable’ | By default, allows Agents to manually dial out numbers with Non‐Callable dispositions (e.g. DNC, Sale, Disconnected Number, Wrong Number, Not Interested); this is also an option not recommended for normal operations since it goes against typical outbound call management, but it’s provided for flexibility |
| Display Warning When Calling the ‘Non‐Callable’ Number | Option for Allowed to Manually Call Number set as ‘Non‐Callable’; indicates to not display a warning when the Agent attempts to dial a Non‐Callable record |
| Display the Specific Disposition with ‘Non‐Callable’ Warning | Option for Allowed to Manually Call Number set as ‘Non-Callable’; indicates to also include the reason (disposition) when a warning is displayed when the Agent attempts to dial a Non-CallableNon‐Callable record |
| Restricted from Calling a Number with a ‘Sale’ Disposition | By default, restricts Agents from calling Contacts with Sale dispositions, even if the disposition is Callable; typically used when multiple Campaigns are used for different stages of sales and follow up processes, or to avoid unnecessary calls. |
| Agent Can View Dialing Lines | By default, allows the Agent to see the list of telephone lines / current calls; useful for the Agent to watch the number of the calls that are being made while waiting on a call |
| Agent Can View Available Contacts | By default, allows the Agent to see the percentage of Contacts in the current Campaign that are still left to be called |
Refer to the following picture.
For effective Outbound Call Management and Inbound Contact Center, whether individually or in a blended manner, we must first set up Campaigns; they group all relevant rules, assignments and definitions to better structure and automate the outbound and inbound activities, to represent your dialing strategy, and to be able to gather and properly view and analyze business statistics.
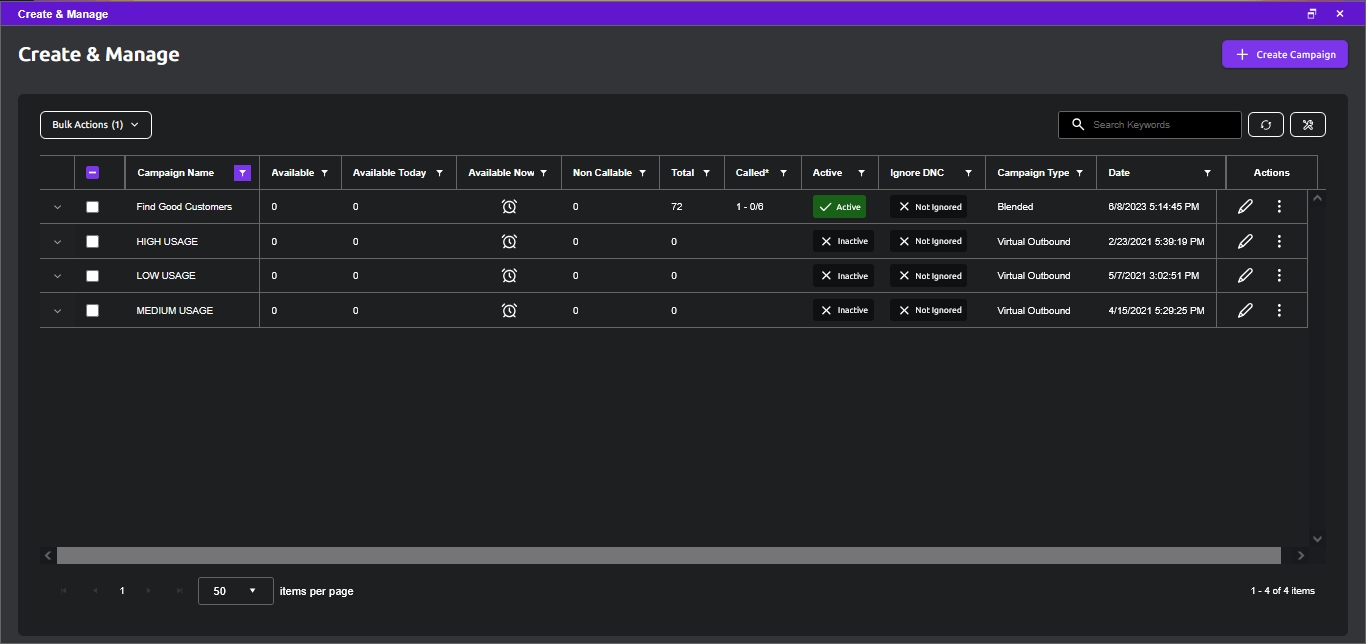
To create or modify a Campaign go to the main menu area on the left and click on Campaigns. On the right, click View in the selection box for Create & Manage.
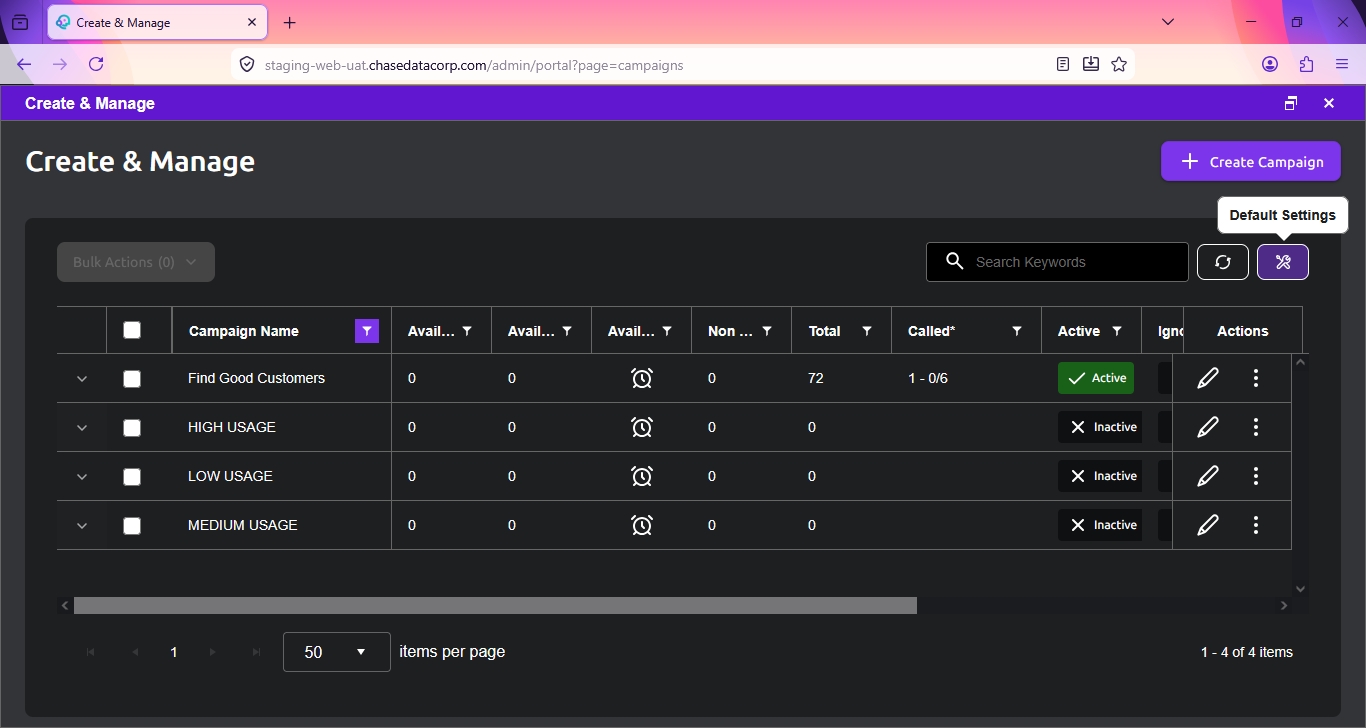
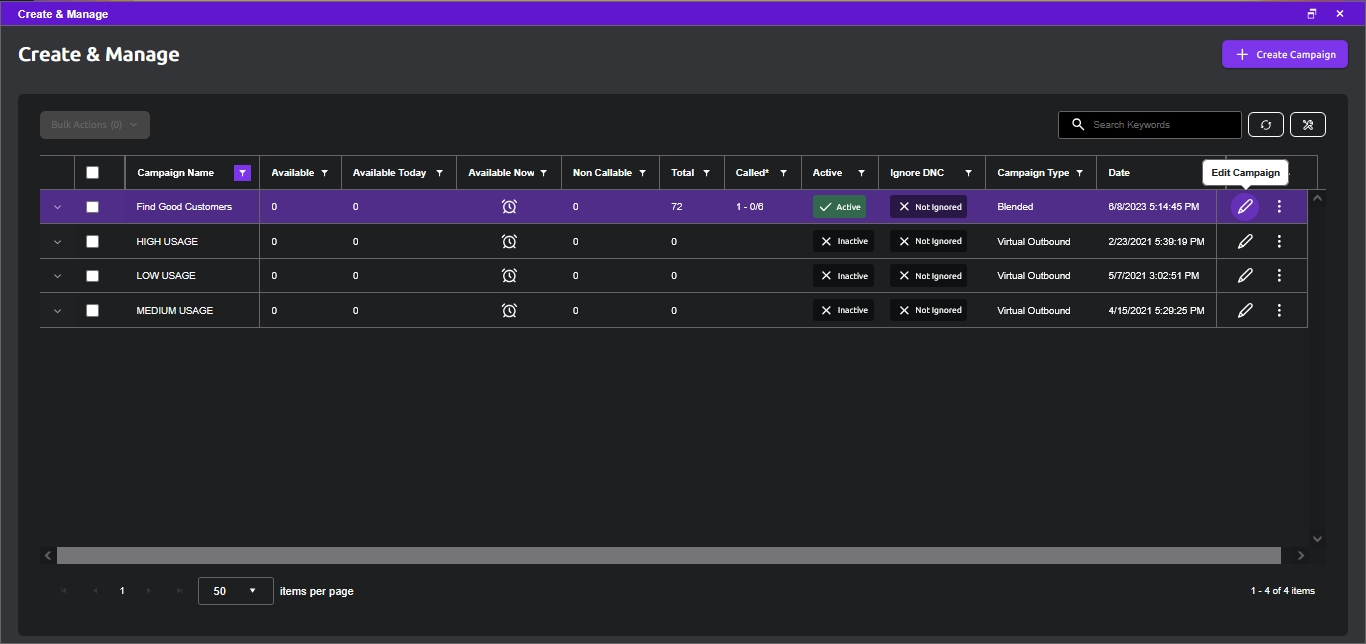
After the list of campaigns is presented, you may click on Create Campaign or select an item to open the corresponding details pane where you can review and modify as needed. Refer to the following picture.
When you click on Create Campaign or on the Edit Campaign icon for an existong one, a new window panel will open, where you configure all the Campaign Settings.
The Campaign Settings configuration area is divided in four major groups, which can be expanded and contracted as needed for better visibility. Obviously, the applicability of settings is directly related to the Campaign type; for example, Inbound Settings are not applicable to Outbound Campaigns.
| Campaign Profile | Common settings for any Campaign, like name, type, etc. |
|---|---|
| Outbound Settings | Settings specific to Outbound communications |
| Inbound Settings | Settings specific to Inbound communications |
| Agent Settings | Settings to indicate agent behavior when handling the Campaign; includes Manual Call behavior. |
The first tab presented in the Campaign Settings pane is Campaign Profile. Refer to the following picture.
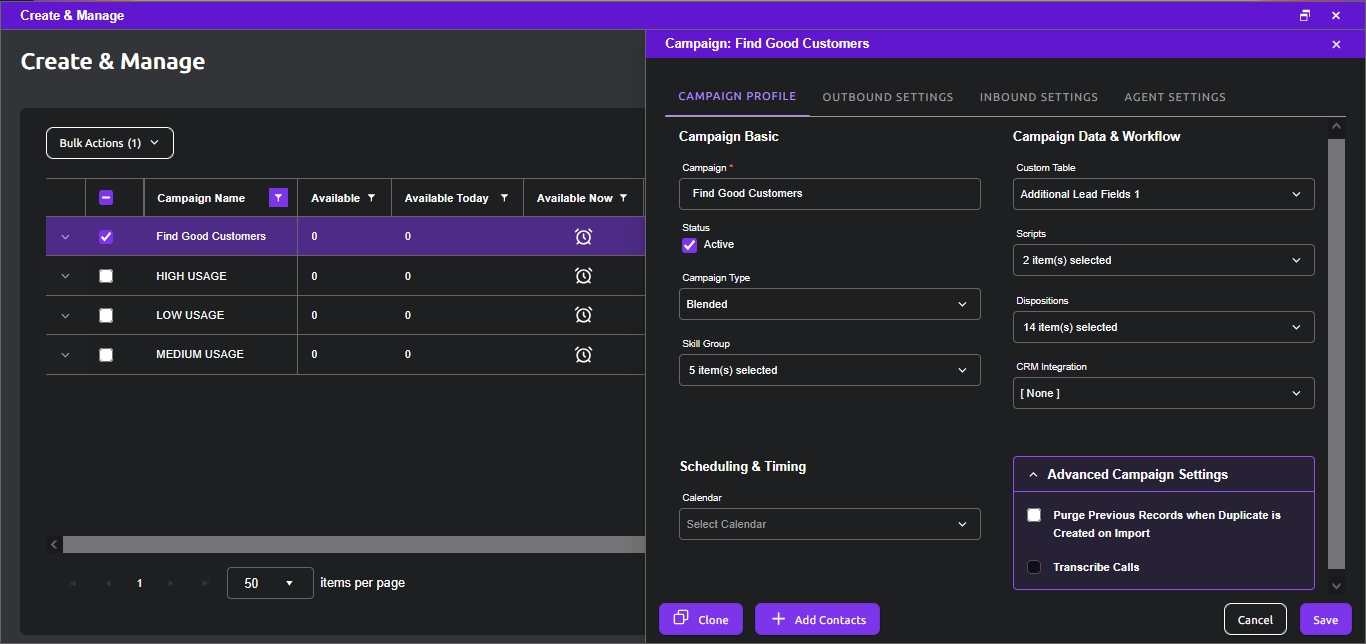
The following settings are included:
| Campaign | Campaign name or label |
|---|---|
| Active | Check-box to set the campaign active |
| Campaign Type | Type of campaign pull-down menu: Outbound, Inbound, Blended, Virtual Outbound (Agentless Dialing), Virtual Blended |
| Skill Group | Ordered list of Skill Groups expected to handle activities for this Campaign; this is the key link to Agents since each of them belongs to a Skill Group |
| Custom Table | The table that defines the set of custom fields (in addition to the default fields) for Contact records of this Campaign (previously Adv. Table) |
| Scripts | Pull-down menu of scripts (e.g. custom HTML pages) that can be displayed when a call is connected, instead of the default one (multiple selections allowed) |
| Dispositions | The wrap up codes, or dispositions, that this Campaign makes available for calls made to Contacts |
| CRM Integration | Pull-down menu to optionally integrate with an external CRM, which allows a corresponding CRM window/view to open alongside the ChaseData GUI (i.e. docked) |
| Calendar | Pull-down menu to indicate which Calendar (a.k.a Scheduler) is to be used for creating reminders, e.g. Callbacks (previously Scheduler) |
| Purge Previous Records when Duplicate is Created on Import | Check-box to remove any Contact record that is determined to be a duplicate (based on PrimaryPhone) of a Contact record being imported or updated; the newly imported Contact record remains as the only one (previously Purge Existing Duplicates During Import/Update) |
| Transcribe Calls | Check-box to indicate that call transcription is enabled campaign-wise, where applicable (must be enabled for the account/group). |
Following is a description of each campaign type:
| Outbound | Outbound dialing rules, algorithms, and procedures (e.g. telemarketing) |
|---|---|
| Inbound | Inbound call routing rules, handling, and procedures (e.g. call center) |
| Blended | Combination of Inbound and Outbound |
| Virtual Outbound | Outbound calling rules for agentless dialing (e.g. message broadcast, press-option to connect, …) |
| Virtual Blended | Combination of Inbound and Virtual Outbound. |
Next are Outbound Settings. Refer to the following pictures.
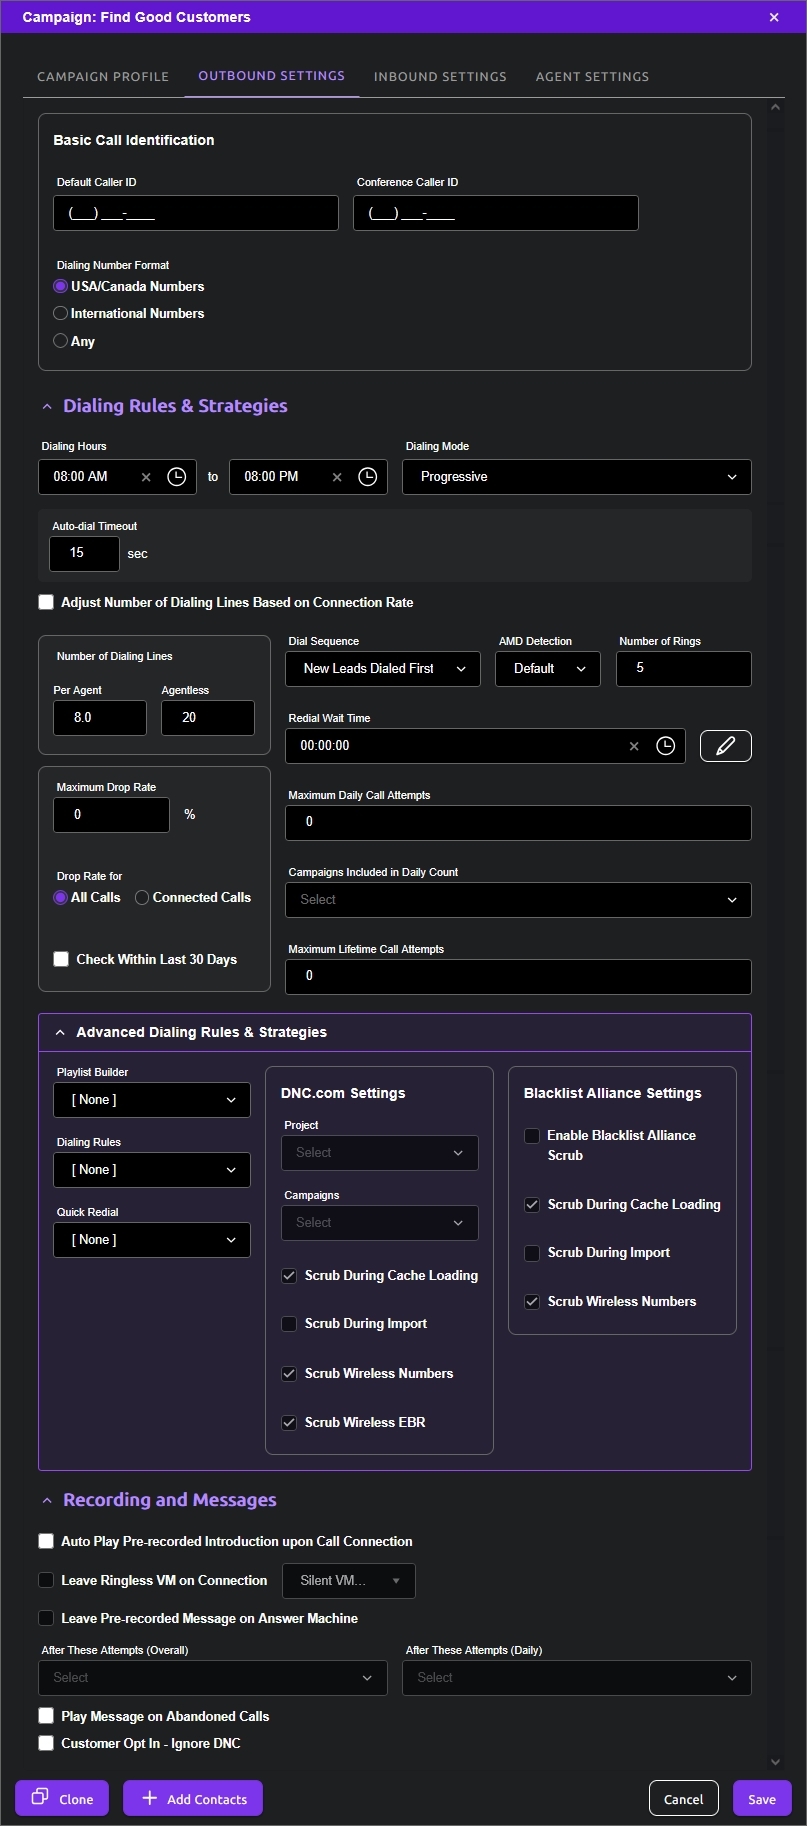
The following settings are included:
| Default Caller ID | The number to be displayed as Caller ID to called parties within this Campaign as default |
|---|---|
| Conference Caller ID | The number to be displayed as Caller ID to called parties of a conference call within this Campaign as default |
| USA/Canada Numbers | Only NANP numbers are expected |
| International Numbers | Only international numbers are expected |
| Any | Any number format may be used |
| Dialing Hours | Start-time and End-time for the campaign’s dialing activity; time zone is based on the Contact phone number |
| Dialing Mode | Pull-down menu to indicate what method to use to initiate outbound calls: Predictive, Preview, Progressive, Available |
| Auto-dial Timeout | Indicates how long (in seconds) to wait before automatically dialing out for the Progressive Dialing Mode (previously Delay Before Out-Dial) |
| Adjust Number of Dialing Lines Based on Connection Rate | Checkbox to enable the system to adjust (increase) the Number of Dialing Lines when the connection rate (calls answered) is low (one symptom is increased agent idle time) |
| Number of Dialing Lines | The number of lines that the system will attempt to use for dialing (constrained by agreement with DialedIn); it is either per agent (i.e. a rate), or overall for agentless call (see following sub-items), mutually exclusive |
| Per Agent | Rate of dialing lines per agent. Every time the Maximum Drop Rate is exceeded (see further ahead), the system will temporarily reduce the Number of Dialing Lines Per Agent from the one configured to 1, until the drop rate decreases to under the Maximum Drop Rate configured. |
| Agentless | Number of agentless dialing lines (Virtual Outbound) |
| Maximum Drop Rate | Maximum allowed value for Drop Rate, or Abandon Rate, which is the number of calls that hang-up before connecting to an agent; calculation: Dropped Calls / Total Calls. Every time the Maximum Drop Rate is exceeded, the system will temporarily reduce the Number of Dialing Lines (Per Agent) from the one configured to 1, until the drop rate decreases to under the Maximum Drop Rate configured. |
| All Calls | True Drop Rate, i.e. Dropped Calls / Total Calls |
| Connected Calls | Instead of actual Drop Rate, it uses the Dropped-to-Connected ratio, i.e. Dropped Calls / Connected Calls (to and agent) |
| Check Within Last 30 Days | Whether to calculate the Maximum Drop Rate within the current day (unselected) or considering calls within the last 30-days |
| Dial Sequence | Pull-down menu to indicate in which order are Contacts called (outbound calls): List Order (chronological, oldest first and in the order they were imported), Random Order (with weight on least number of dial attempts), Last Name (A to Z), New Leads Dialed First (chronological, most recent first), Best Practice Mode |
| AMD Detection | Pull-down menu to indicate the level of Answering Machine Detection (AMD) accuracy desired: Accurate, Default, None. This helps determine at what point to either leave a message or disconnect (Recording and Messages settings) |
| Number of Rings | Number of telephone rings after which the call is determined to be not answered |
| Redial Wait Time | The time that the system must wait before attempting to call again to this number, or redialing (previously Minimum Time Before Redial); redialing occurs based on configured number of attempts and last call disposition / wrap up code |
| Maximum Daily Call Attempts | Maximum number of calls attempted, including redials, on a number on any given day (previously Maximum Attempts Per Day) |
| Campaigns Included in Daily Count | Include in the call attempt count, calls from the current Campaign and those Campaigns selected here (previously Associated Campaigns as part of Maximum Attempts Per Day); this applies when the Contact record is duplicated in those Campaigns; notice that if the associated Campaigns have a different maximum, and both include each other in their setting, each will threshold at its own maximum even though they count calls from both |
| Maximum Lifetime Call Attempts | Maximum number of calls attempted, including redials, on a number for the totality of the Contact record life (previously Maximum Dialing Attempts) |
| Playlist Builder | Indicates Filtered Lists that will be used by the Campaign, instead of the full list of Contacts in the Campaign; a filtered list is a set of those Contacts that meet a more focused set of criteria |
| Dialing Rules | Indicates Alternate Phone rules that will be used for reaching a Contact in the Campaign; an Alternate Phone Rule indicates how to go through an alternate progression of telephone numbers in the Contact record when the Contact is set with a configured disposition or wrap up code |
| Quick Redial | Enable Quick Redial by selecting a Quick Redial rule-set from the pull-down menu; a rule-set groups one or more rules, which match attempt numbers with disposition sets (condition) and wait times (delay to redial) |
| DNC.com Settings | Indicates the customer DNC.com account information to be used for DNC scrubbing. This section will be greyed out if the corresponding DNC account hasn’t been previously configured. |
| Project | The customer's DNC.com Project |
| Campaigns | The customer's DNC.com Campaign (do note that this is the DNC.com Campaign, not the one in the DialedIn system) |
| Scrub During Cache Loading | Switch to indicate, when selected, that DNC.com scrubbing should be done by the system during call cache loading, in bulk, rather than individually just before each call; this option allows for a more efficient process |
| Scrub During Import | Switch to indicate, when selected, that DNC.com scrubbing should be done by the system during lead import, in bulk, rather than individually just before each call; this option allows for a more efficient process |
| Scrub Wireless Numbers | Switch to indicate, when selected, that the system should not dial numbers identified as wireless numbers (as indicated by the DNC.com query response) |
| Scrub Wireless ERB Numbers | Switch to indicate, when selected, that the system should not dial numbers identified as EBR wireless numbers (as indicated by the DNC.com query response) |
| Blacklist Alliance Settings | Make use of customer’s Blacklist Alliance account to scrub flagged numbers. This section will be greyed out if the corresponding API KEY hasn’t been previously configured. Blacklist Alliance responses for flagged numbers are logged by DialedIn, which are displayed as part of the Call Details report under the Details column for that particular call record. Following are some examples of what is typically displayed: "DNC database match. Additional information: screamer Litigator.""DNC database match. Additional information: plaintiff-secondary Litigator." "DNC database match. Additional information: Litigator." |
| Enable Blacklist Alliance Scrub | Enable scrubbing numbers through the use of Blacklist Alliance's API. |
| Scrub During Cache Loading | Switch to indicate, when selected, that Blacklist Alliance scrubbing should be done by the system during call cache loading, in bulk, rather than individually just before each call; this option allows for a more efficient process |
| Scrub During Import | Switch to indicate, when selected, that Blacklist Alliance scrubbing should be done by the system during lead import, in bulk, rather than individually just before each call; this option allows for a more efficient process |
| Scrub Wireless Numbers | Switch to indicate, when selected, that the system should not dial numbers identified as wireless numbers (as indicated by the Blacklist Alliance query response) |
| Auto Play Pre-recorded Introduction upon Call Connection | This indicates whether when a customer answers a call, a pre-recorded message is to be played to the customer upon connection. |
| Leave Ringless VM on Connection | This indicates to Leave a Pre-recorded Ringless VM Message on Answer Machine |
| Leave Pre-recorded Message on Answer Machine | This indicates to Leave a Pre-recorded Message on Answer Machine |
| After These Attempts (Overall) | Indicates in which call attempts to the Contact, lifetime, the voice message drop is attempted |
| After These Attempts (Daily) | Indicates in which call attempts to the Contact, on a daily basis, the voice message drop is attempted |
| Play Message on Abandoned Calls | Indicate whether to play a pre-recorded message to customers whose calls are dropped (i.e. not answered by an agent, abandoned); the customer is offered the option for requesting, via DTMF, to be added to an internal DNC list (pre-recorded message file needs to be uploaded prior to enabling this option) |
| Customer Opt In – Ignore DNC | Check-box to allow customers to opt in, to bypass DNC checking for this Campaign; do notice that the normal behavior for the system is to check against DNC list in order to help the customer comply with regulations. |
Following are the Dialing Mode Options:
| Predictive | Optimized dialing that considers average talk time, number of agents waiting, and lines assigned per agent, as well as adheres to the drop ratio configured for the campaign. Predictive dialing algorithms minimize the time that agents spend waiting between conversations, while minimizing the occurrence of a lead answering when no agent is available. |
|---|---|
| Preview | Preview dialing allows agents to review lead information before the system dials out; the agent can decide to carry out the call or move on to the next lead, potentially lowering rates of call abandonment. So, in essence it’s an assisted manual call. |
| Progressive | Progressive dialing also allows for lead reviewing (same way as Preview mode), but automatically dials out after a configurable time has elapsed (see Auto-dial Timeout). |
| Available | Waits for agent to be in waiting state before it dials out the lines assigned to the agent; may result in somewhat slower dialing speed than Predictive dialing mode, but potentially a lower drop rate. |
Following are the Dial Sequence Options:
| List Order | Choose leads (Contacts) in chronological order; the oldest Contacts are to be dialed first; when multiple Contacts are exported from a single file, the order in the file determines the relative age of the Contacts |
|---|---|
| Random Order | Choose leads (Contacts) randomly, putting greater weight on Contacts with the least number of dial attempts |
| Last Name | Choose leads (Contacts) in alphabetical order (A to Z), based on LastName; Contacts without a value for LastName are called last |
| New Leads Dialed First | Choose leads (Contacts) based on creation date, with the most recent ones called first; in other words, the newest imported Contacts are dialed first |
| Best Practice Mode | Shuffle all leads (Contacts), both those already in the dialing cache and new ones (zero call attempts); give priority to Contacts with the least number of dial attempts. This ensures a consistent flow of calls, eliminating possible lulls caused by reaching the end of the cache, for an even-paced call distribution. NOTE: when Best Practice Mode is activated within the Dial Priority module (with utilization enabled), the aged leads specifically fetched from that subcampaign are shuffled with the new ones. |
Following are the AMD Detection Options:
| Accurate | Algorithm aims for at least 90% correct AMD detection; slight delay may occur when a customer does answer a call |
|---|---|
| Default | Same as above |
| None | No AMD detection is attempted; call is connected to an Agent if an Answer Machine answers. |
Next are Inbound Settings. Refer to the following picture.
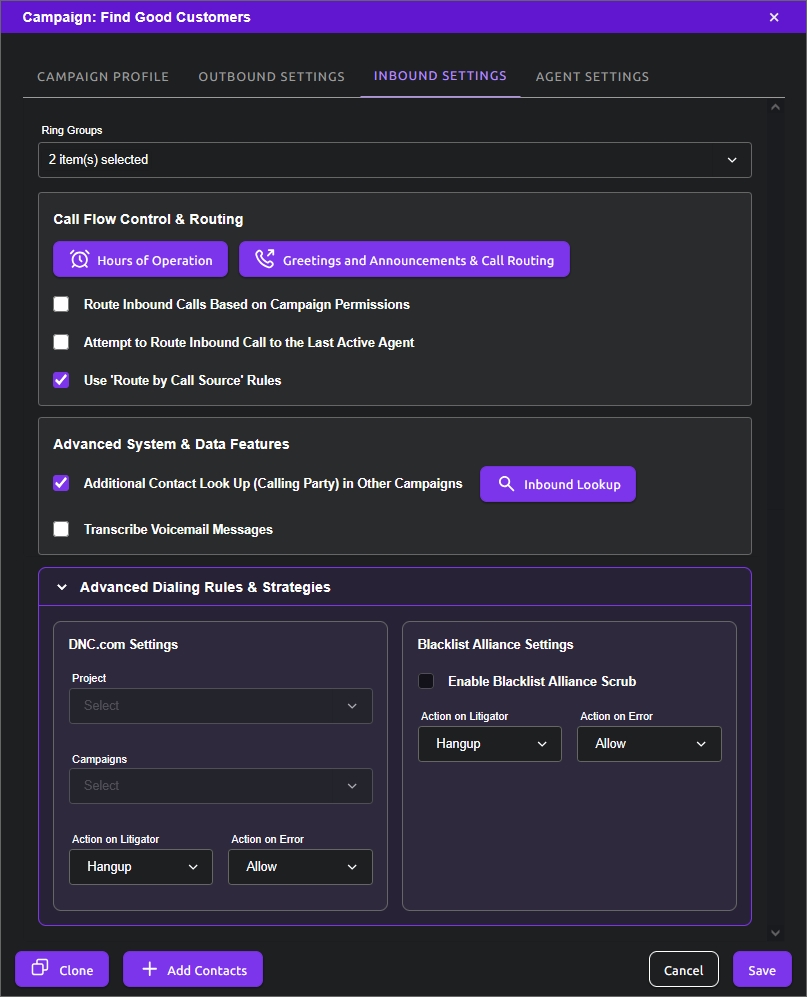
The following settings are included:
| Ring Groups | Pull-down menu (multiple selections allowed) to select groups from the Inbound Call Queues & Ring Groups |
|---|---|
| Hours of Operation | Opens a pop-up window to define hours of operations for the Campaign, which is used for Call and Agent management; the Hours of Operation window includes an option to define Holidays, as well, which opens another pop-up window; refer to pictures that follow |
| Greetings and Announcements & Call Routing | Link to Greetings and Announcements & Call Routing configuration window |
| Route Inbound Calls Based on Campaign Permissions | Enables using the Campaign that holds the Contact record, rather than the Campaign associated with the inbound number (source DID); typically used when sharing one nationwide DID package among multiple Campaigns (previously Use Campaign of Existing Lead as Inbound Hook) |
| Attempt to Route Inbound Call to the Last Active Agent | Enables the system to attempt to assign the inbound call to the Agent that previously handled a call with the Contact associated with the calling number; if that Agent is not signed in or is paused, the call is assigned as per normal rules (previously Try to Send Inbound Call to the Last Active Agent) |
| Use “Route by Call Source” Rules | Enables Route by Call Source for this Campaign; a bypass mechanism of inbound Call Queues in order to handle certain known numbers in a special manner (previously Ignore Route by Call Source with inverse value) |
| Additional Contact Lookup (Calling Party) in Other Campaigns | Enables searching for the Contact record, based on the inbound caller ID, when the Contact is not found within the current Campaign; it then handles the call based on the Campaign where the Contact record is found (previously Look up Record of Inbound Calling Party); the link opens the Inbound Lookup pop up window to select the Campaigns to include in the lookup; refer to pictures that follow |
| Inbound Lookup | Opens a panel to select from available Campaigns |
| Transcribe Voicemail Messages | Enables call transcription of inbound messages Campaign-wide. |
| DNC.com Settings | Indicates the customer DNC.com account information to be used for DNC scrubbing in the context of inbound calls. This section will be greyed out if the corresponding DNC account hasn’t been previously configured. |
| Project | The customer's DNC.com Project |
| Campaigns | The customer's DNC.com Campaign (do note that this is the DNC.com Campaign, not the one in the DialedIn system) |
| Action on Litigator | What to do with the inbound call if DNC.com's response indicates that the number is tagged as a litigator. Options are Allow the call, Hangup, or provide Busy signal. | Action on Error | What to do with the inbound call if DNC.com's response indicates an error. Options are Allow the call, Hangup, or provide Busy signal. |
| Blacklist Alliance Settings | Make use of customer’s Blacklist Alliance account to scrub flagged numbers in the context of inbound calls. This section will be greyed out if the corresponding API KEY hasn’t been previously configured. Blacklist Alliance responses for flagged numbers are logged by DialedIn, which are displayed as part of the Call Details report under the Details column for that particular call record. Following are some examples of what is typically displayed: "DNC database match. Additional information: screamer Litigator.""DNC database match. Additional information: plaintiff-secondary Litigator." "DNC database match. Additional information: Litigator." |
| Enable Blacklist Alliance Scrub | Enable scrubbing numbers through the use of Blacklist Alliance's API. |
| Action on Litigator | What to do with the inbound call if Blacklist Alliance's response indicates that the number is tagged as a litigator. Options are Allow the call, Hangup, or provide Busy signal. | Action on Error | What to do with the inbound call if Blacklist Alliance's response indicates an error. Options are Allow the call, Hangup, or provide Busy signal. |
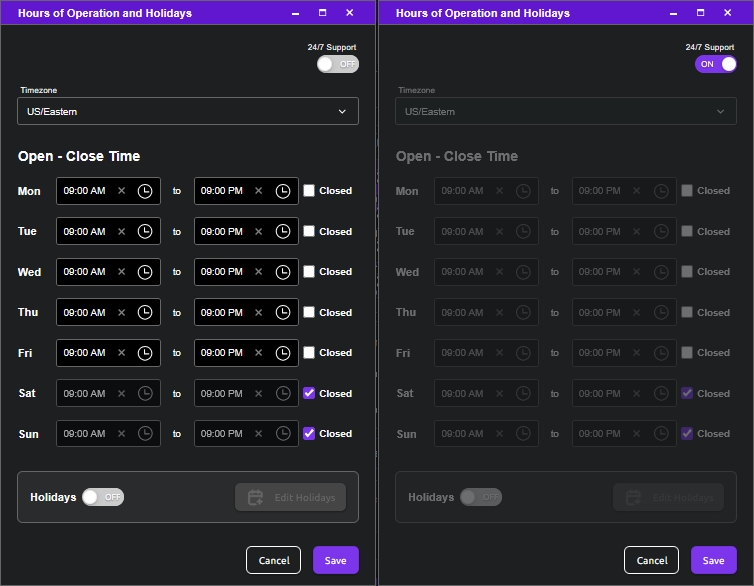
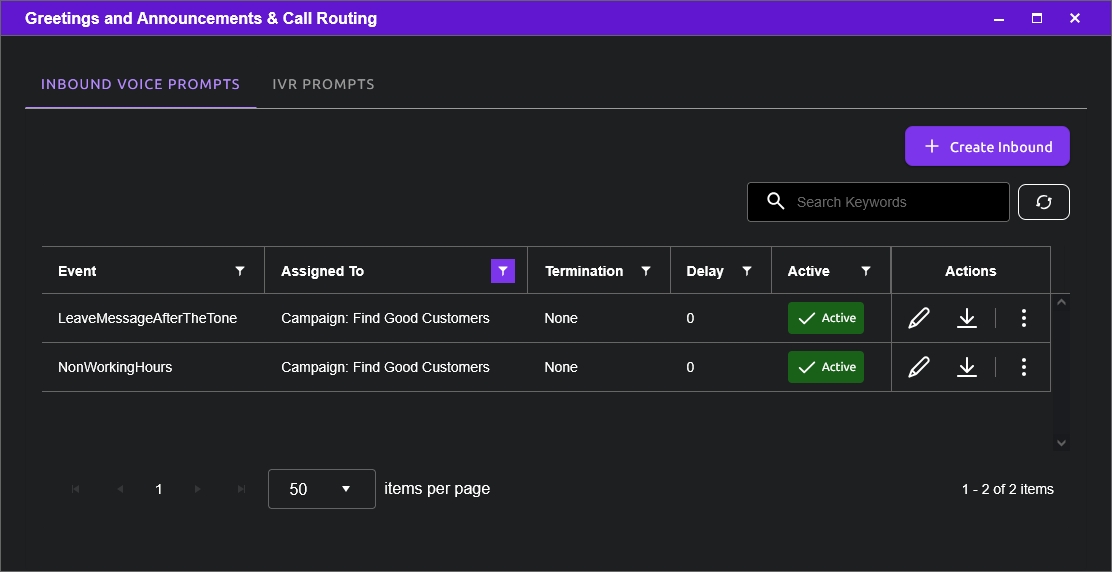
Next are Agent Settings. Refer to the following picture.
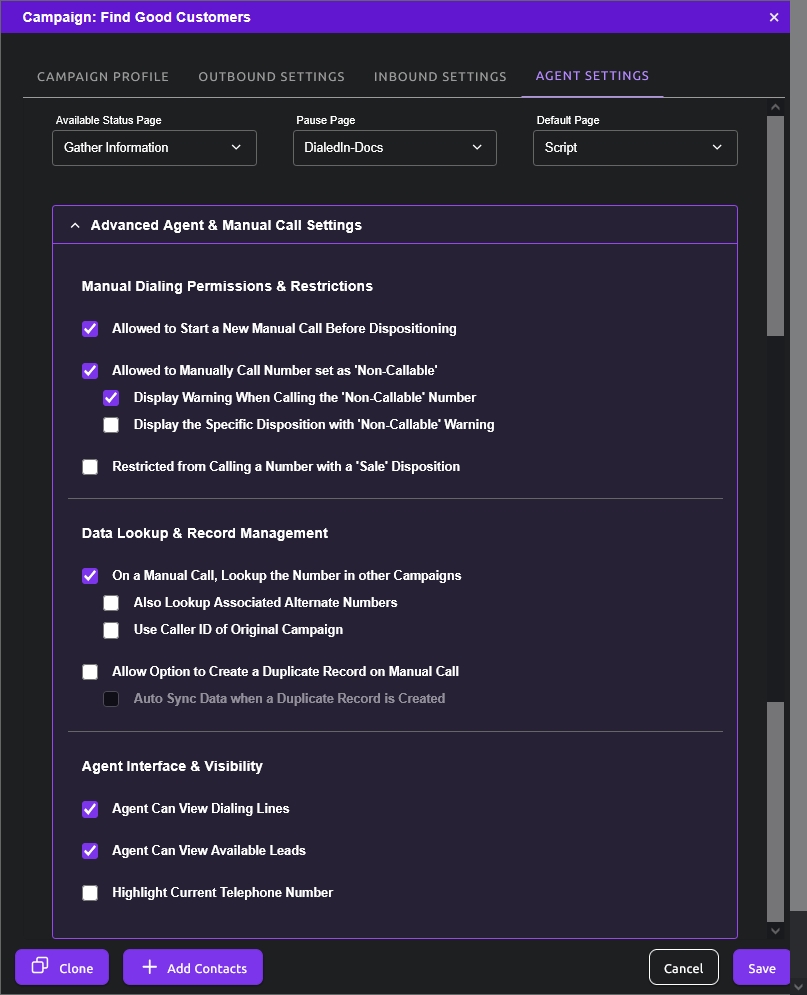
The following settings are included:
| Available Status Page | The Script (e.g. custom HTML page) that is to be displayed when the agent is in available or waiting state (instead of the default one) |
|---|---|
| Pause Page | The Script (e.g. custom HTML page) that is to be displayed when the agent is in pause state (instead of the default one) |
| Default Page | The screen (page/tab) that is to be in focus when an agent gets connected to a call; either Default, Call Info or Script (previously Default Screen) |
| Allowed to Start a New Manual Call Before Dispositioning | Allows Agents to initiate a manual call to another lead without having to first set the disposition for the immediately preceding call that the Agents was connected to; it is not a recommended option for normal operations since it goes against typical outbound call management, but it's provided for flexibility (previously Allow Agent to Make New Manual Call Before Dispositioning of Prior Record) |
| Allowed to Manually Call Number set as ‘Non-Callable’ | Allows Agents to manually dial out numbers with Non-Callable dispositions (e.g. DNC, Sale, Disconnected Number, Wrong Number, Not Interested); this is also an option not recommended for normal operations since it goes against typical outbound call management, but it’s provided for flexibility (previously Allow Agents to Manually Dial Non-Callable Record (with warning)) |
| Display Warning When Calling the ‘Non-Callable’ Number | Option for Allowed to Manually Call Number set as ‘Non-Callable’; indicates to not display a warning when the Agent attempts to dial a Non-Callable record (previously Hide Warning Window When Calling Non-Callable Leads with inverse value) |
| Display the Specific Disposition with ‘Non-Callable’ Warning | Option for Allowed to Manually Call Number set as ‘Non-Callable’; indicates to also include the reason (disposition) when a warning is displayed when the Agent attempts to dial a Non-Callable record (previously Show Non-Callable Disposition In Warning Window) |
| Restricted from Calling a Number with a ‘Sale’ Disposition | Restricts Agents from calling Contacts with Sale dispositions, even if the disposition is Callable; typically used when multiple Campaigns are used for different stages of sales and follow up processes, or to avoid unnecessary calls (previously Restrict Agents from Dialing Records with Disposition of Sale) |
| On a Manual Call, Lookup the Number in other Campaigns | For a manual call, if a corresponding Contact record doesn't exist in the current Campaign, the system is instructed to search system-wide for a matching Contact record, instead of just creating a new record in the current Campaign; if the Contact is found, the call is handled with the associated Campaign (previously Search Database for Record When Making Manual Call) |
| Also Lookup Associated Alternate Numbers | Option for On a Manual Call, Lookup the Number in other Campaigns; it instructs to also look at Alternate phone numbers of the Contact records when trying to find a match for the manual call number (previously Search Database for Alternative Number When Making Manual Call) |
| Use Caller ID of Original Campaign | Option for On a Manual Call, Lookup the Number in other Campaigns; it instructs to, in addition, use the Caller ID configured for the Campaign where the Contact record was found |
| Allow Option to Create a Duplicate Record on Manual Call | Presents to the Agent the option to generate a new (duplicate) Contact record in the current Campaign, for a manual call, when the Contact was found in another Campaign (the original one); allows for the Contact record in the original Campaign to be left unmodified (previously Allow for the Creation of Duplicate Record on Manual Call) |
| Auto Sync Data when a Duplicate Record is Created | Option for Allow Option to Create a Duplicate Record on Manual Call; instructs to, in addition, copy data from the original Contact record in the original Campaign to the new (duplicate) Contact record in the current Campaign (previously Copy Recent Lead Data for Duplicated Record) |
| Agent Can View Dialing Lines | Allows the Agent to see the list of telephone lines / current calls of the Campaign; useful for the Agent to watch the number of the calls that are being made while waiting on a call (previously Allow Agents to See Dialing Lines) |
| Agent Can View Available Leads | Allows the Agent to see the percentage of Contacts in the Campaign that are still left to be called (previously Allow Agents to See Available Leads) |
| Highlight Current Telephone Number | Instructs the system to highlight in the Management Console Dashboard the phone number that is “active”, i.e. call connected with the Agent (previously Highlight Active Phone Number). |
A sub-campaign is an optional component that helps define a smaller list of contacts within a campaign to allow for more granular actions on outbound calls. Some examples are to only call contacts in one or more sub-campaigns, prioritize groups of contacts (leads) on a per-sub-campaign basis, etc.
We can see sub-campaigns while still in the Create & Manage area of Campaigns; just expand a campaign. If there are any Sub-campaigns, an indication will be listed below the Campaign; select Sub-campaign. A new sub-panel will open on the right side, showing the Outbound Settings that can be modified for the Sub-campaign or group of Sub-campaigns (refer to Campaign Settings for their explanation). Refer to the following picture.
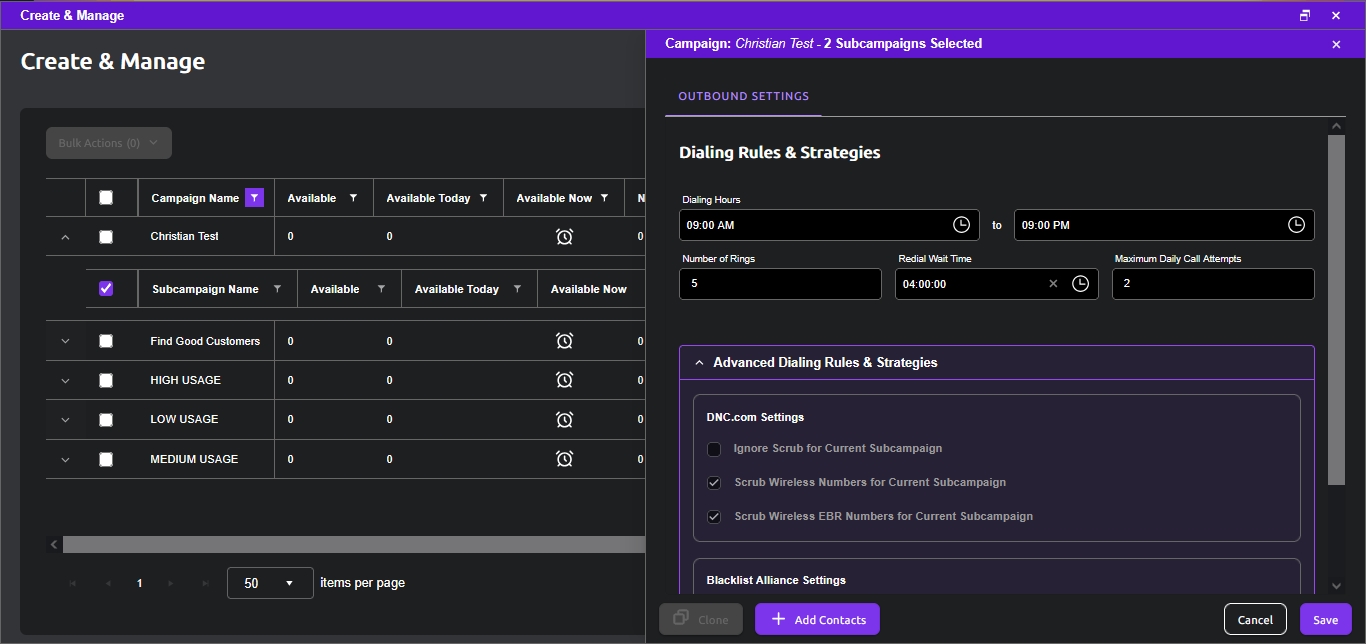
Do note that you cannot add Sub-campaigns here, since Sub-campaigns are created on actual records (in other words, there cannot be empty Sub-campaigns). In order to add Sub-campaigns, therefore, we retrieve Campaign records, select one or more of those records, and assign them to a Sub-campaign; new Sub-campaigns are created on-the-fly, when needed, from that point.
This is performed through Call Records (Views); the first thing needed is to select the Campaign where we want records assigned to a Sub-Campaign. Pull-down the top-left menu and select a Campaign; then click on Search. Refer to the following pictures. You can also use additional features or go to Advanced Search; refer to the Call Records (View) chapter for a complete description.
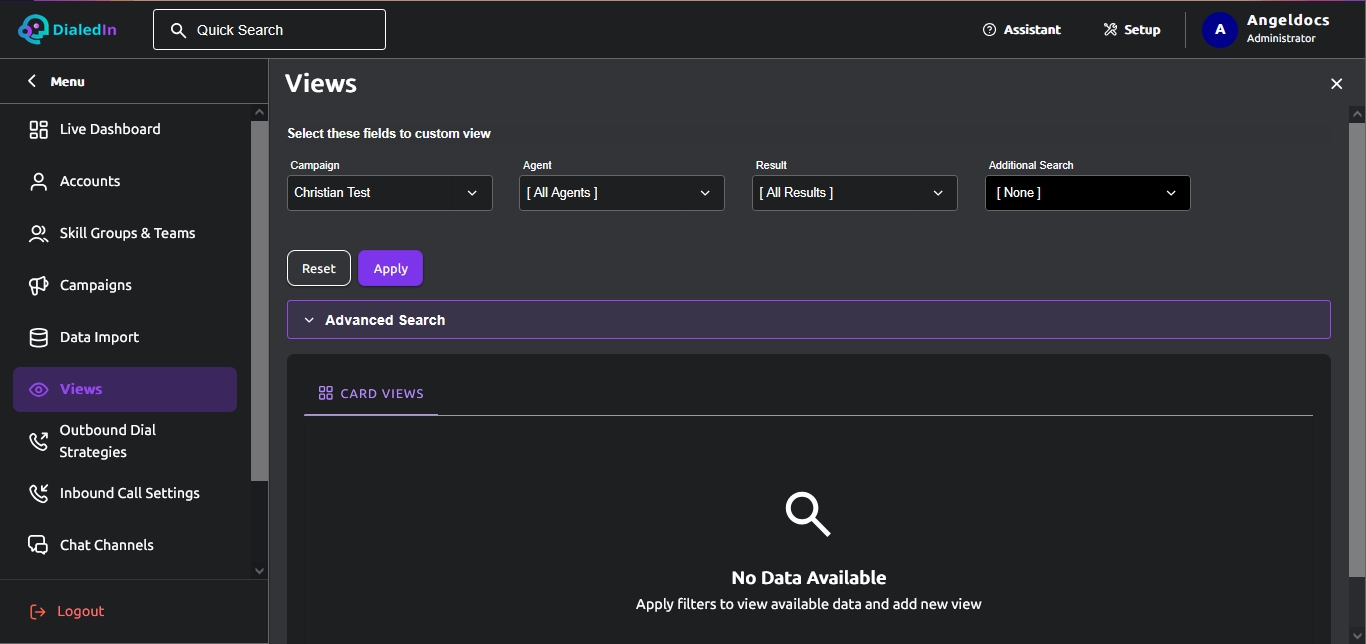
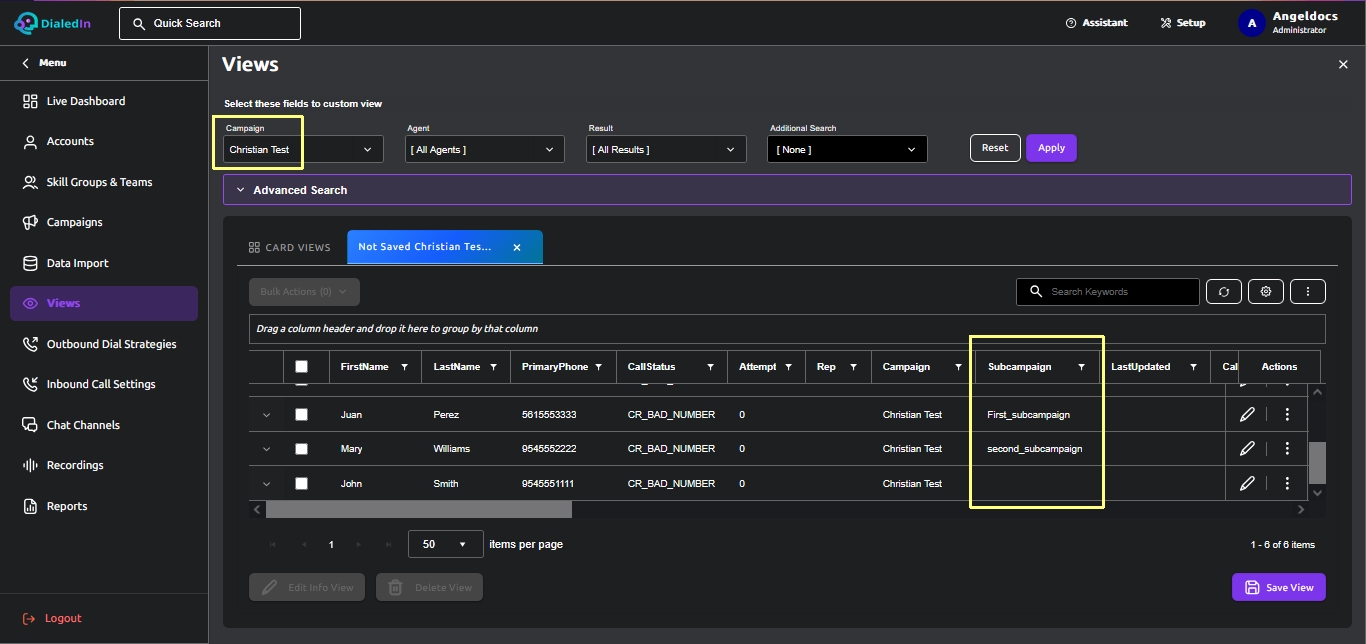
At this point, the list of records for the searched Campaign will be shown; now select a record to add to or modify current sub-campaign, and click on the Edit button.
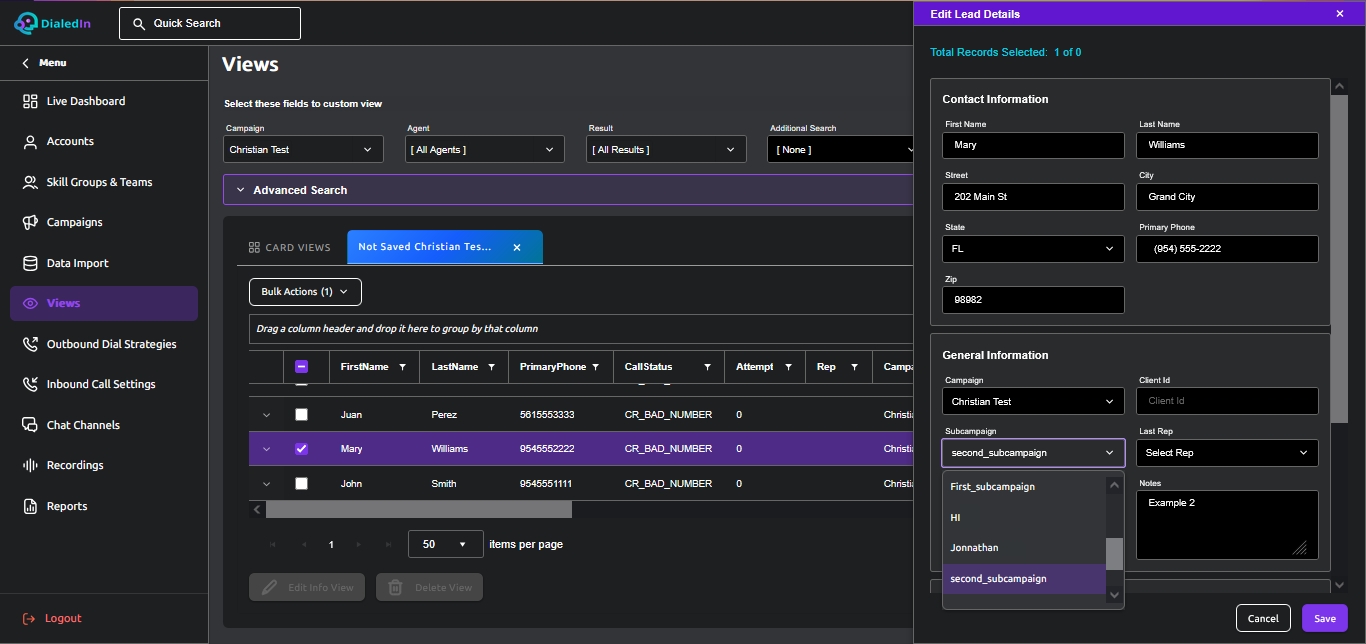
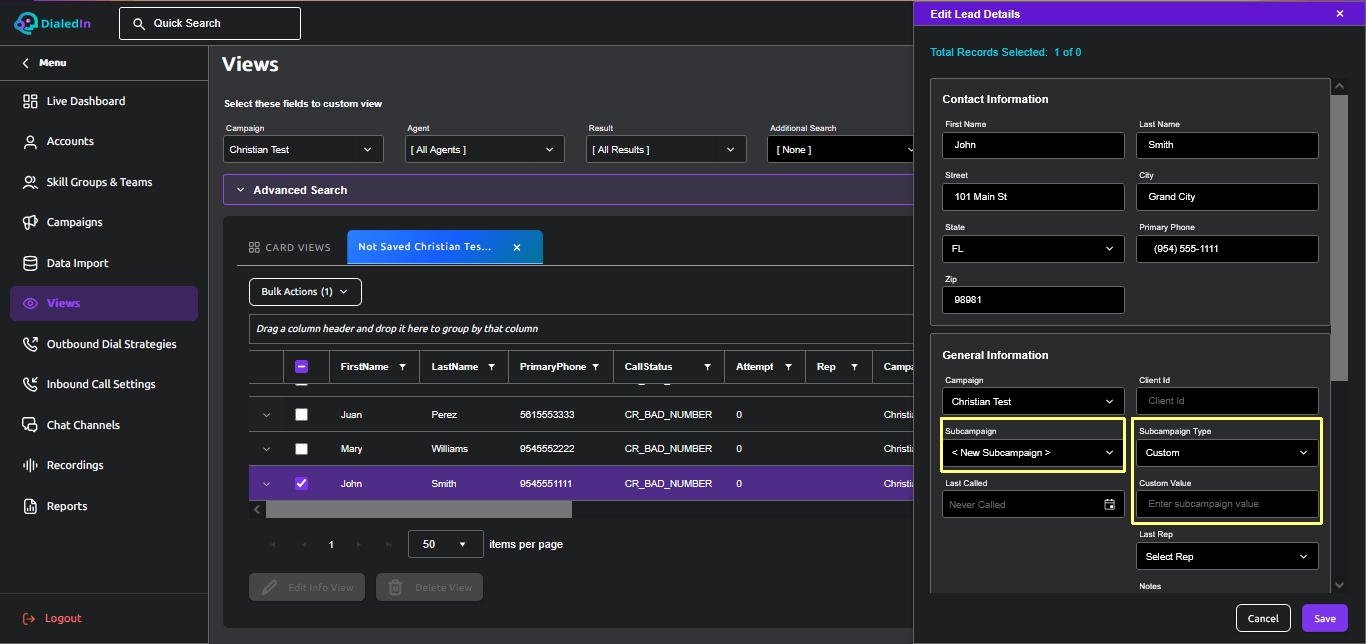
A new window panel opens up; go to the Sub-campaign drop-down menu and select an existing sub-campaign to add it to, or ‹ New Subcampaign ›. If you're adding a new one, select Custom and enter the name for the new Sub-campaign and Save it. Refer to the following pictures.
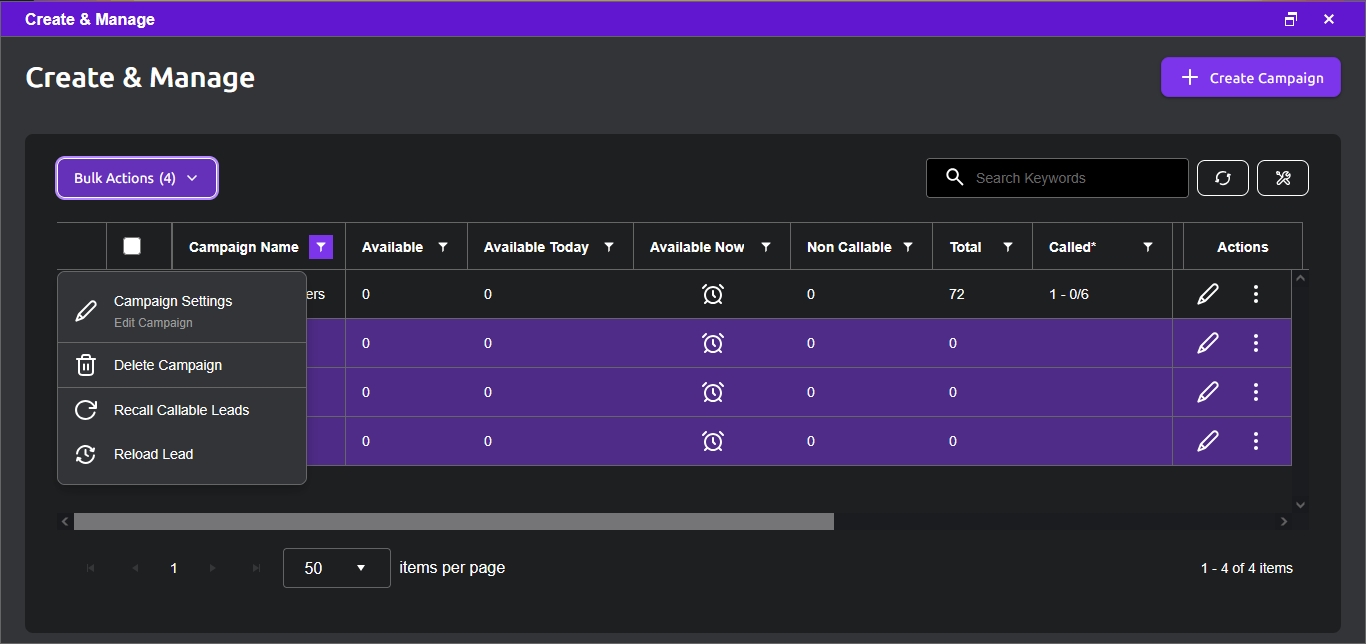
There are a few other things that can be done within the Campaigns area; one is Bulk Actions on campaigns that you have selected in the list, as follows:
| Campaign Settings | Show Campaign Settings (refer to the beginning of this section) for the Campaign that has been selected |
|---|---|
| Delete Campaign | Allows completely removing a Campaign; the system will ask to confirm before proceeding |
| Recall Callable Leads | Sets the system to call again Contacts that are callable, by appropriately resetting the corresponding counters against Minimum Time Before Redial and Maximum Attempts Per Day |
| Reload Leads | Cleans out the dialing system cache to allow for reloading leads (Contacts) based on fresh settings; it’s not an action that is required, but rather a utility that may be used when it’s thought that some undesired items are kept behind in the dialing cache. |
Refer to the following picture.
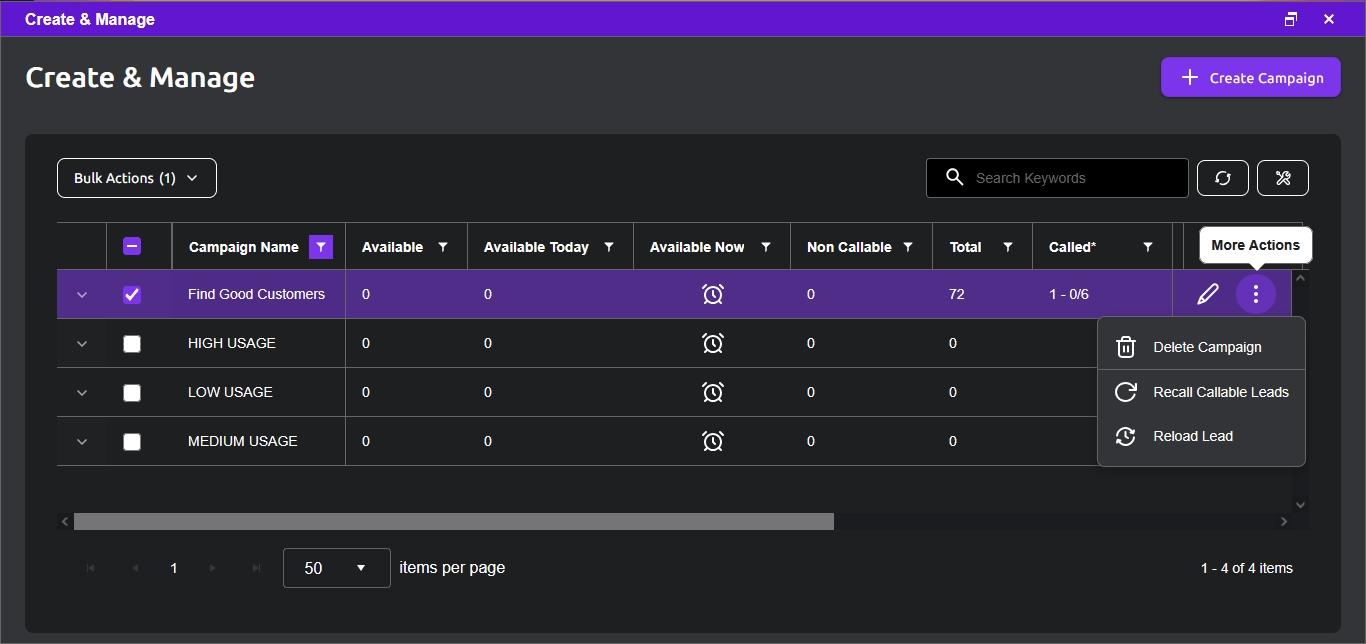
On an individual campaign basis, there's a More Actions menu, as follows:
| Delete Campaign | Allows completely removing a Campaign; the system will ask to confirm before proceeding |
|---|---|
| Recall Callable Leads | Sets the system to call again Contacts that are callable, by appropriately resetting the corresponding counters against Minimum Time Before Redial and Maximum Attempts Per Day |
| Reload Leads | Cleans out the dialing system cache to allow for reloading leads (Contacts) based on fresh settings; it’s not an action that is required, but rather a utility that may be used when it’s thought that some undesired items are kept behind in the dialing cache. |
Refer to the following picture.
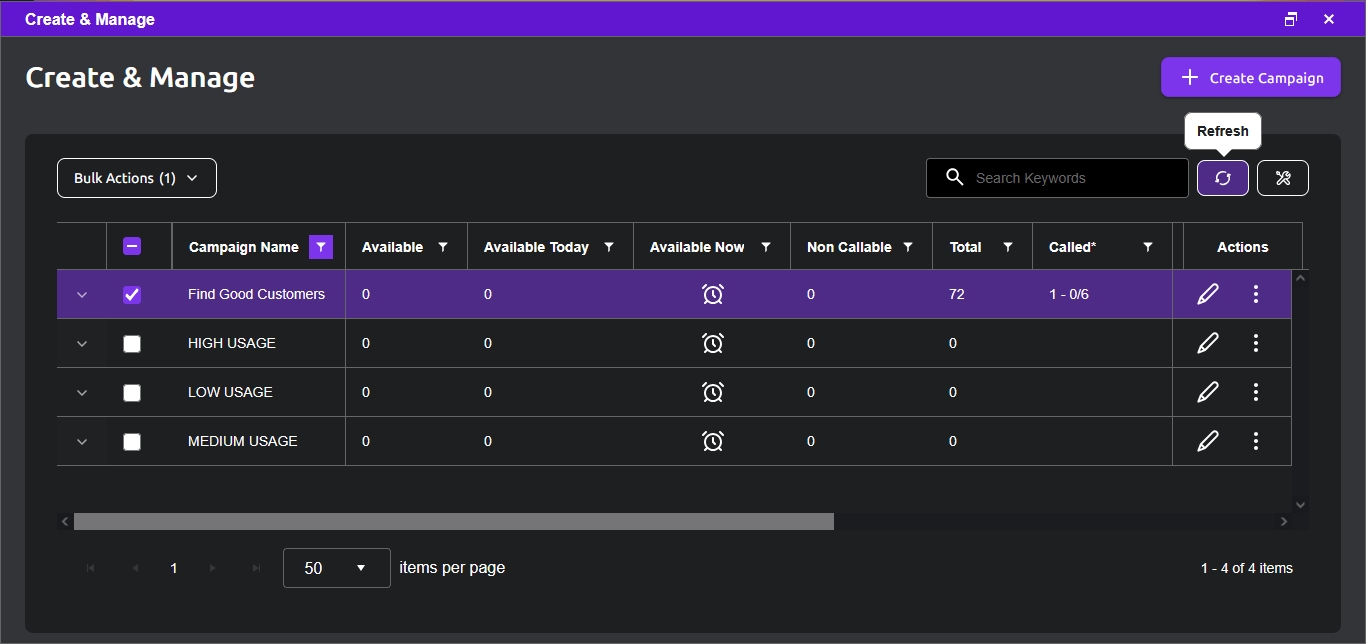
There is also a Refresh button for the campaign list. Refer to the following picture.
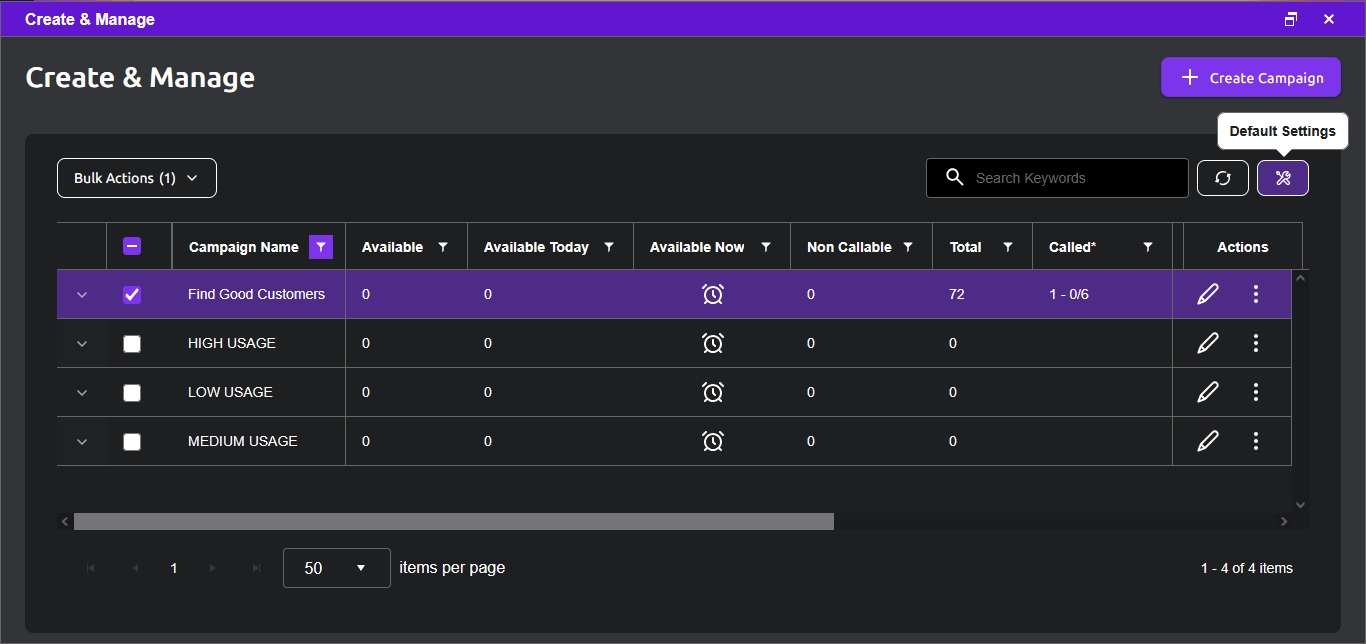
And a button to access the Default Settings (refer to the corresponding section) straight from Campaigns. Refer to the following picture.
The purpose of Outbound Call Management is to reach contacts in a planned, methodical, efficient, effective, and accountable manner. The ChaseData CCaaS system aids with this goal and automates the related tasks. By allowing management to define rules within DialedIn CCaaS system, decision making is centralized and automatized; management can limit or allow as much decision-making capability to their agents, based on their skills.
DialedIn CCaaS provides several dialing mode options in order to meet all of the outbound calling requirements of the call center operations. Each dialing mode can be assigned to any Campaign. Some dialing modes leverage efficient, high volume connection rates for the call center; others are better suited for customer call backs that require detailed review of customer notes and records.
Outbound Call Management is driven by Campaigns, where the outbound dialing behavior is defined; that is because outgoing calls are generated with a purpose, and that purpose is built into a Campaign. But there are special treatments or behaviors of Outbound Call Management that we define outside a Campaign (some are referenced in the Campaign); we will present those items in this section.
In general, an agent can only take outbound calls from one Campaign at a time; the agent selects the Campaign when logging in, or when switching Campaigns after login. The Campaigns allowed for an agent are determined by Skill; the Skill can be assigned Active Campaigns.
We will discuss how to use Dialing Priorities with Sub-Campaigns to partition Campaigns as your plans progress. We will discuss how to filter contacts, or leads, using Playlists. We will discuss how to create special Dial Lists for specific agents. And we will also discuss how to define special Dialing Rules to configure the system to progress through a list of the contact’s telephone numbers.
But before we get to that, let’s review how outbound dialing is handled without considering any special condition; refer to the following diagrams.
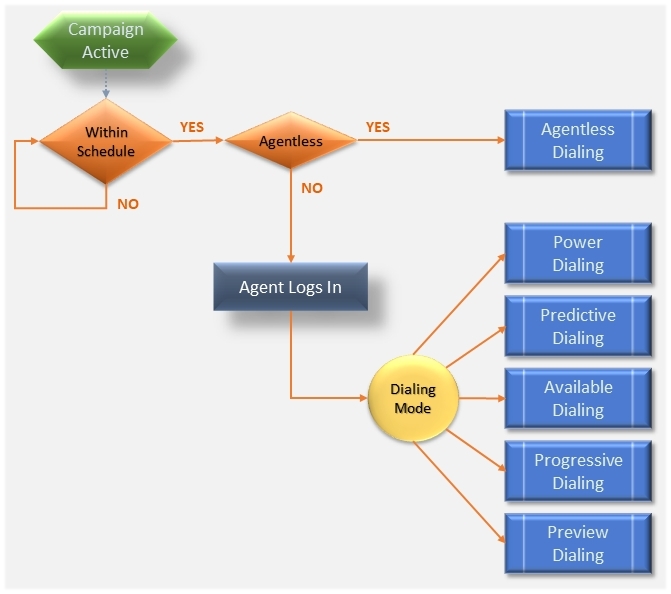
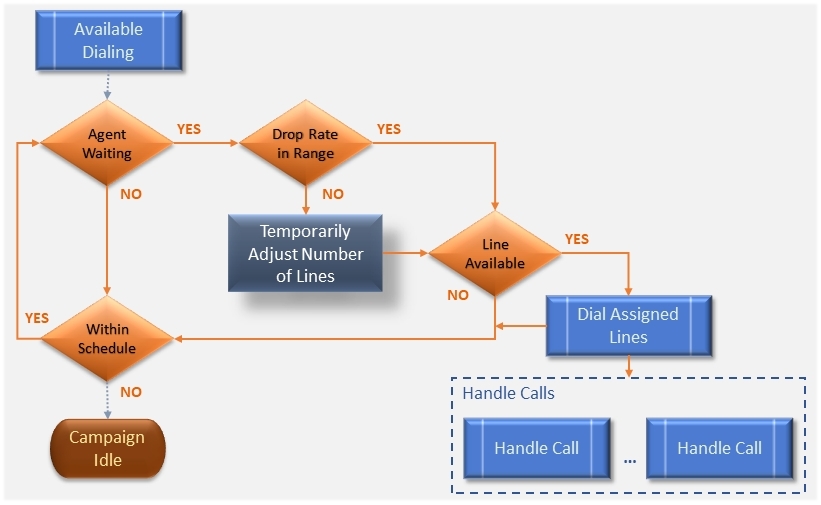
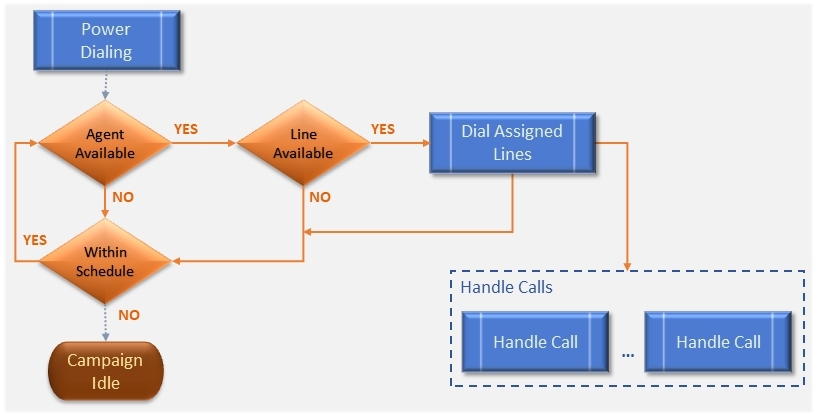
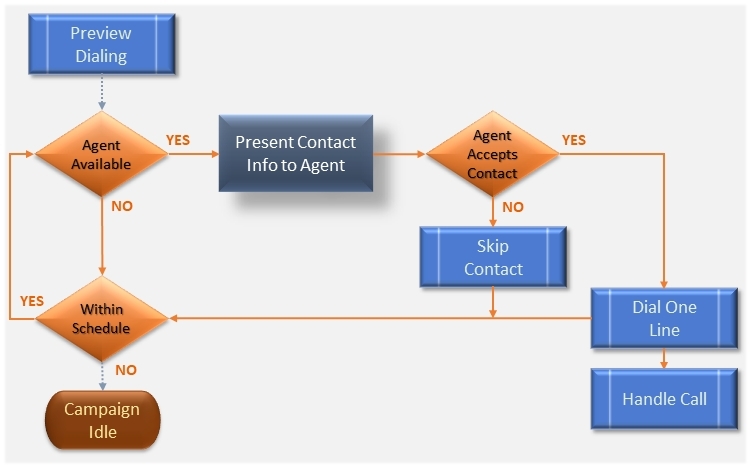
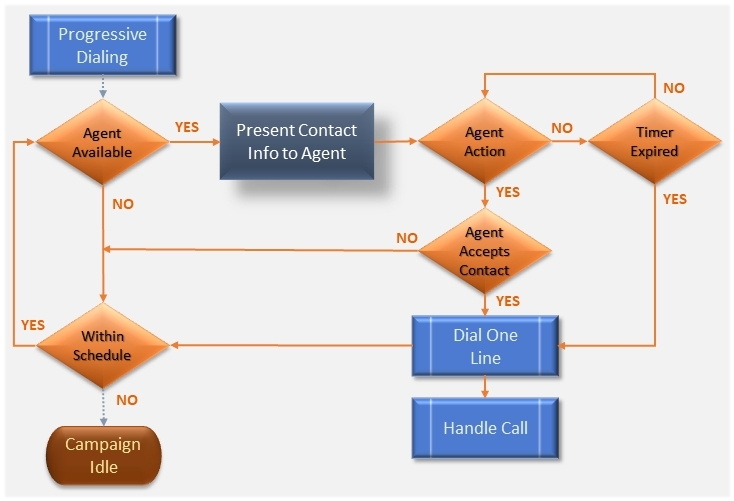
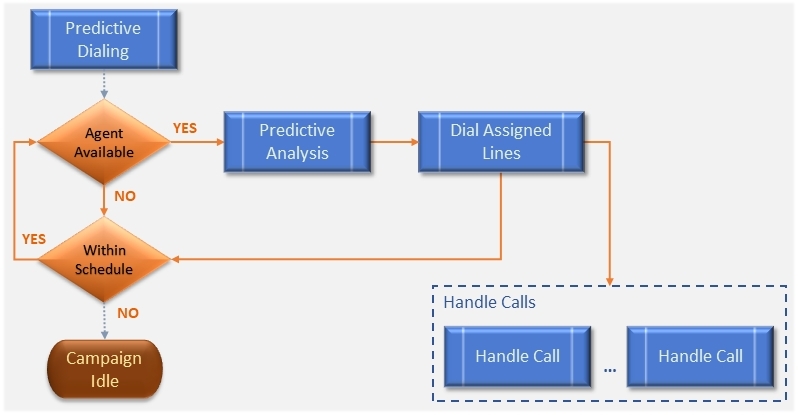
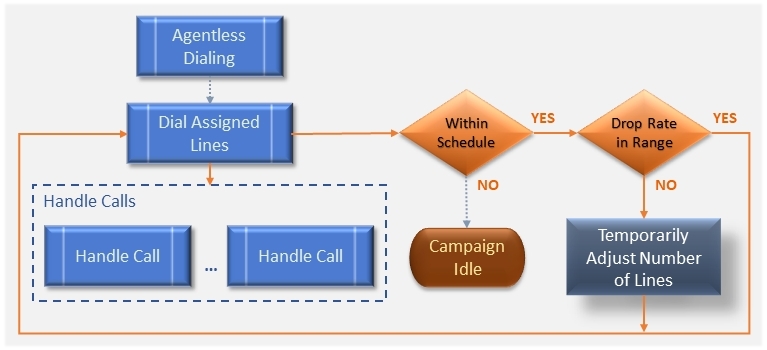
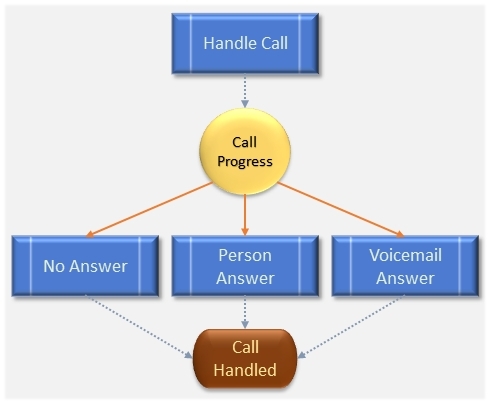
Let’s now look at the special treatments and behaviors that we can apply to Outbound Call Management; we start with Outbound Call Rules and parameters. The typical process is to define these rules and then associate them with Campaigns and/or Agents.
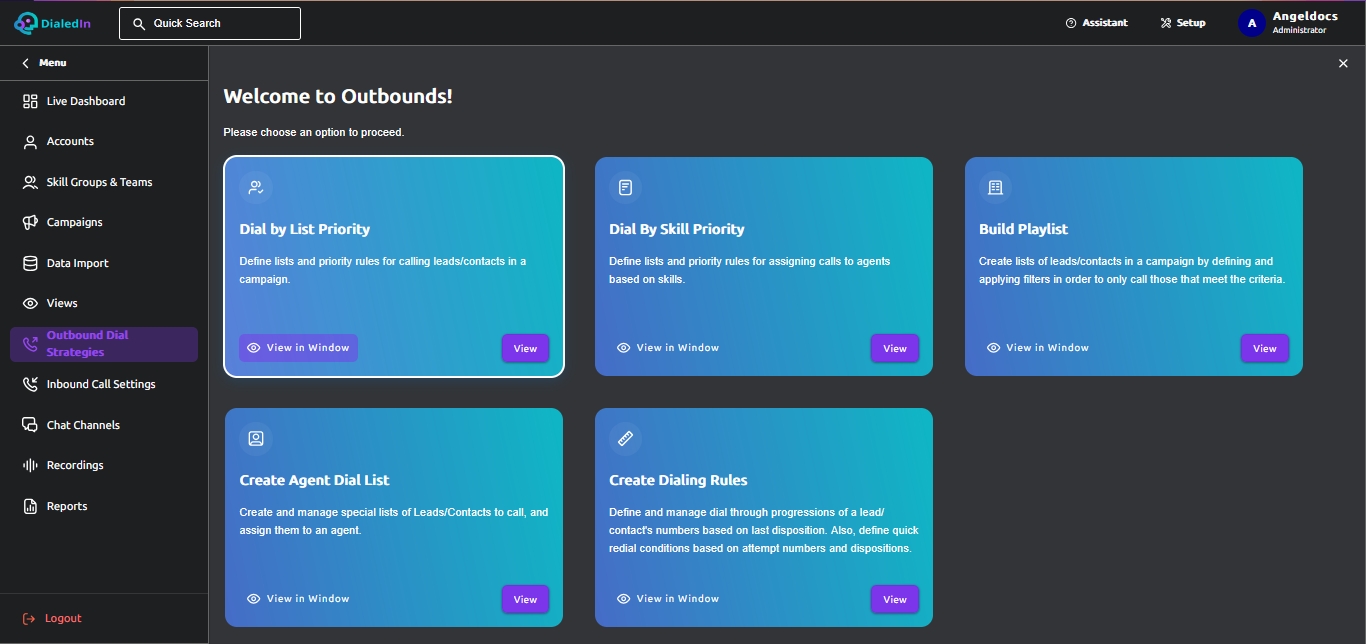
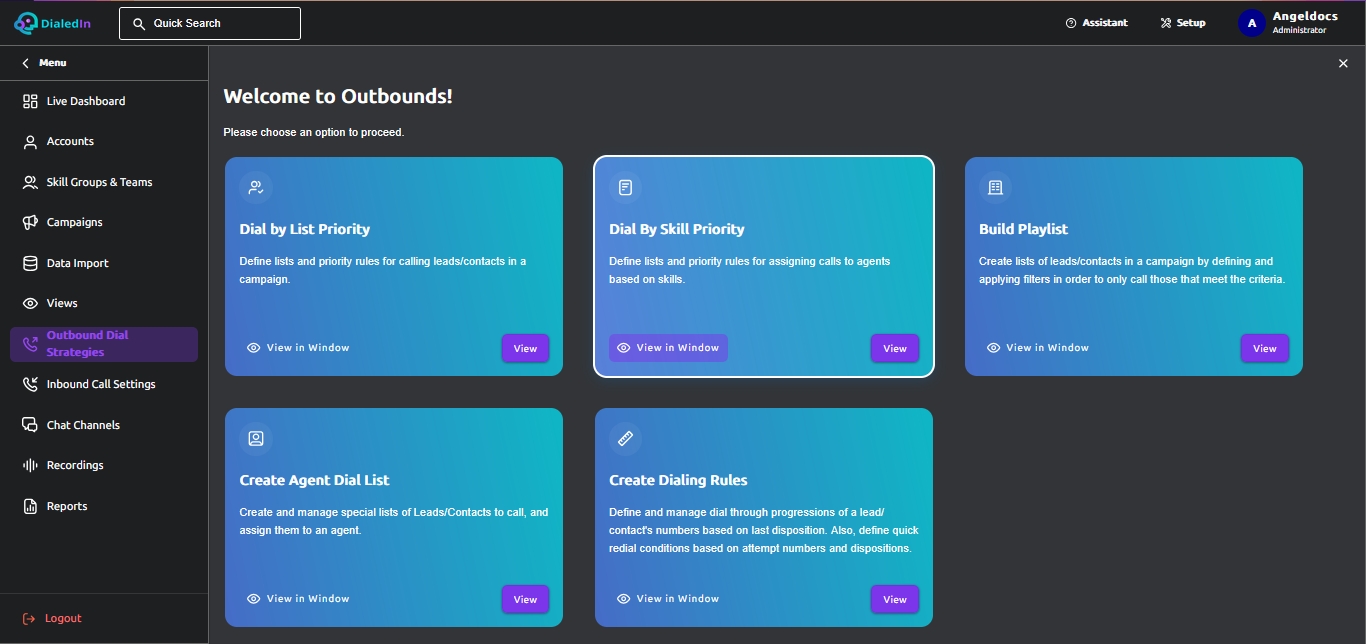
To perform the corresponding configuration tasks go to the main menu area on the left and click on Outbound Dial Strategies. On the right, click View in the selection box for the dial strategies that you want to manage, as per the next sub-sections.
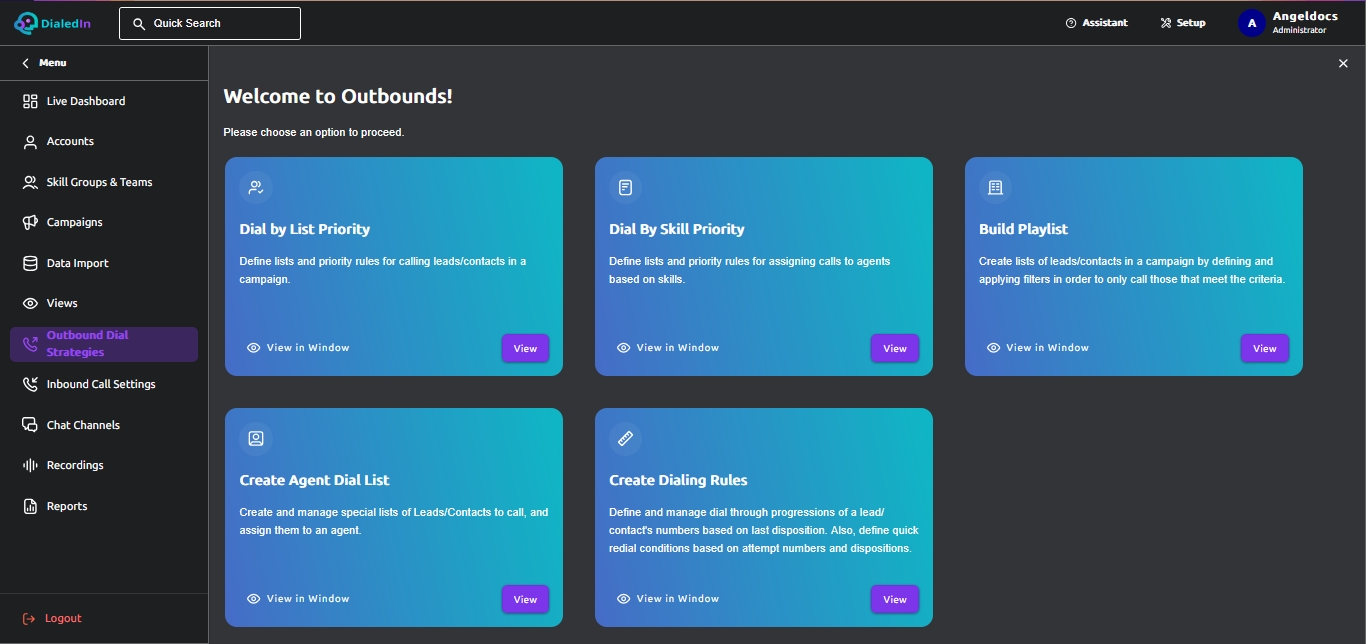
Dial Priority is a mechanism to prioritize calls within a Campaign. It is based on Sub-campaigns; specifically, the active status of the sub-campaigns, the ordering of the active sub-campaigns, and the weight (percentage) of each active sub-campaign. Keep in mind that if a campaign doesn’t have sub-campaigns, or it has sub-campaigns, but none marked active, the system dials in random order from the full set.
Keep in mind that if Dial Priority is defined for a Campaign, all and every call for that Campaign, for every agent handling calls for that Campaign, will be bound by the Dial Priority. If you don’t want these rules to apply anymore, you must remove the corresponding Dial Priority.
To configure dial priorities go to the main menu area on the left and click on Outbound Dial Strategies. On the right, click View in the selection box for Dial by List Priority.
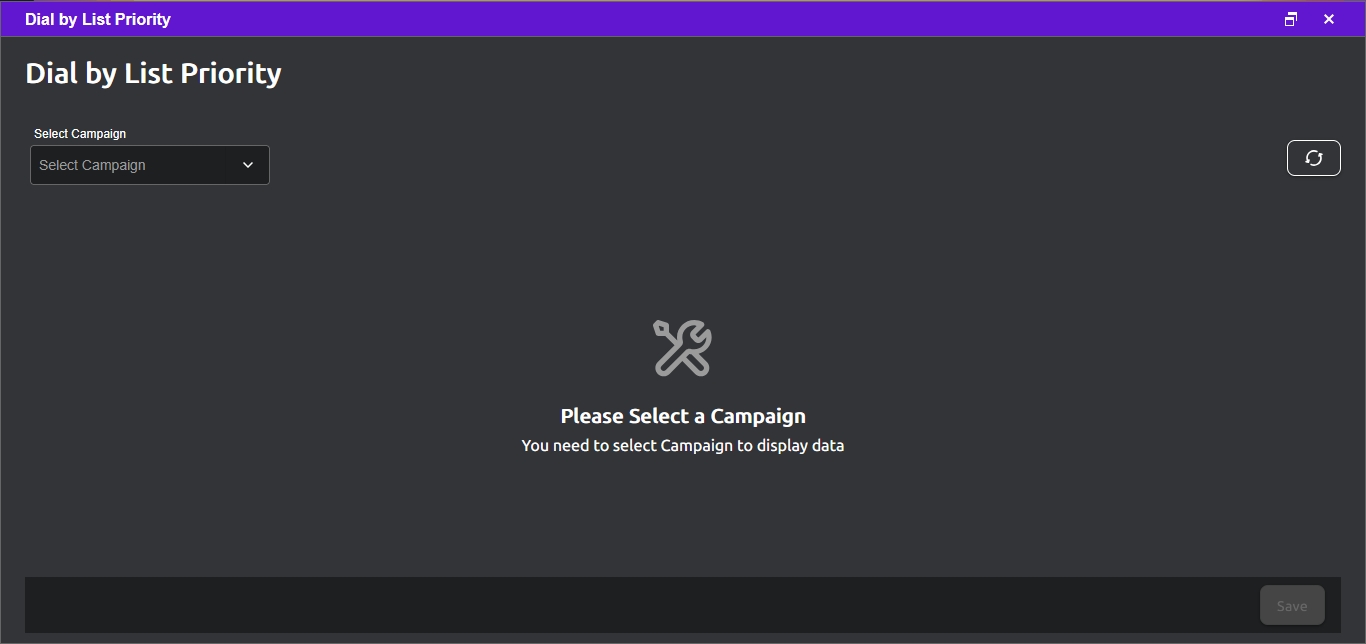
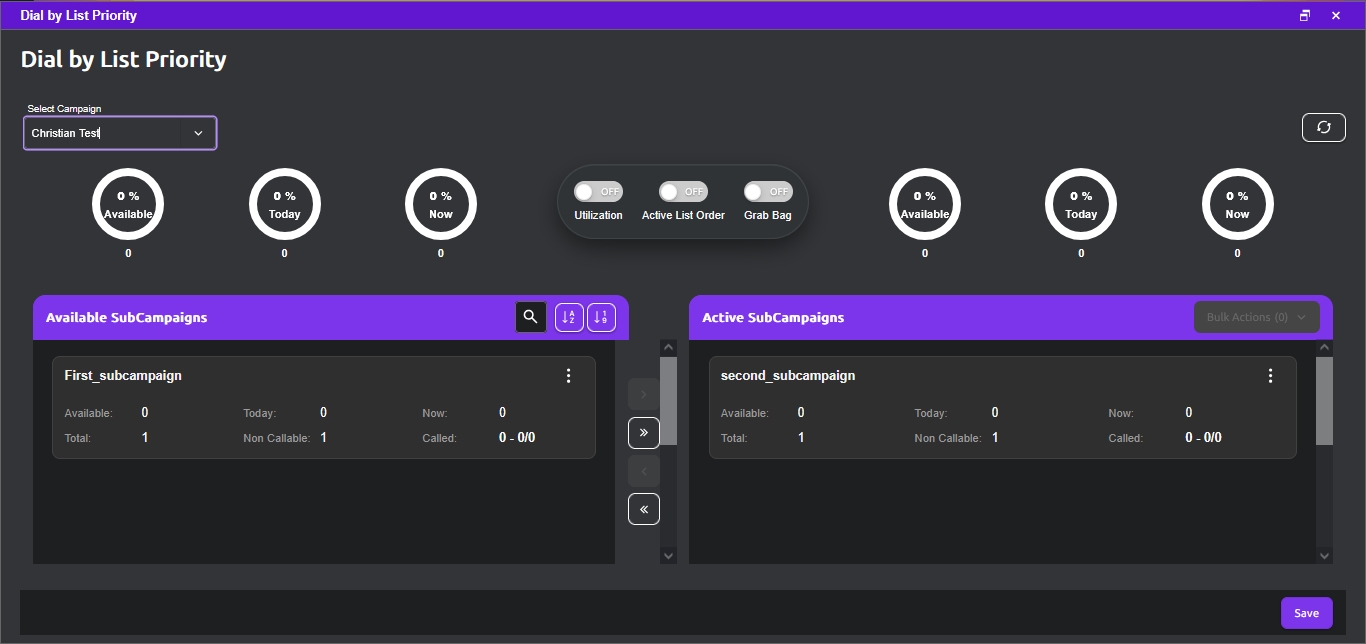
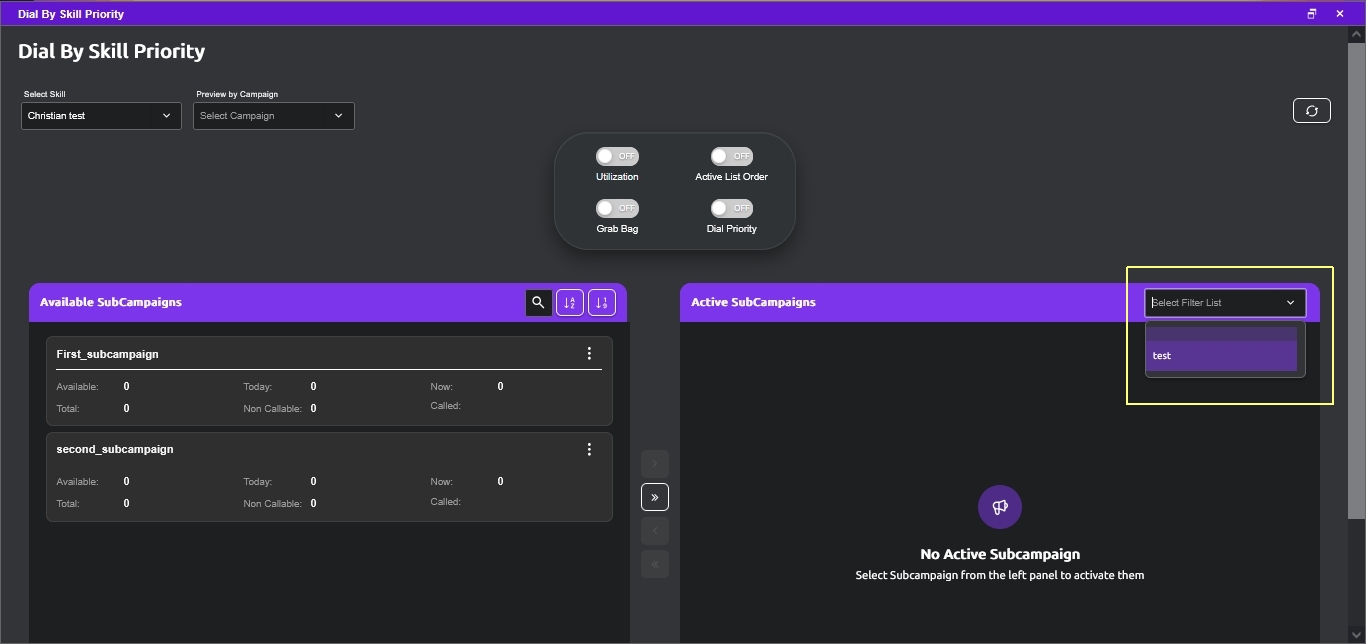
After selecting a campaign, its sub-campaigns appear split into two areas; the right area shows the Sub-campaigns that are selected to be active for this rule, while the left area shows those that have not, but still available for selection. You can click-and-drag sub-campaigns from one side to the other, or click-select (single or multiple) sub-campaigns and use the action item icons between the two panels; click on the icon to perform the corresponding action (Add, Add All, Save, Refresh, Remove All, Remove).
After saving (click on the Save icon), the system will be set to dial in random order from the active sub-campaigns (or the full set if no sub-campaigns or no active sub-campaigns); this assumes that all the switches in the top part of the window panel are in the OFF position (more about that later). Refer to the following picture.
To assign a percentage of records to handle for each active sub-campaign, click on the Utilization switch button in the top area of the window panel. After that switch is set to the ON position, each sub-campaign in the active state is shown with a scroll-menu for you to set the percentage. Refer to the following picture.
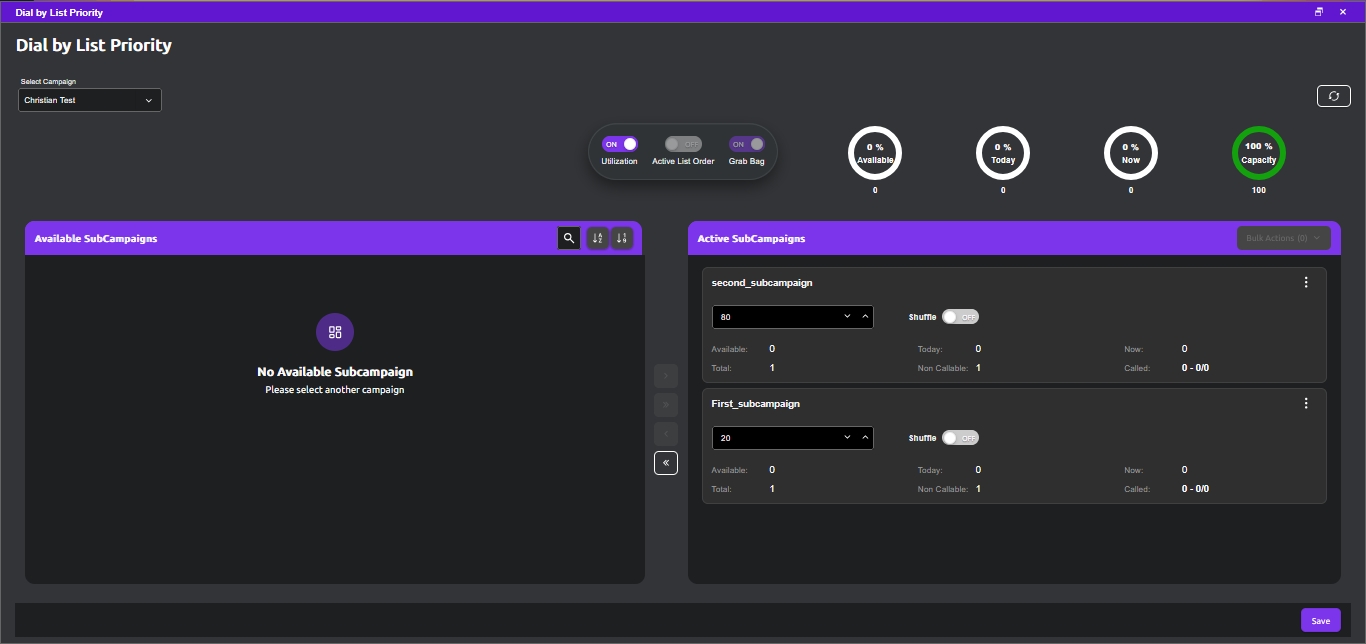
When the Utilization switch is ON, each Active Sub-Campaign is presented with a percentage selector, which should add to 100%. Each allowed combination of the switches (Utilization, Active List Order, and Grab Bag) will produce a unique way of selecting and prioritizing records from the selected (Active) sub-campaigns, as explained in the ”Prioritization Mechanisms for Dial Priority and Skill Priority” sub-section.
Note that the graph with percentages in the area above of the Available and Active sub-campaigns represent totals for all sub-campaigns, for both the Available side and the Active side. For example, if there were two sub-campaigns in the Available side, say S1 and S2, with S1t the total contacts in S1 and S1a the available contacts in S1, and similarly for S2, the graph for Available represents (S1a+S2a) / (S1t+S2t). The other graphs follow a similar logic.
Keep in mind, as well, that there are Campaign Settings, i.e. Dial Sequence, that affect how the system selects the records for each campaign/sub-campaign (e.g. New Leads Dialed First), within the percentages specified, according to the switch setting rules. Refer to Campaign Settings and to Prioritization Mechanisms for Dial Priority and Skill Priority”.
Skill Priority allows performing skills-based dialing by defining outbound dialing priorities for a specific Skill; every agent assigned that Skill will get outbound calls according to the corresponding Skill Priority, bypassing the standard Campaign to which the Agent signs into. It works by defining priorities to a selected list of Sub-Campaigns; these Sub-Campaigns can be from any Campaign.
Keep in mind that if Skill Priority is defined for a Skill, all and every call related to that Skill, for every agent that has that Skill, will be bound by the Skill Priority. If you don’t want these rules to apply anymore, you must remove the corresponding Skill Priority.
Before we go any further, you should be aware that your version of the solution may have an enhancement that allows you to (1) use Skill Priority for inbound calls, as well, and/or (2) define Skill Priority for a full Campaign by just using the priority rules configured in a corresponding Dial Priority rule and/or a filter in a Playlist. We present both cases hereafter.
First, the original solution options.
To configure dial priorities go to the main menu area on the left and click on Outbound Dial Strategies. On the right, click View in the selection box for Dial by Skill Priority.
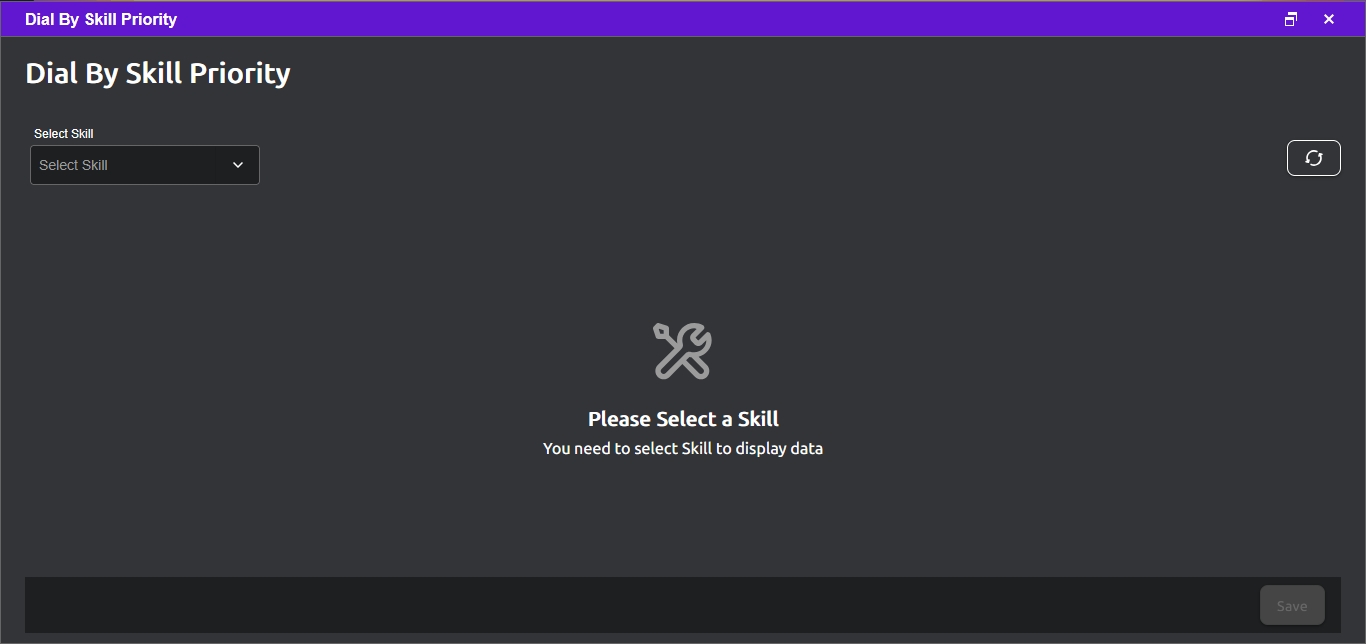
After selecting a skill, sub-campaigns from all campaigns appear split into two areas; the right area shows the Sub-campaigns that are selected to be active for this rule, while the left area shows those that have not, but still available for selection. You can click-and-drag sub-campaigns from one side to the other, or click-select (single or multiple) sub-campaigns and use the action item icons between the two panels; click on the icon to perform the corresponding action (Add, Add All, Save, Refresh, Remove All, Remove).
In essence, Skill Priority is allowing you to combine dialing records that belong to different Campaigns, but through their Sub-Campaigns (those in the Active list); all within a common “dialing cache” and prioritization rule. The Campaign rules applied to each call are those where the original record belongs (the Campaign under which the related Sub-Campaign belongs), irrespective to which Campaign the Agent is logged into.
Now, the enhanced solution options. In the enhanced solution, Skill Priority is expanded to include both outbound and inbound calls.
Let us first start with the end result of defining a Skill Priority rule, including the enhancements:
Applying Skill Priority to inbound calls is an optional and additional step to outbound Skill Priority for the associated Skill. This is enabled on the Skill itself, by turning on an option to apply those Skill Priority rules to inbound calls, as well; in essence, the associated Skill Priority rules defined for outbound calls are also applied to inbound calls if the Skill is enabled.
In summary, the enhanced version of Skill Priority covers the following:
It is important to understand what happens when Agents are no longer available and/or there are no more contacts available in the Skill Priority Sub-Campaign(s).
The following behavior cases should be taken into consideration. First, let’s make these simple assumptions for illustration purposes:
Skill Priority Rule 1 (SPR-1) includes Sub-Campaign AA (SCM-AA) and is activeSCM-AA resides in Campaign A (CM-A)Skill 1 (SK-1) is associated with SPR-1Agent 1 (AG-1) has SK-1 and is logged inAgent 9 (AG-9) has Skill Other (SK-Other), and SK-Other is not associated with any Skill Priority ruleAG-9 is logged into CM-ANo other agents are logged inNo-Agent Case – no more Agents with the associated Skill are logged in anymore:
At one point, AG-1 logs out with the following effect:The dialing cache for SPR-1 is removed, which includes SCM-AA itemsThe items in SCM-AA, however, are still callable through its parent campaign, CM-AAG-9 is logged into CM-A and therefore SCM-AA may be assigned to AG-9 based on the campaigns dialing rules.Empty/Exhausted Sub-Campaign Case – no more callable items in the Skill Priority rule Sub-Campaigns:
For simplicity, assume the only active Sub-Campaigns for SPR-1 is SCM-AAAt one point, SCM-AA does not have any more callable items resulting in the following:Since SK-1 is associated with SPR-1, and AG-1 has SK-1, AG-1 can only get calls associated with SCM-ASince there are no more callable items in SCM-A, AG-1 becomes idle and gets no calls whatsoever.Sub-Campaign active in multiple Skill Priority rules Case – a callable item is a candidate for loading in more than one Skill Priority dialing cache:
A callable item will not be permitted to be in more than one dialing cache at any given time in order to avoid calling it multiple times without meeting required wait timesAfter the callable item is added to a dialing cache, the dialing cache is active, and the item has not yet been dialed, the item is made unavailable for adding it to another dialing cache.Refer to the following pictures.
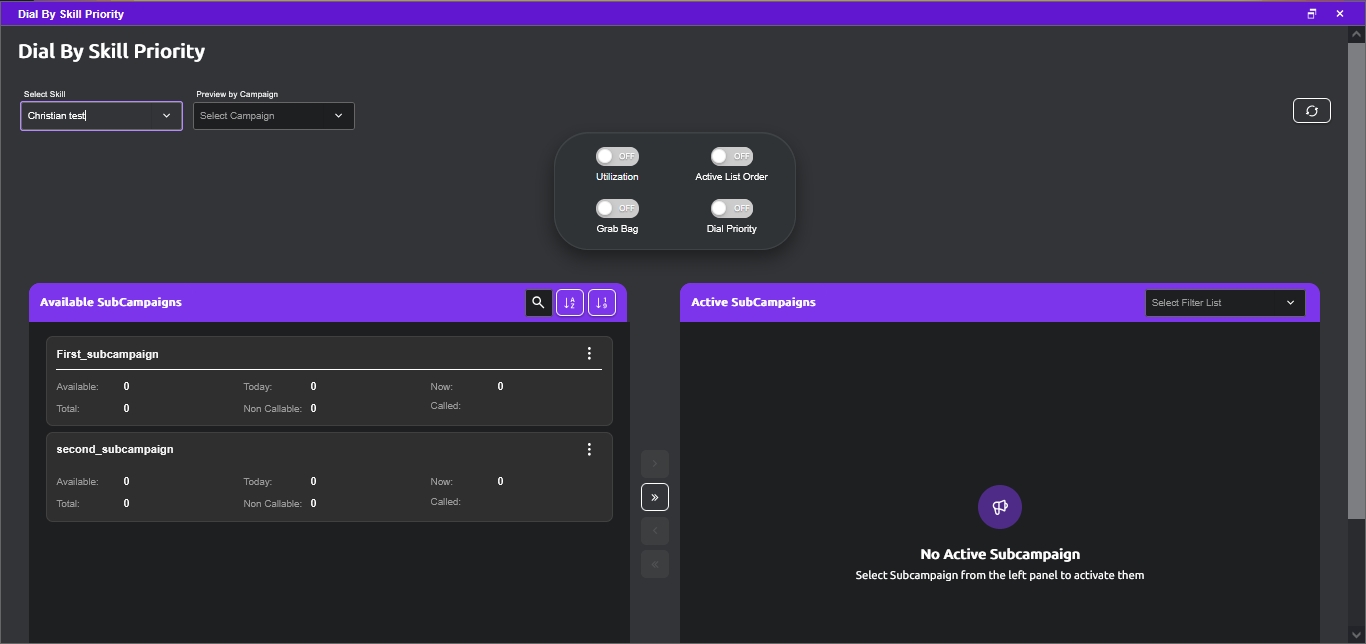
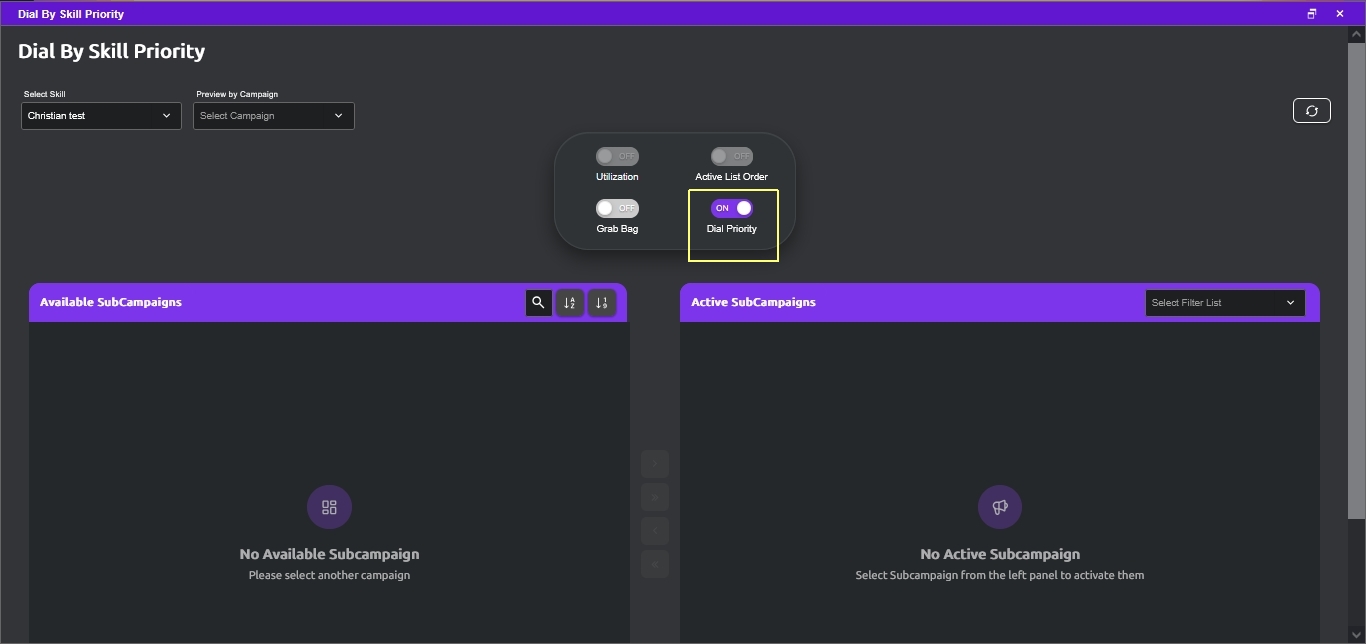
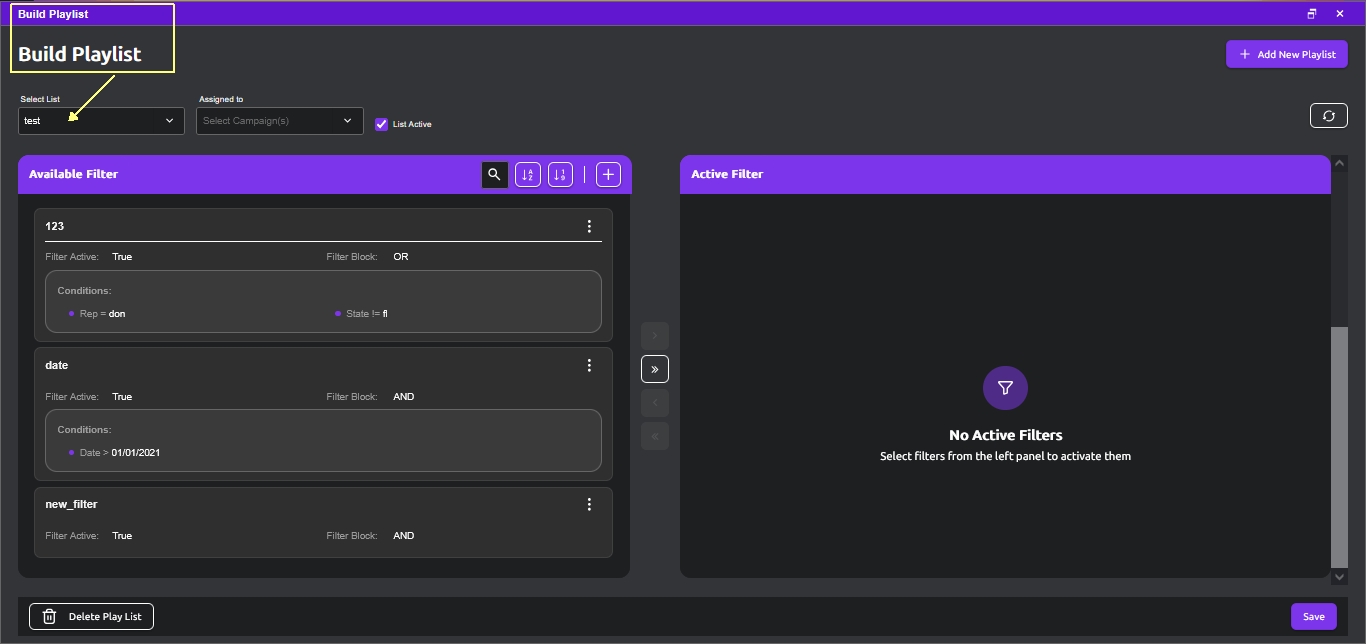
Selection and prioritization of records from the selected (Active) sub-campaigns follow the same rules as in Dial Priority. Refer to “Prioritization Mechanisms for Dial Priority and Skill Priority” for details.
Next, we discuss Skill Priority on inbound calls.
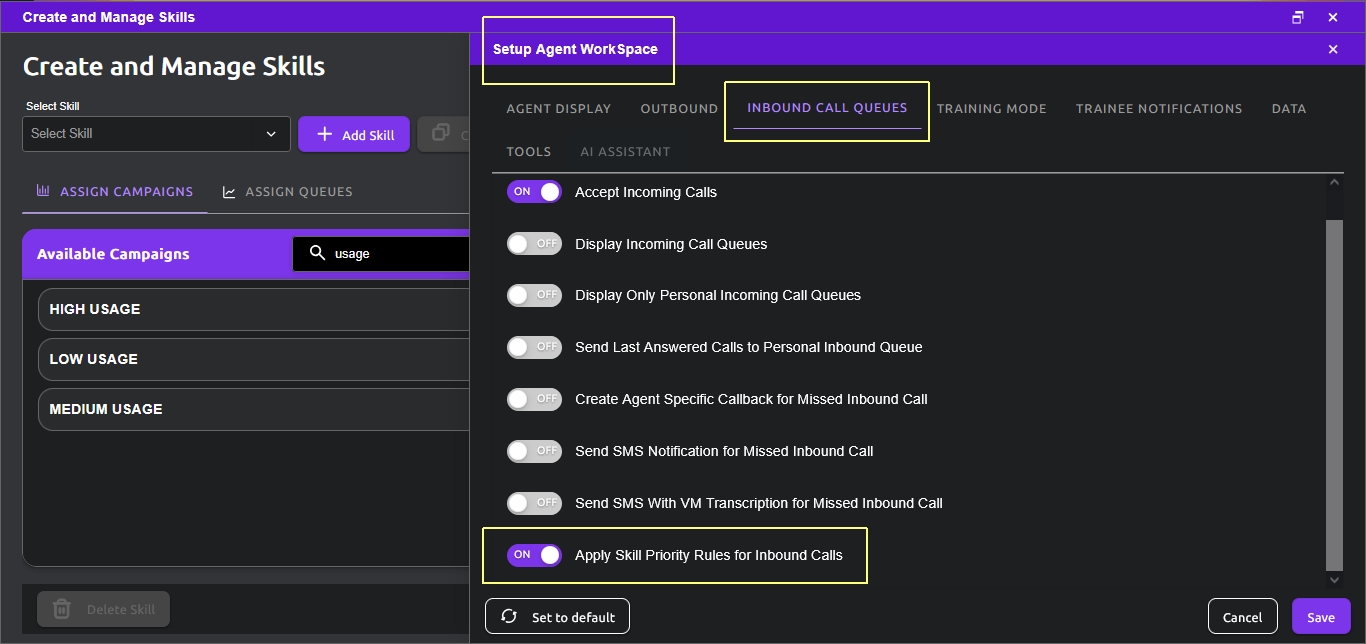
The same Skill Priority rules for outbound calls can be applied to inbound calls, as well. To do so, the Skill itself has to be enabled, and that is all that is needed, to incorporate Skill Priority rules for inbound calls.
The way it works for inbound calls is as follows. The calling number from the inbound call is looked up in the system to determine whether it is part of a Sub-campaign and/or Playlist. If so and the Sub-campaign is active on a Skill Priority rule, or the Playlist enabled, then the associated Skill is also checked to determine if it is enabled to Apply Skill Priority Rules for Inbound Calls. If it is, it looks for an available Agent with that Skill (otherwise just continues with standard inbound call handling). If the Skill is enabled and an Agent with that Skill is available, it routes the call to the Agent, otherwise it treats the call as if No Agent is Available.
To configure a Skill for inbound Skill Priority, go to the main menu area on the left and click on Skill Groups & Teams. On the right, click View in the selection box for Create and Manage Skills, select the corresponding Skill, switch to the Agent Workspace, move to the Inbound Call Queues tab, and check the Apply Skill Priority Rules for Inbound Calls option. Refer to the following pictures.
In the previous sections we presented Dial Priority, which performs Contact (lead) record prioritization based on Sub-Campaigns from a single Campaign, and a similar capability, Skill Priority, which is rather based on all Sub-Campaigns and assigned to a Skill.
In this section we present guidelines about how Contact (lead) records are selected and ordered (i.e. prioritized) for dialing out, which apply to both Dial Priority and Skill Priority.
When Dial/Skill Priority is not taking place, Dial Sequence dictates how to prioritize Contact records in the Campaign as a whole. To be precise, Dial Sequence is actually a secondary criterion; the primary criterion happens under-the-hood (and not configurable) based on number of call attempts (records with the least call attempts go first). Following is an example.

Following are all the options available for Dial Sequence Criteria. Notice that only the Second Criterion is configurable; the First Criterion is implied and not visible, and is included in this explanation just for proper understanding of the applicable behavior.

The following table provides a reference of all possibilities that will be addressed here.
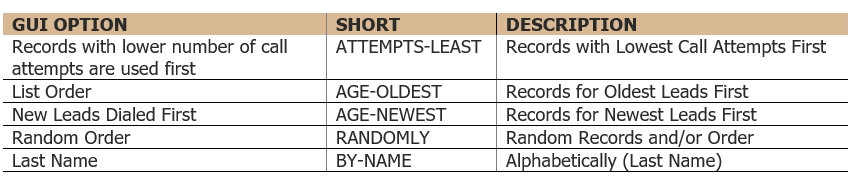
At a high level, the process of handling Dial/Skill Priority has two parts: (1) Select records from one or more Sub-Campaigns using a selection criterion, and (2) Prioritize/sort the selected records using a sorting criterion.
Part (1) itself consists of two steps: (a) determine how many records to get from each sub-campaign, and (b) determine which records to obtain from each sub-campaign (i.e. selection priorities).
For the only purpose of providing an explanation and presenting examples, in this section we use the terms Grab Prioritization and Bucket Prioritization with the intention to identify which criterion is used during each step. Let’s be clear that these terms are not used within the GUI but are just used to help in the explanations in this section. Grab Prioritization determines what to select, while Bucket Prioritization determines how to order the records selected.
With that in mind, refer to the following table.

Primary identifies the first criterion to use, while Secondary provides a tie breaker if it becomes necessary. To give an analogy, you could have a set of people to select from, and decide to use their last name as the primary criterion for selection, but if you have two names with the same last name, you could use the first name as secondary criterion.
The user interface for Dial Priority and Skill Priority present a set of switches whose ON/OFF setting determine the selection and prioritization mode to be applied. This section explains the modes corresponding to each allowed combination of these switches. Refer to the following picture.
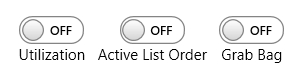
Therefore, let us start by summarizing the allowed switch combinations and the resulting mode. Do note that the mode is just a short ‘description’ of what the switch combinations represent, just for the purpose of this section, and not an actually presented in the Management Console GUI.
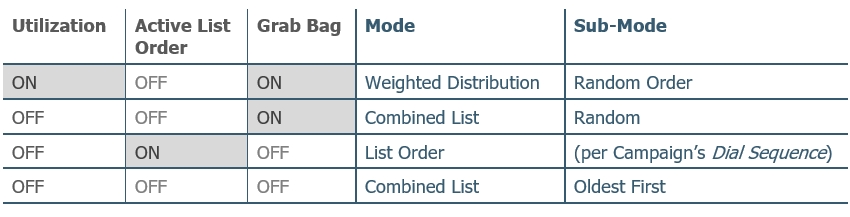
The sub-sections that follow provide a description of the selection and ordering behavior for each of these allowed combinations.
This case occurs when the following switch settings are used:

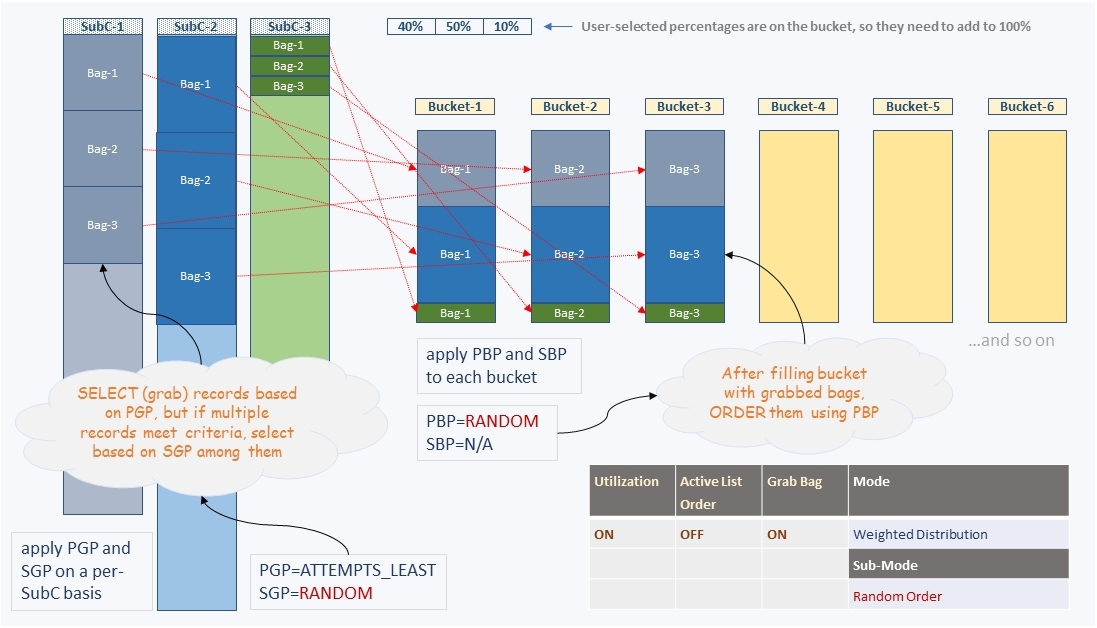
This case is about selecting chunks at a time of Contact records; we will call these chunks Buckets. We fill the bucket with Contact records from the specified Sub-Campaigns; the number of records that we grab from every campaign to fill a bucket is determined by the percentage (weight) assigned to each specified Sub-Campaign. Obviously, we should make sure that these percentages add to 100%.
The following priorities are applied:

As we have previously discussed, the first step is the selection process. The Primary Grab Priority (PGP) used in this step is to grab records with the lower number of call attempts (ATTEMPTS_LEAST); if more records than needed satisfy this criterion, the needed number of records is selected using the Secondary Grab Priority (SGP), which is set to be RANDOM (among those that satisfy the PGP).
After the bucket is filled with the selected Contact records, the records in the bucket are ordered (prioritized) using the Primary Bucket Priority (PBP), which in this case is set to be of a random order (RANDOM). Notice that since PBP is random, there is no need for a Secondary Bucket Priority (SBP).
This process is repeated one bucket at a time.
The following picture provides a pictorial example of how this case works.
This case occurs when the following switch settings are used:

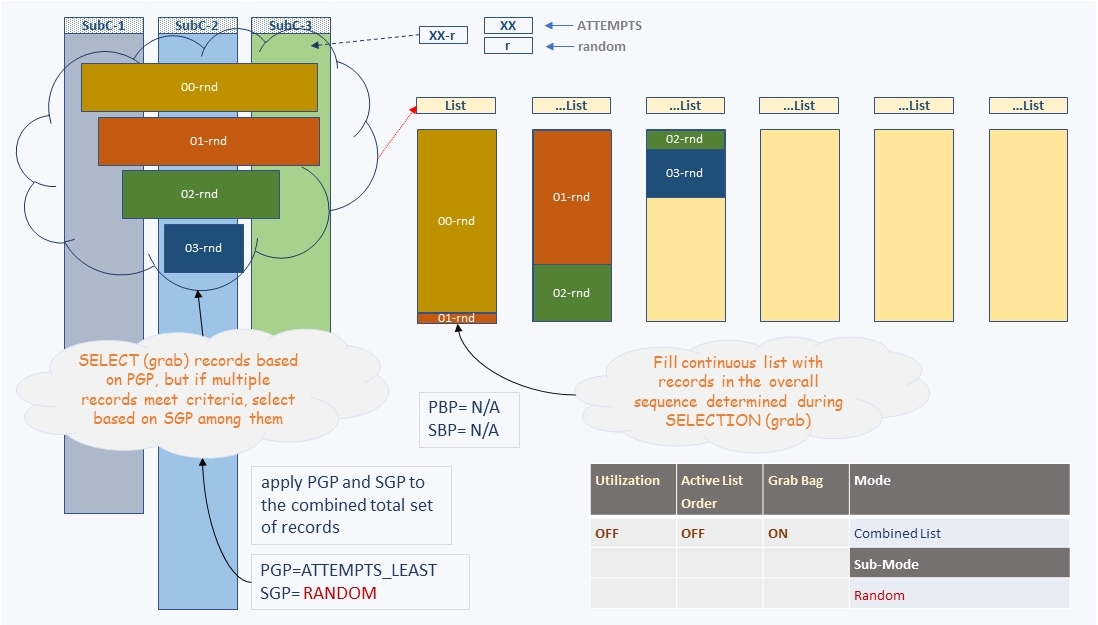
In this case, rather than thinking about buckets, we should think about a continuous list of records, even though this list may be split in pieces for performance purposes (but has no impact on the selection an ordering logic) as the example later in this section shows.
In this case, the selection criteria are applied to the combined set of all the Contact records from all the included Sub-Campaigns as a whole.
The following priorities are applied:

This case is all about the selection process. The Primary Grab Priority (PGP) used in this step is to grab records with the lower number of call attempts (ATTEMPTS_LEAST) from the combined list of all included Sub-Campaigns; records with the same number of call attempts are then ordered (prioritized) using the Secondary Grab Priority (SGP), which is set to be RANDOM.
The dialing list is then filled with the selected Contact records, which are already ordered (prioritized), hence there is no need to apply a Primary Bucket Priority (PBP) or a Secondary Bucket Priority (SBP) on the dialing list.
The following picture provides a pictorial example of how this case works.
This case occurs when the following switch settings are used:

In this case, rather than thinking about buckets, we think about a continuous list of records, as well, even though this list may be split in pieces for performance purposes (but has no impact on the selection an ordering logic) as the example later in this section shows.
For this case, we work with one Sub-Campaign at a time; we select all the records from one Sub-Campaign before we move on to the next Sub-Campaign. The Sub-Campaign to be used first and which one follows is determined by the order in which they are arranged in the GUI by the user.
On a per Sub-Campaign basis, the selection criteria are applied to the complete set of Contact records from that Sub-Campaign.
The following priorities are applied:

Once again, this case is all about the selection process. The Primary Grab Priority (PGP) used in this step is to grab records with the lower number of call attempts (ATTEMPTS_LEAST) from the complete set in the Sub-Campaign whose turn is next; records with the same number of call attempts (which we refer to as Bags in the pictorial example) are then ordered (prioritized) using the Secondary Grab Priority (SGP), which is obtained from the corresponding Campaign’s Dial Sequence setting.
The dialing list is then filled with the selected Contact records, which are already ordered (prioritized), hence there is no need to apply a Primary Bucket Priority (PBP) or a Secondary Bucket Priority (SBP) on the dialing list.
The following picture provides a pictorial example of how this case works.
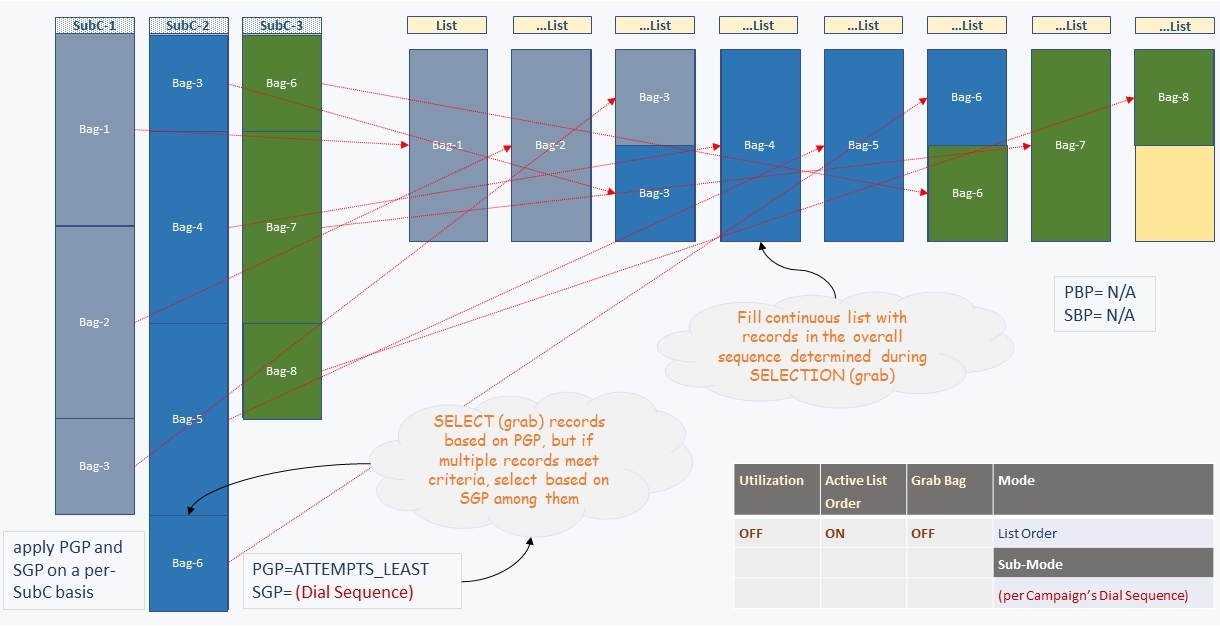
This case occurs when the following switch settings are used:

In this case, again, rather than thinking about buckets, we think about a continuous list of records, even though this list may be split in pieces for performance purposes (but has no impact on the selection an ordering logic) as the example later in this section shows.
In this case, the selection criteria are applied to the combined set of all the Contact records from all the included Sub-Campaigns as a whole.
The following priorities are applied:

This case is all about the selection process, as well. The Primary Grab Priority (PGP) used in this step is to grab records with the lower number of call attempts (ATTEMPTS_LEAST) from the combined list of all included Sub-Campaigns; records with the same number of call attempts are then ordered (prioritized) using the Secondary Grab Priority (SGP), which is set to be AGE_OLDEST.
The dialing list is then filled with the selected Contact records, which are already ordered (prioritized), hence there is no need to apply a Primary Bucket Priority (PBP) or a Secondary Bucket Priority (SBP) on the dialing list.
The following picture provides a pictorial example of how this case works.
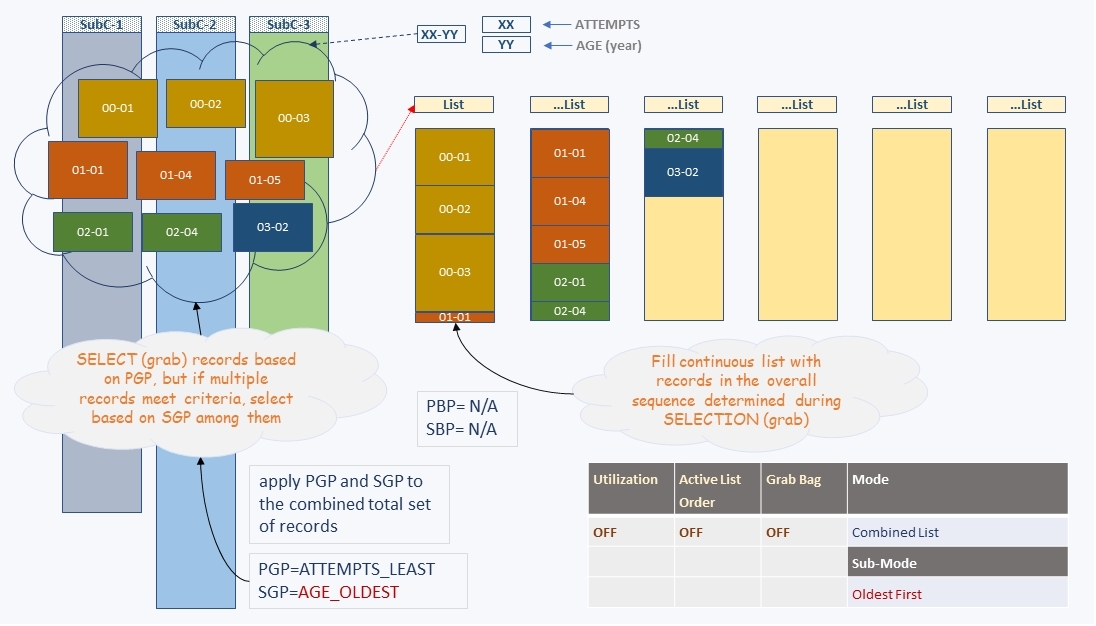
As previously mentioned, a Playlist is a mechanism that allows us to filter Contacts, or leads, for the purpose of discriminating among the complete set of Contacts in a Campaign, in order to execute focused calls. This could be useful when we want to keep all the Contacts in a Campaign, but at a given time only call a set of those Contacts that meet a more focused set of criteria; we build Playlists for that, using the Playlist Builder. These Playlists are to be assigned to Campaigns (refer to Campaign Profile) to put them into effect. Do note that a Playlist supersedes any Dial Priorities that may have been set up.
We tell the DialedIn CCaaS system how to build a Playlist through a Playlist Builder, by indicating how to select records using Filters applied on the records. For example, create a list from records identified with a specific ‘Campaign’ AND a specific ‘Rep’, AND where the Contact address is in a specific ‘State’. The following picture depicts such a filter set definition.
The previous example translates to the following:
_user_guide_filter_1 AND _user_guide_filter_2 OR _user_guide_filter_3which resolves to:
_user_guide_filter_1 AND (_user_guide_filter_2 OR _user_guide_filter_3)which effectively expands into:
((Campaign=training) AND (Rep=’testagent’))>AND>((State CONTAINS Florida) OR (State CONTAINS florida))>The rules are as follows:
Refer to the following picture.
To configure a Playlist, go to the main menu area on the left and click on Outbound Dial Strategies. On the right, click View in the selection box for Build Playlist. Then select an existing list from the top-left pull-down menu or create a new list by clicking on the Add New Playlist button, or the Add New Filter, top right. Refer to the following pictures.
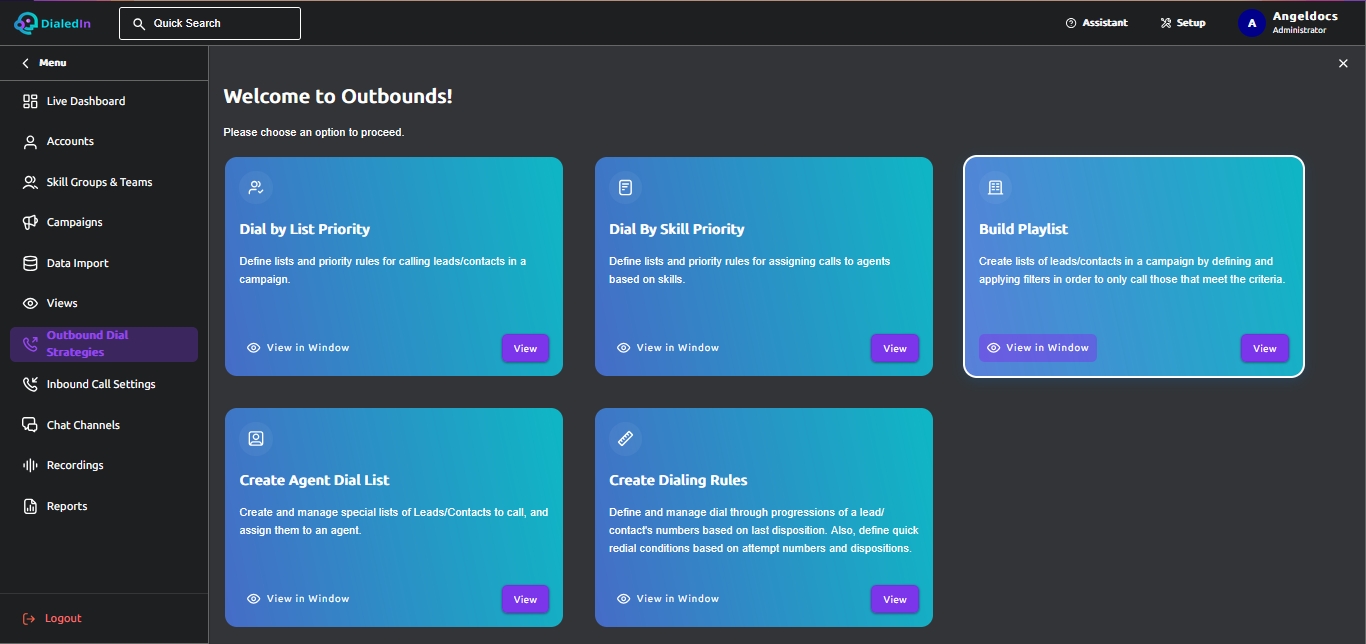
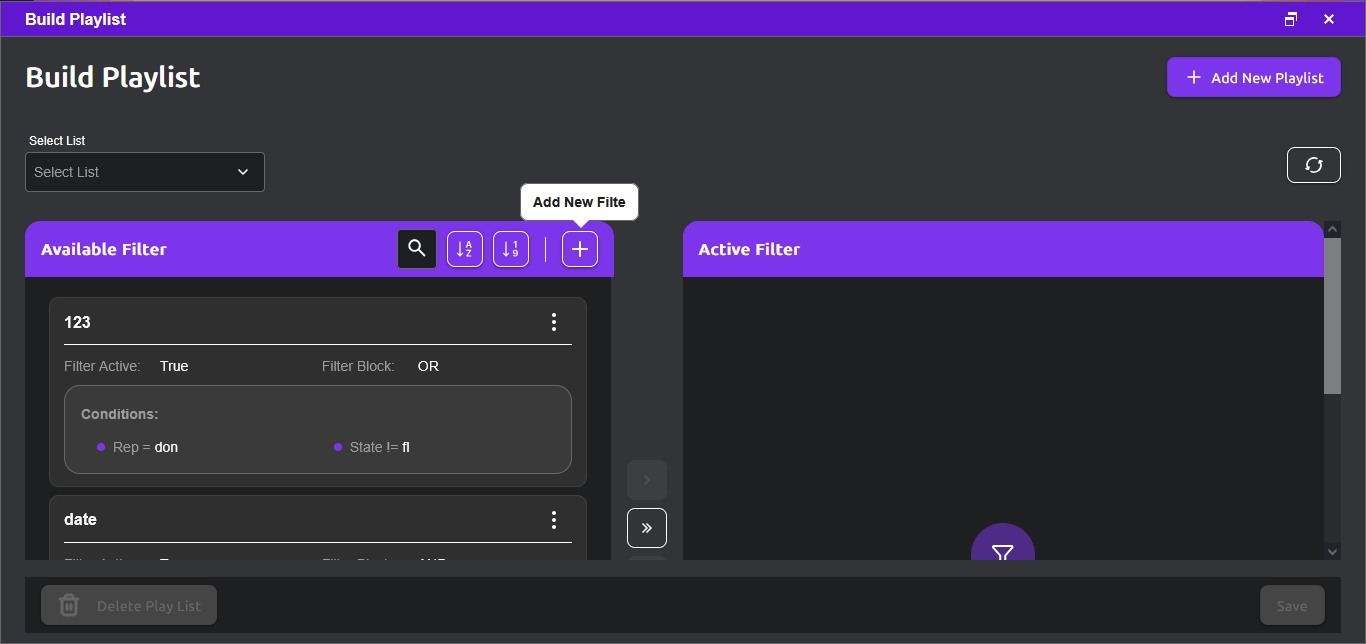
As you can see, we have a list of Available Filters on the left panel; when someone creates a Filter, they are made available for use in defining any Playlist. On the right panel we have a list of Active Filters, which represent those Filters that are part of the current Playlist.
You can move Filters between the Available Filters and the Active Filters areas, which effectively builds a Playlist; this can be done either by drag-and-drop or using the action icons between the two window panels.
To add a new Filter, click on the Add Filter button, which pops up a new dialog window. Type the filter name, select the logical operator (AND, OR) to be used between this Filter block and the one that would follow; then create statement lines by clicking on the new item editing area and enter or select the appropriate values. Click Save to apply changes. Refer to the picture below.
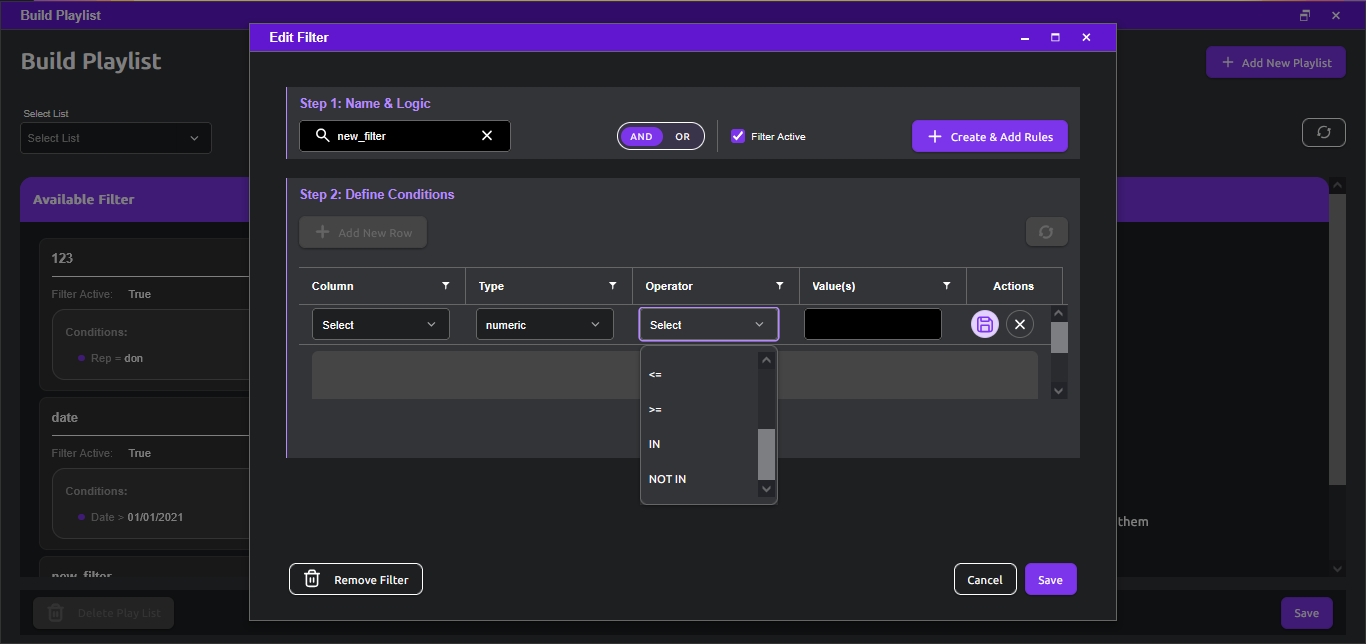
Each resulting Filter is a group of one or more conditional statements (lines) to which the AND logical operator is applied between each statement; if you have condition statements A, B, and D, your Filter would be interpreted as “A AND B AND C”.
Operators:
| = | string, numeric, date | The values on the left and right side of the operator match exactly |
|---|---|---|
| != | string, numeric, date | The values on the left and right side of the operator match exactly |
| IN | string, numeric | The value on the left side of the operator matches a value of a list of values on the right side of the operator |
| NOT IN | string, numeric | The value on the left side of the operator matches a value of a list of values on the right side of the operator |
| CONTAINS | string | The value on the left side of the operator can be found within (is a sub-string of) the value on the right side of the operator |
| STARTS | string | The value on the left side of the operator can be found at the beginning (is the first sub-string) of the value on the right side of the operator |
| ENDS | string | The value on the left side of the operator can be found at the beginning (is the first sub-string) of the value on the right side of the operator |
| < | numeric, date | The value on the left side of the operator is smaller than the value on the right side of the operator; for dates, smaller is equivalent to earlier |
| > | numeric, date | The value on the left side of the operator is larger than the value on the right side of the operator; for dates, larger is equivalent to more recent |
| ≤ | numeric, date | The value on the left side of the operator is smaller than or the same as the value on the right side of the operator; for dates, smaller is equivalent to earlier |
| ≥ | numeric, date | The value on the left side of the operator is larger than or the same as the value on the right side of the operator; for dates, larger is equivalent to more recent |
The following default formats need to be considered for the rules to be properly interpreted:
Date – should be in the following form: MM/DD/YYYY, where MM is the two-digit month number, DD is the two-digit day of the month, and YYYY is the four-digit year.State – should be in the following form: where XX, which represents the official two-character abbreviation representing a USA state.To make a Playlist definition to be available for Campaigns, you must check the List Active checkbox. Refer to the following picture.
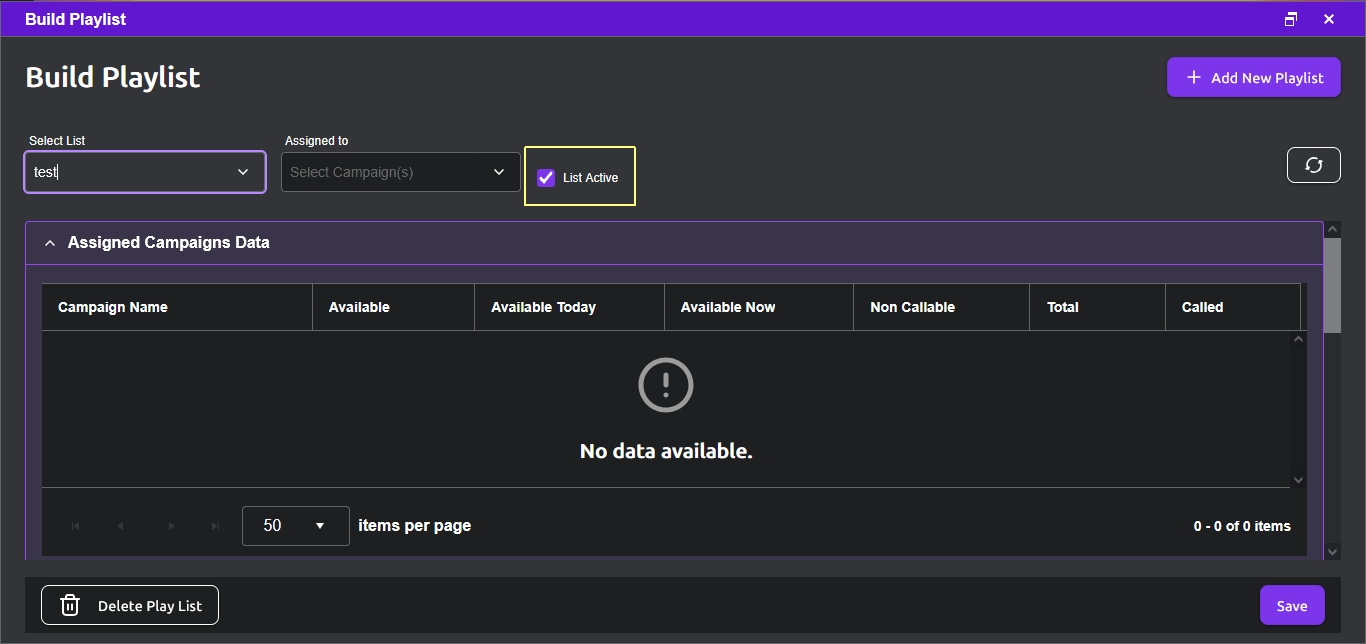
You can assign a Playlist definition to a Campaign, which effectively sets the corresponding parameter in Campaign Settings Settings; or you could just do it directly in
You can assign a Playlist definition to a Campaign, which effectively sets the corresponding parameter in Campaign Settings Settings; or you could just do it directly in Campaign Settings at any time, as long as List Active is set.
at any time, as long as List Active is set.Admin users can create and manage special lists of numbers (Contacts) to call, assigning them to specific agents. The agent’s Skill must be enabled to Use Dial Lists; when enabled, the Agent Client GUI will provide the ability to access the assigned lists and call a Contact in one of those lists.
To configure Dial Lists, go to the main menu area on the left and click on Outbound Dial Strategies. On the right, click View in the selection box for Create Agent Dial Lists. Then pull down the Select Agent menu found in the top left of the presentation area and select one of the agents in the menu. Then pull down the Select List menu next to it and select a list, if available. Refer to the following picture.
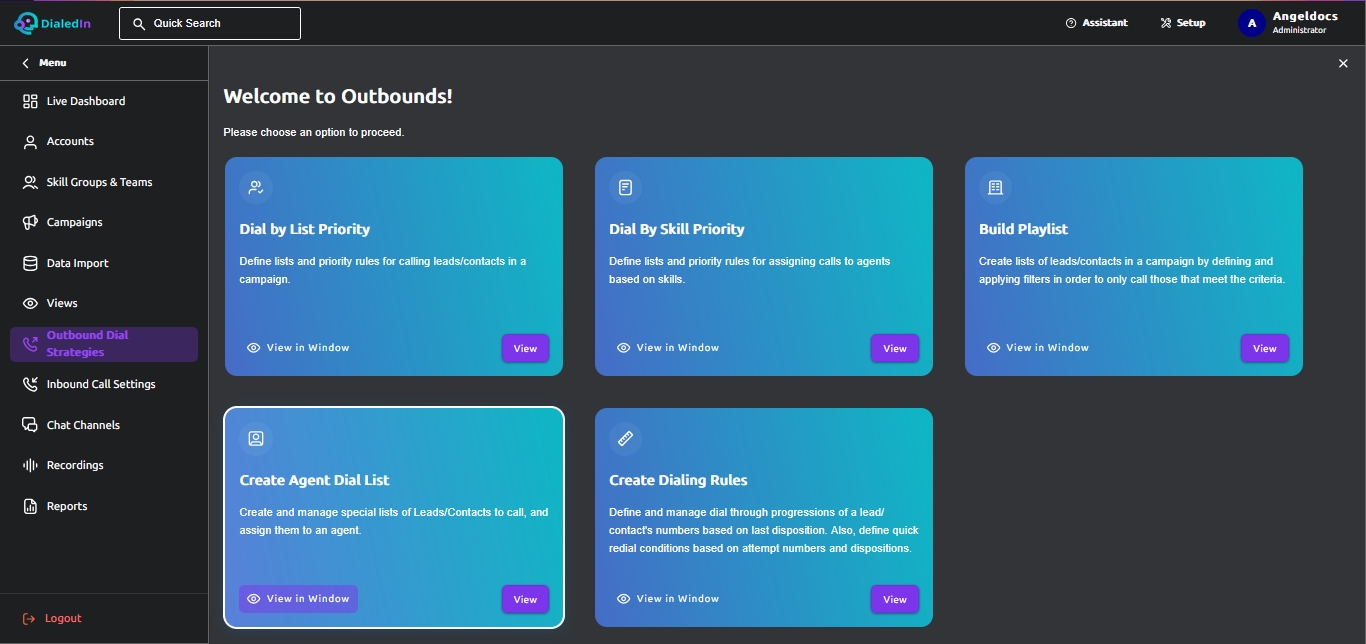
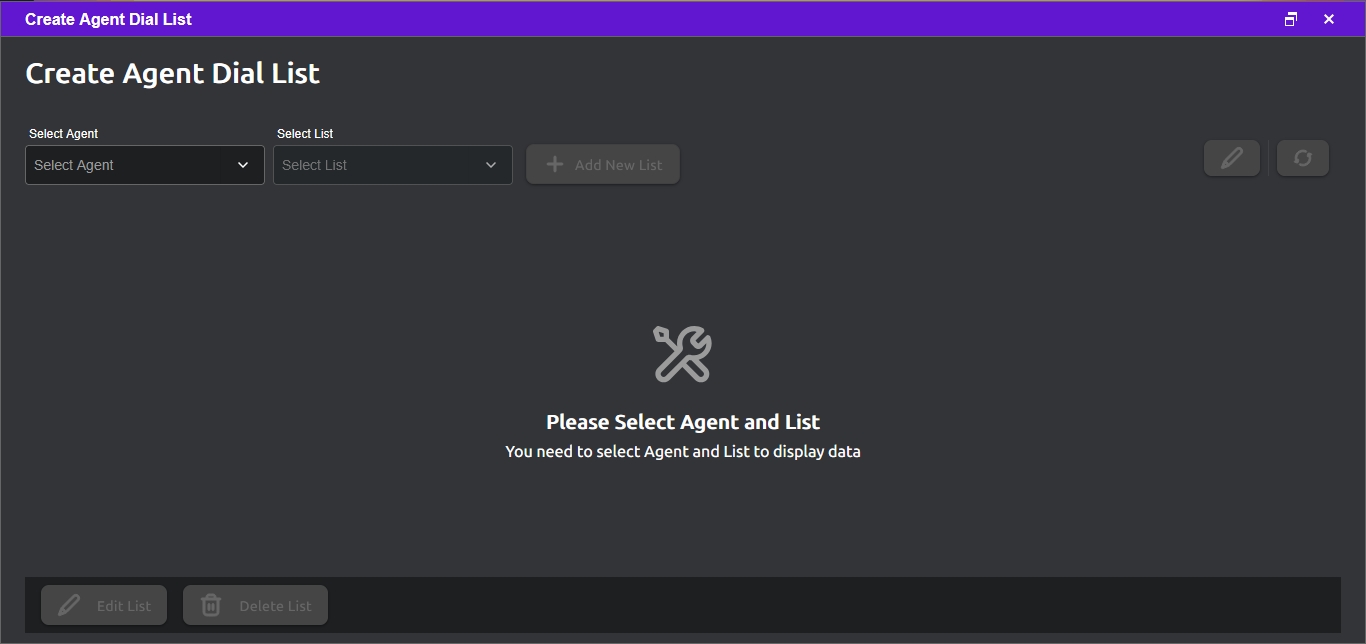
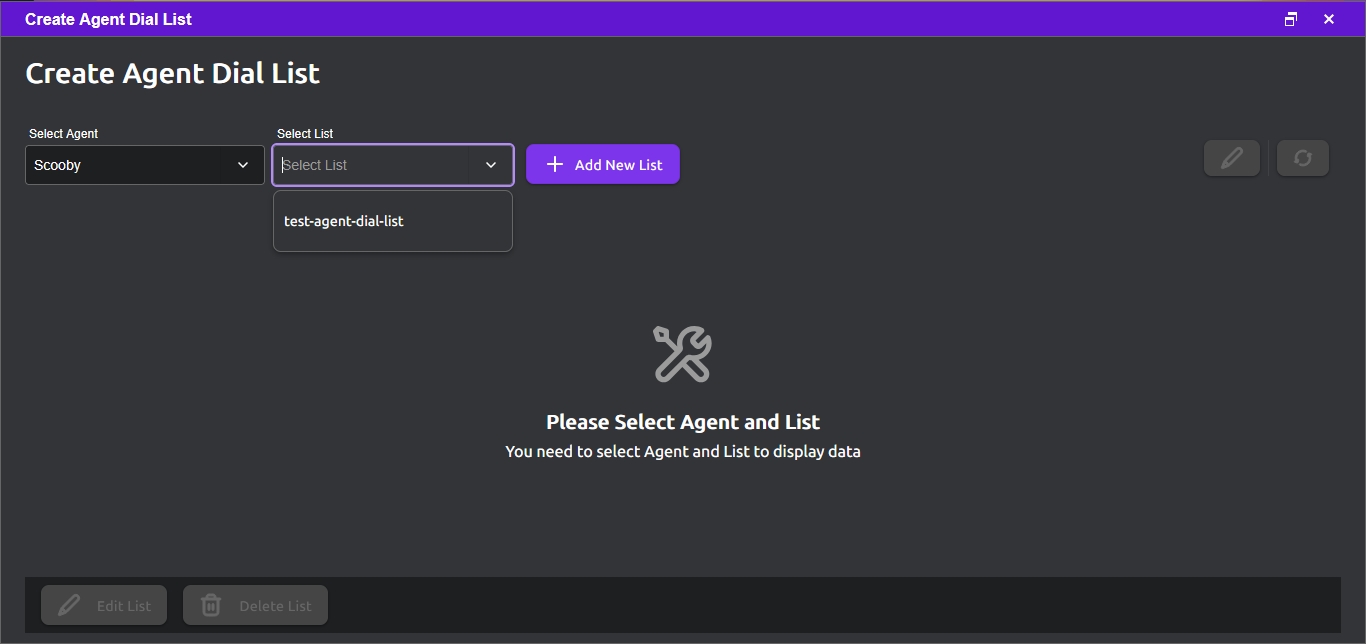
If the selected list is not empty, it will show the numbers already included in the list; in addition, if a number in the list has already been dialed, it will show a check-mark in its left-most column, as well as the date, time, and duration of the last call; otherwise, it will just show a question-mark.
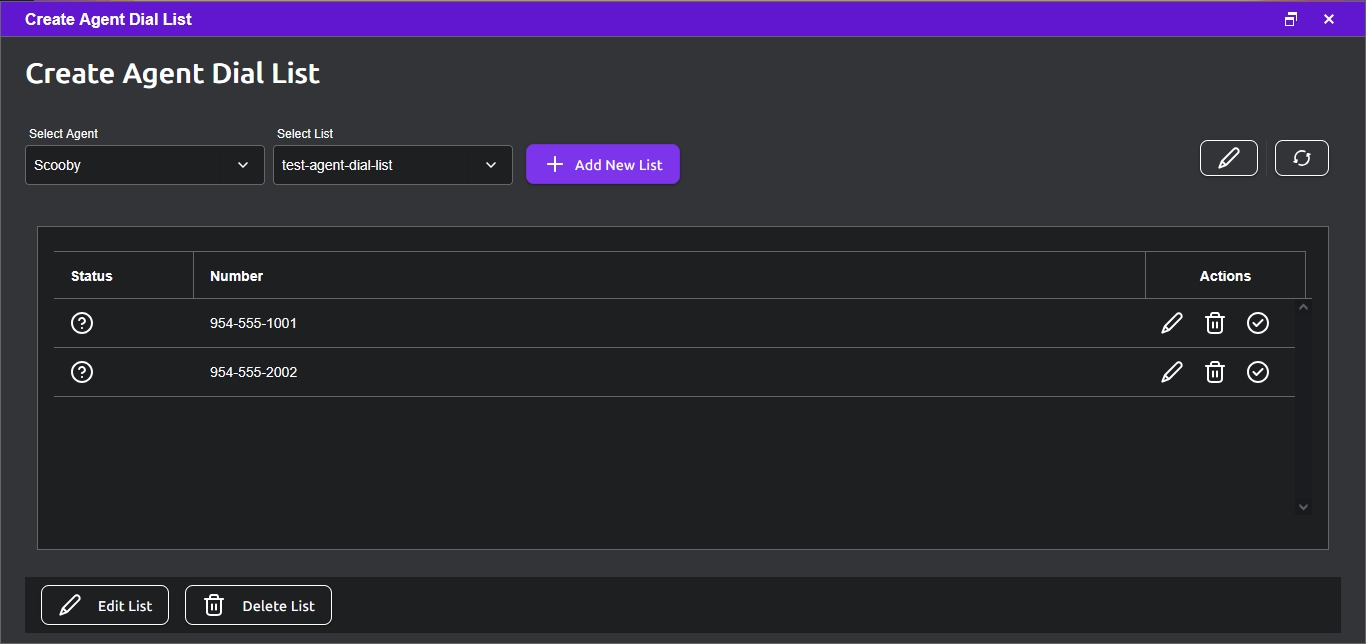
You can either add a new list by clicking on the Add New List button, or edit the list by clicking on the Edit Dial List (pen) icon. Refer to the following picture.
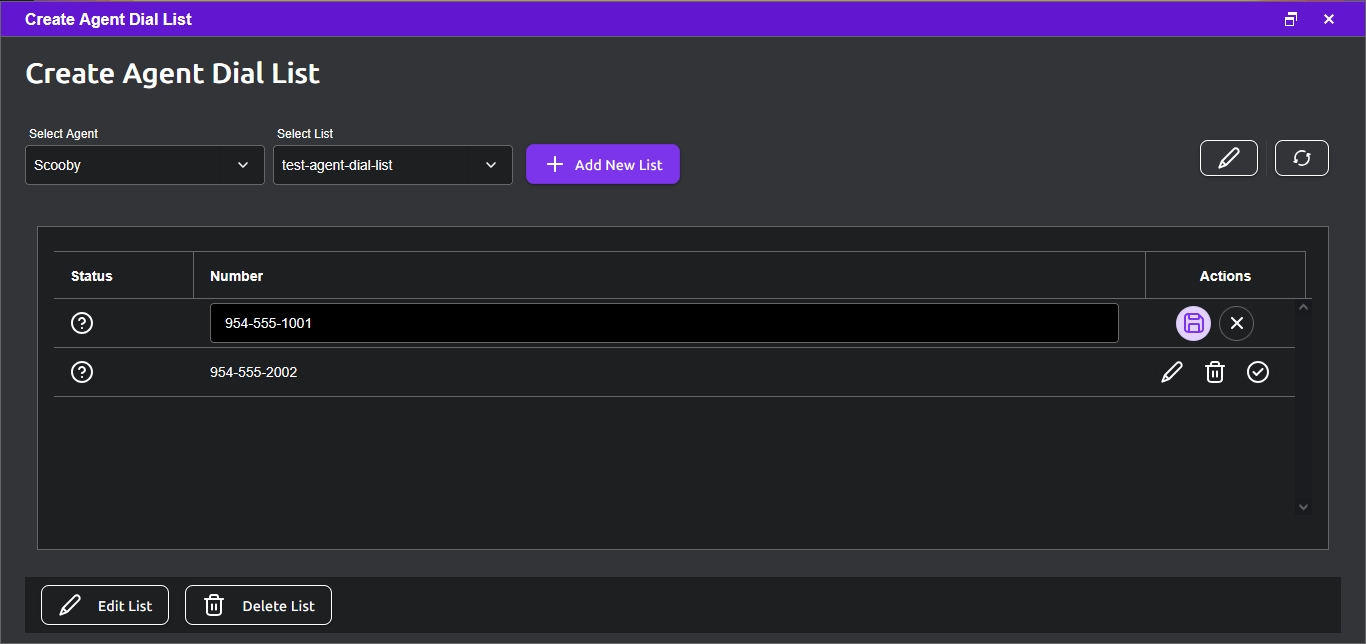
After clicking on Add New List you’ll be able to type the name of the new list on the name field; you can then Save or Cancel, so you can either save the new empty list or cancel the operation. Refer to the following picture.
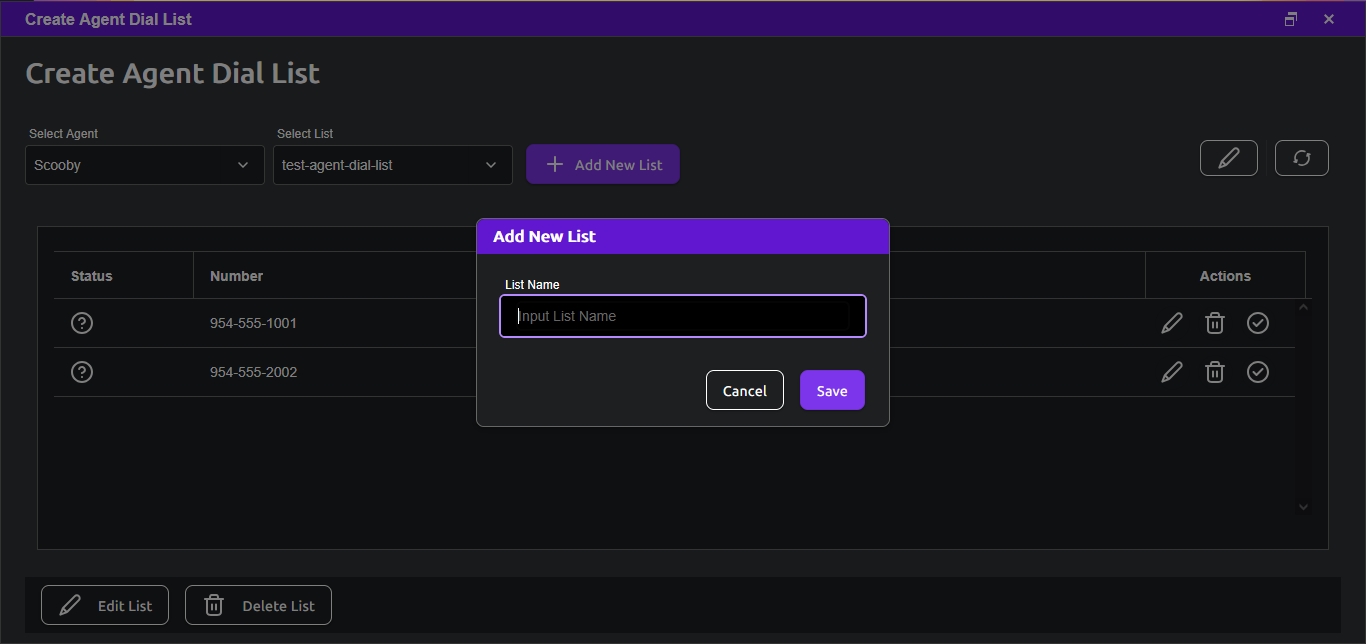
You are now able to add numbers to the newly created list; you do this, with any list, by clicking on the Edit Dial List (pen) icon on the list itself (as opposed to the phone number's). A list with zero or more rows is shown; you can now Add New Rows, one for each number.
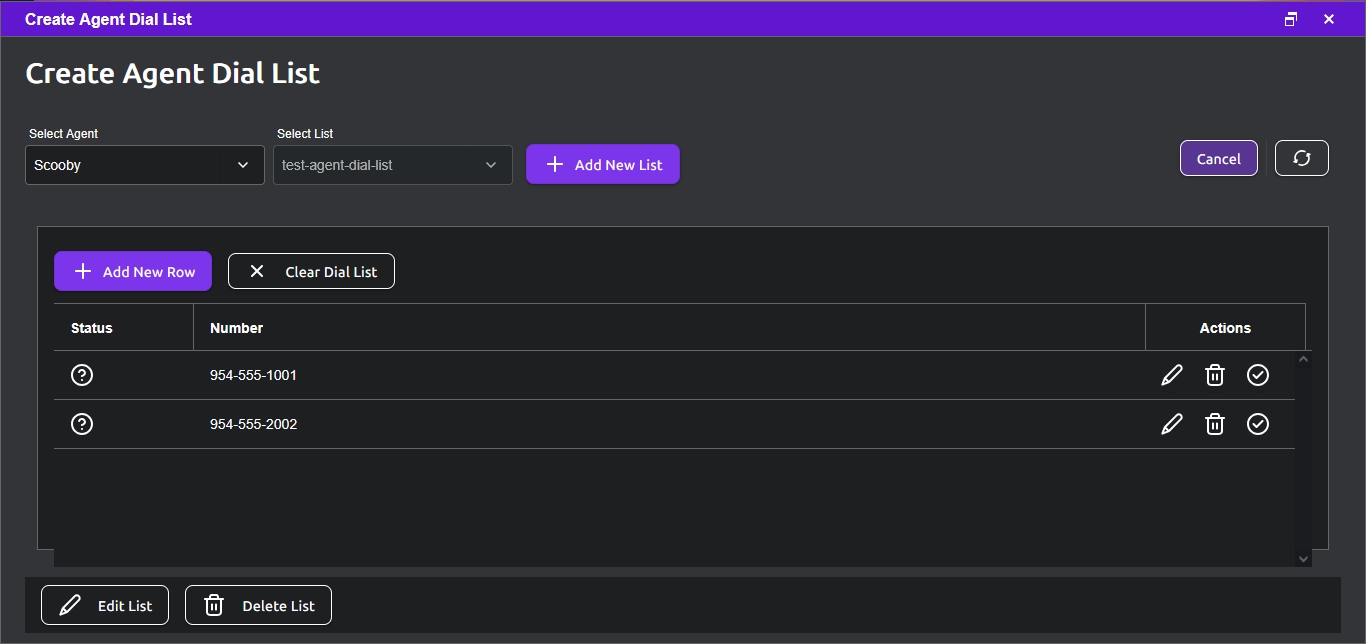
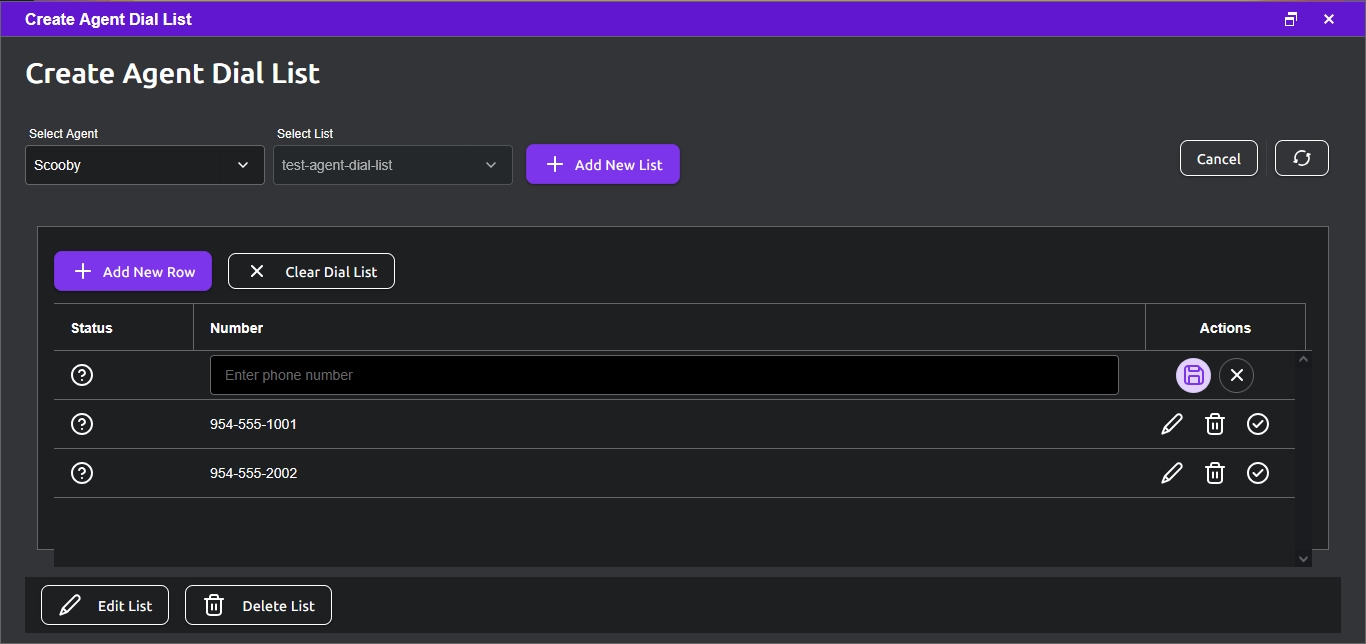
Sometimes the original number for a Contact is not the best or right number to call, for one reason or another, and a call attempt results in Wrap-up Code indicating some kind of failure reaching out to the Contact; to handle those cases, the DialedIn CCaaS system allows creating and configuring Dialing Rules that go through an alternate progression of numbers, in the case that the disposition or wrap-up code in the Contact record matches one in a corresponding list (Disposition Set).
The alternate phone numbers to progress through are identified by the Phone Fields included in the rule; in other words, the system looks for a match against the value of one of the fields of type Phone listed in the Disposition Set.
The Dialing Rule is defined by creating an ordered list that indicates, with each item in the list, what field value to check in the Contact record, in the case that one of the dispositions (in a Disposition Set) match the Contact’s current disposition.
We’ll go through these two steps in more detail, but first, there’s one more step needed, which is to assign the Dialing Rule to the appropriate Campaign; refer to Campaign Profile for that.
So, first, we need to define a Disposition Set; multiple sets can be used. To do this, go to the main menu area on the left and click on Outbound Dial Strategies. On the right, click View in the selection box for Create Dialing Rules, then look first at the Disposition Sets. You will see a list of disposition sets, if previously defined.
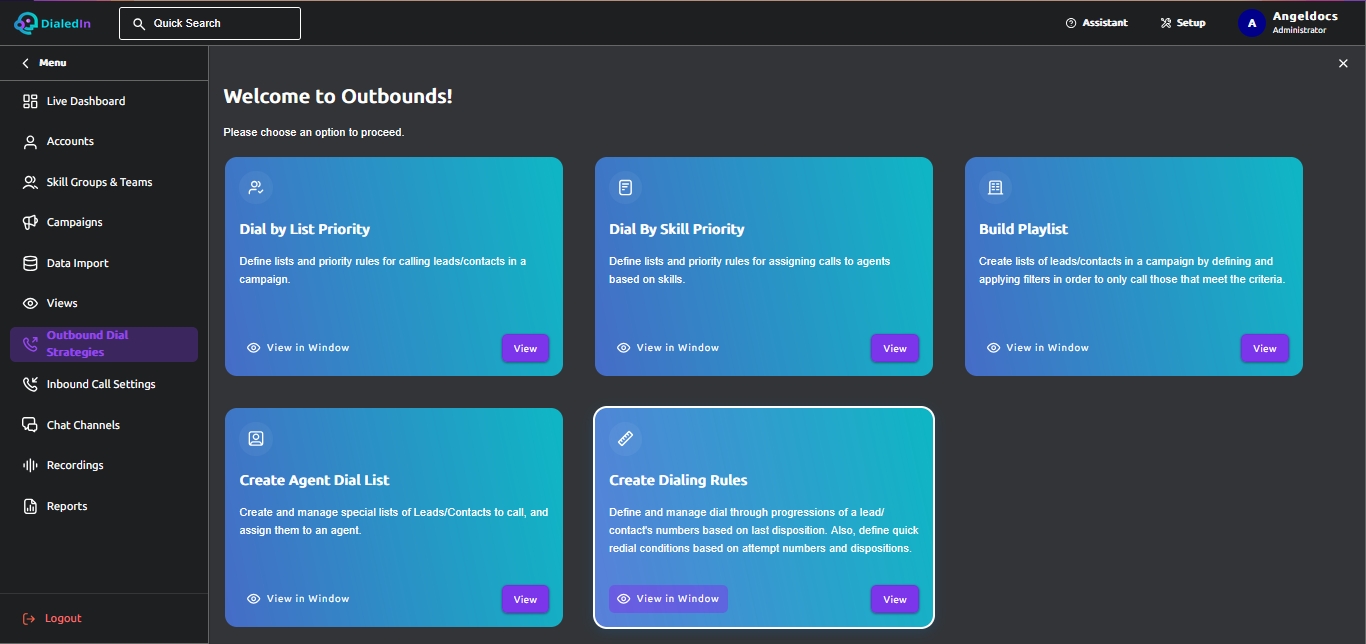
To create a new Disposition Set, click on Add Disposition Set. Then enter name and description, and click on Add Disposition in order to add dispositions to the set. Refer to the following pictures.
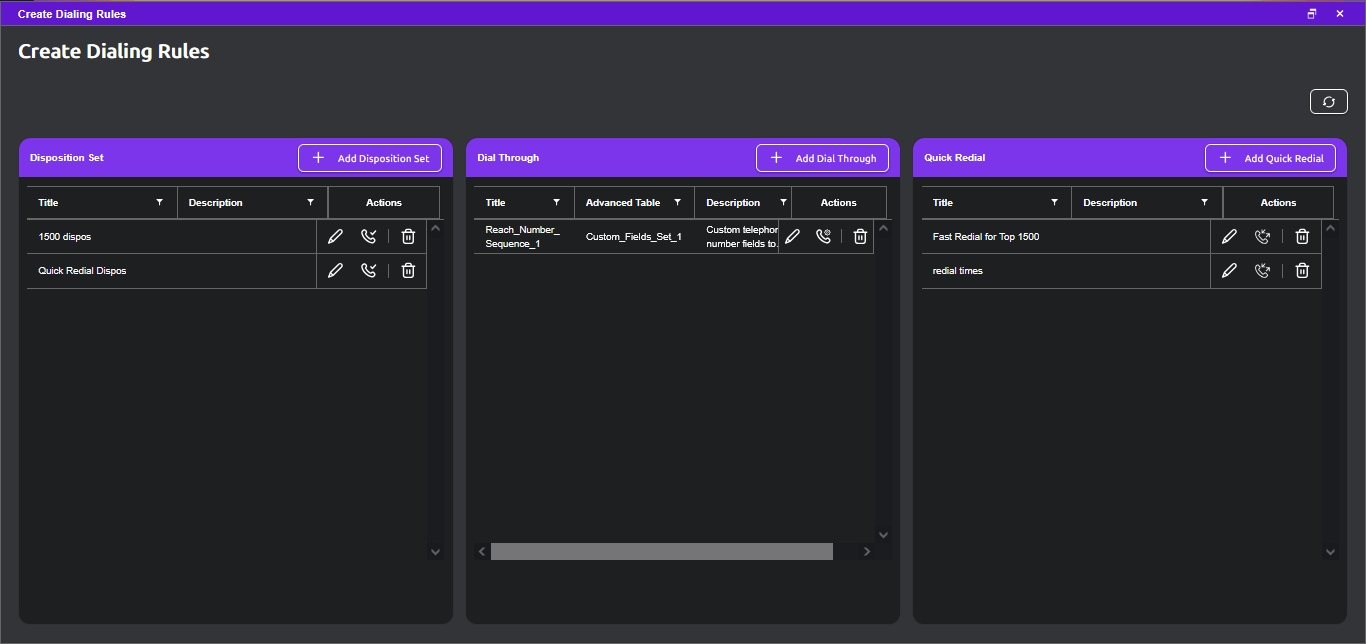
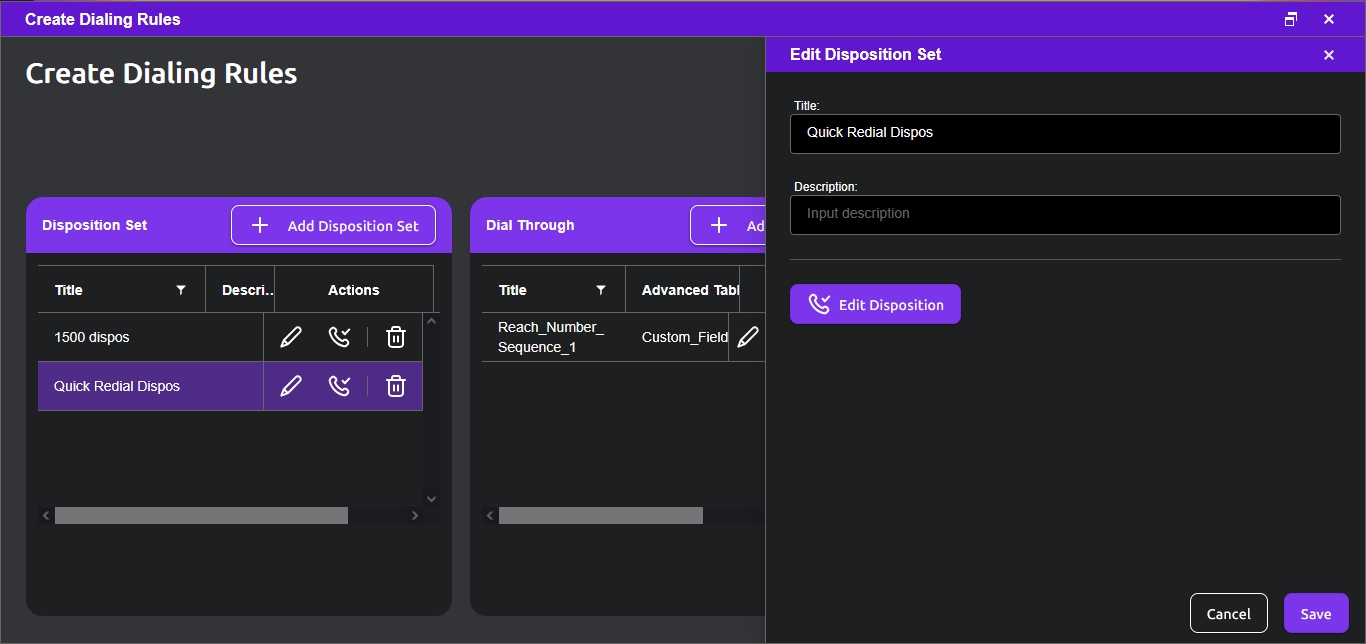
Now, we need to create the other part of the Dialing Rule, which identifies the phone fields to consider (go through). To do this, we work on the Dial Through part of the screen to select or add the list to go through. Refer to the following picture.
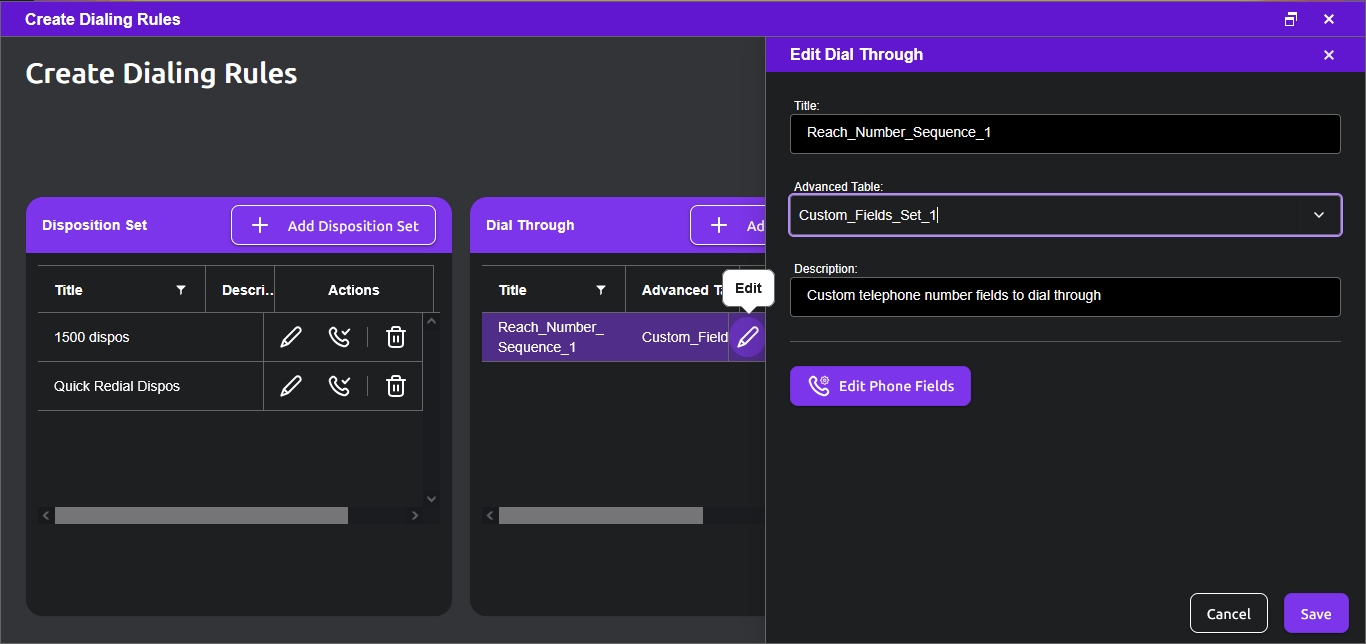
To create a new one, click on Add Dial Through. Then enter title (name) and description, and pull down the Advanced Table (Custom Data) menu to select the list that contains the phone fields to be considered. You may need to Save at this point, in order for the next step to be effective.
Next is to create the list of phone fields to be referenced and link them to a Disposition Set; click on Edit Phone Fields, which will open a new window where we can Add New Row to include a new association between a Phone Field and a Disposition Set, indicating that the dispositions on that set trigger the use of that field to determine which number to dial. The set also includes a Sort Order value (larger number dials first). Refer to the following picture.
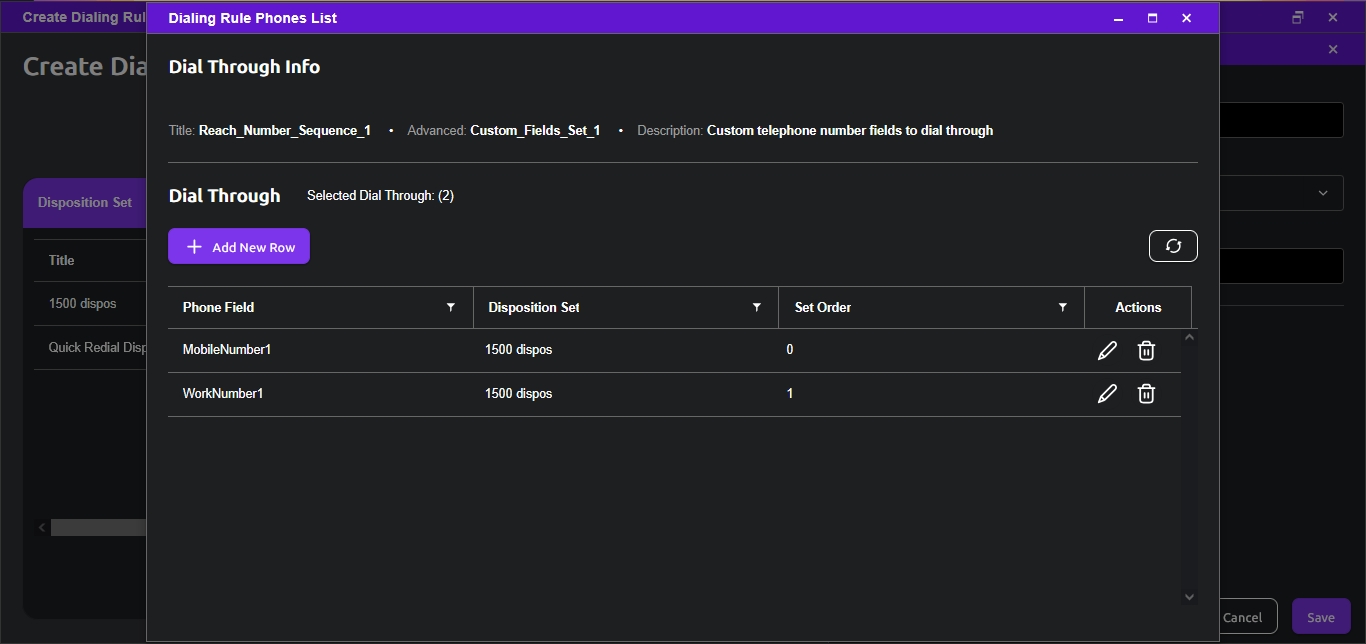
With the DialedIn Quick Redial, or Fast Redial, feature you can quickly and automatically call again (redial) numbers that meet certain criteria, for example, -calls that returned a busy signal or went to an answering machine.
Multiple Quick Redial rule-sets can be defined at the system level, and a campaign can be enabled with one of them. A Quick Redial rule-set can have multiple rules, where each rule provides two conditions to meet, attempt number and disposition (call status), and defines how long to wait (delay) before the redial is performed if the conditions are met. For example, if attempt number 1 returns a busy signal (disposition/call status), wait 10 minutes, then redial.
Quick Redial is a prioritization condition, therefore the involved number is put in the priority queue and dialed immediately when the wait time concludes. This, of course, considers time zone, schedules, and callability settings, meaning that other broader settings, like being outside calling hours, will prevent the redial from taking effect.
A Quick Redial rule-set can include multiple rules, which are entirely at the discretion of the administrator implementing them, including whether there is any overlap among them. This is important to understand because overlaps usually cause overflows, since the ChaseData system will apply a rule independently of the other rules. For example, if a rule indicates a Fast Redial after 10 minutes for attempts 1, 3, and 5, while another rule indicates a Fast Redial after 5 minutes for attempt 4, it will execute all of them (10-min delayed fast redial for attempts 1, 3, and 5, AND 5-min delayed fast redial for attempt 4).
Both system and non-system dispositions can be used for a Quick Redial rule. An implication of this is that even manual calls can be fast redialed, if the disposition of that call and the call attempt match a rule.
The number used as Caller ID is unchanged for a redial (same as for the call attempt on which the quick redial is performed).
Let us now go through the process of defining and enabling Quick Redial for a Campaign. You will notice that you need some building blocks before Quick Redial is enabled for a Campaign. But for the purpose of understanding the purpose and end result first, here we present the feature from the top down, starting at the Campaign settings, and then looking at the underlying building blocks as we go along. In some cases, these building blocks will already be available, but in most cases, particularly the first few times, you will need to address them first.
With that in mind, the first thing is to enable the campaign for Quick Redial, which we do in the Advance Dialing Rules & Strategies area of the Outbound Settings of Campaign Settings for the campaign desired (refer to the corresponding Campaign section). Here we pull down the Quick Redial menu and select a previously created Quick Redial rule-set. Refer to the following picture.
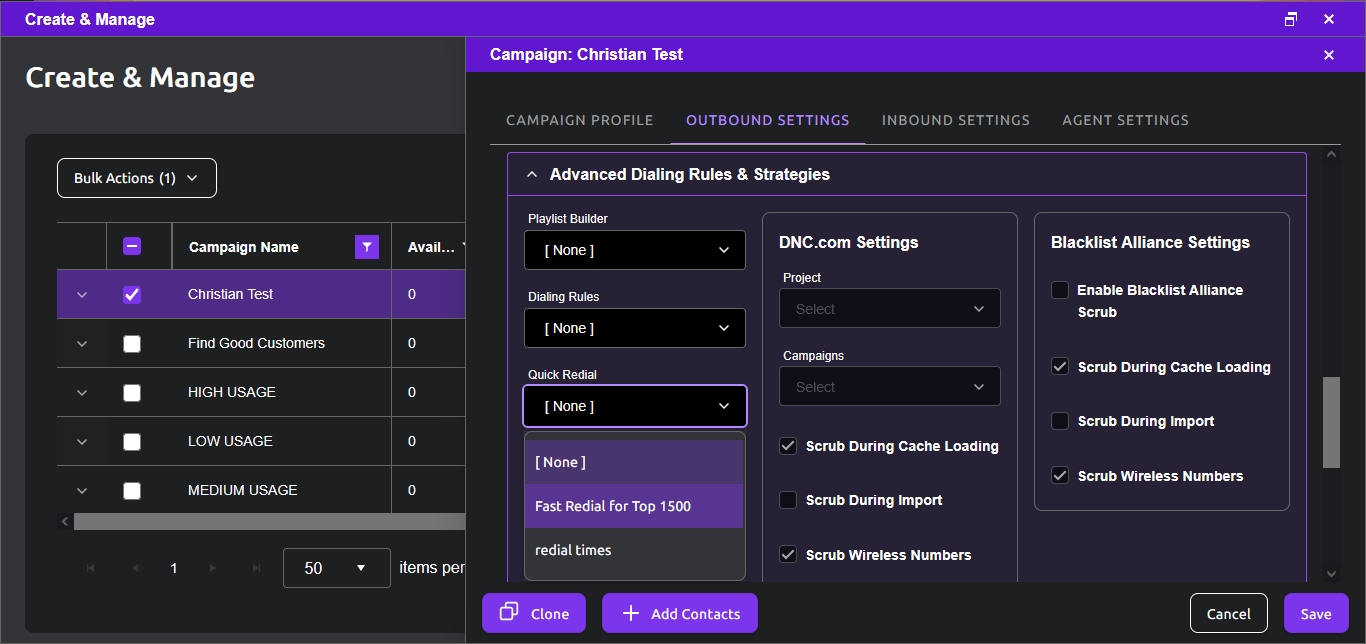
Now, let us review where this Quick Redial rule-set is defined. To do this, go to the main menu area on the left and click on Outbound Dial Strategies. On the right, click View in the selection box for Create Dialing Rules, then move to the Quick Redial area.
This area lists all Quick Redial rule-sets available. Click on the desired one to review or edit, or add one by clicking on the Add Quick Redial button. This will open a new window showing the title (name), description, and a link to the Redial Rules, which in turn shows the corresponding Attempt List.
Refer to the following pictures.
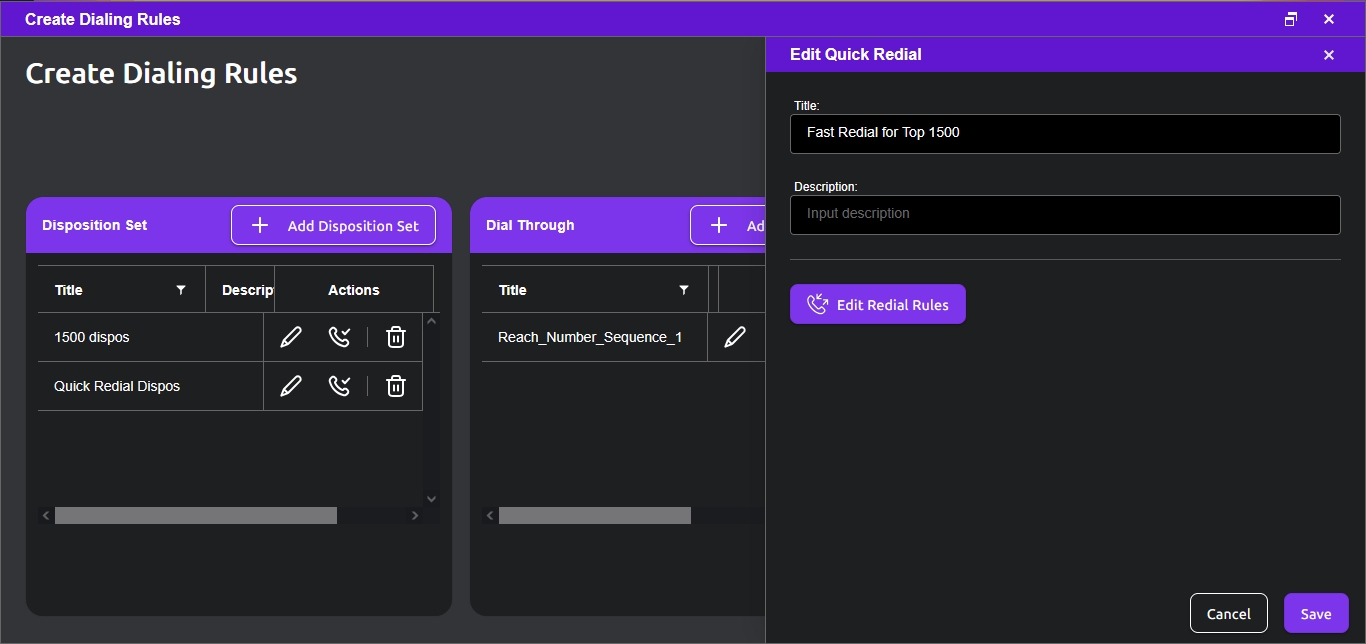
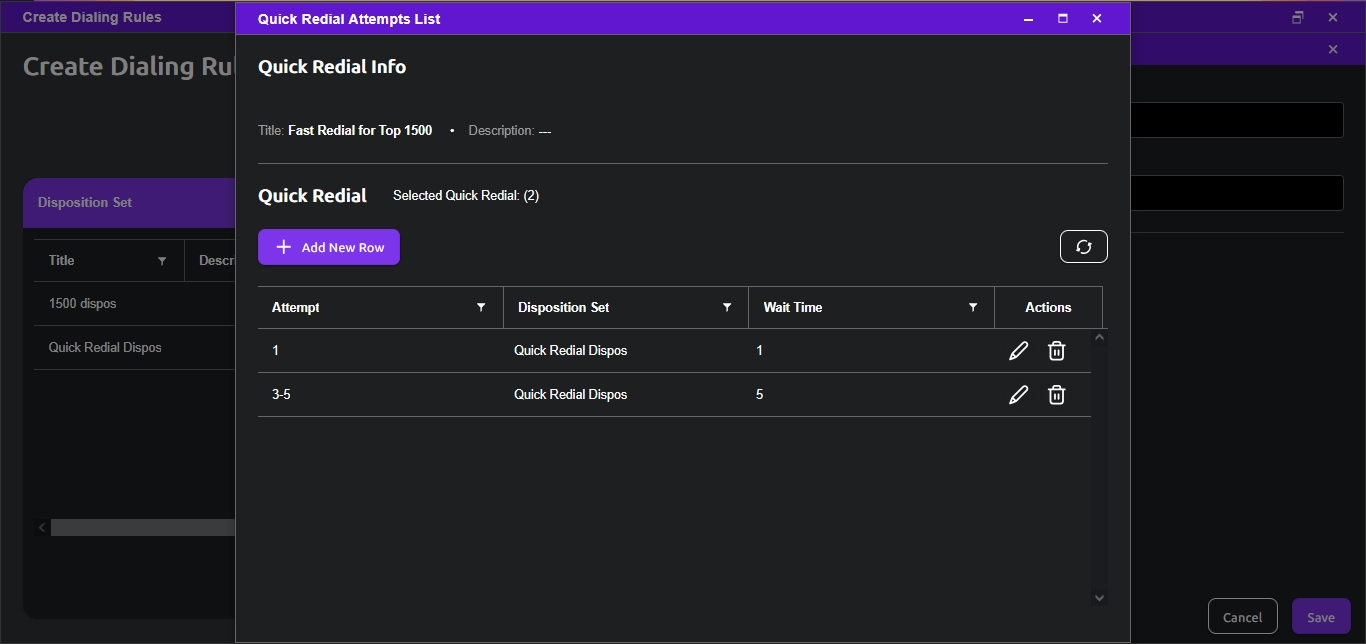
Each Attempt List is composed of three parts; the call Attempts to be checked against a disposition in the Disposition Set, and the Wait Time (in minutes) of delay after that attempt before executing the quick redial.
These parameters can be edited by clicking on the Edit button (or a new Attempt List can be created with Add New Row); in the case of Attempt and Wait Time, just enter the desired values, while for Disposition Set a pull-down menu lists available ones previously defined.
The Attempt parameter can be a single attempt number (e.g., “2”), a range of attempt numbers (e.g., “1-4”), a comma-separated list of attempt numbers (e.g., “2,4,6”), or a combination (e.g., “1-3,5,8”).
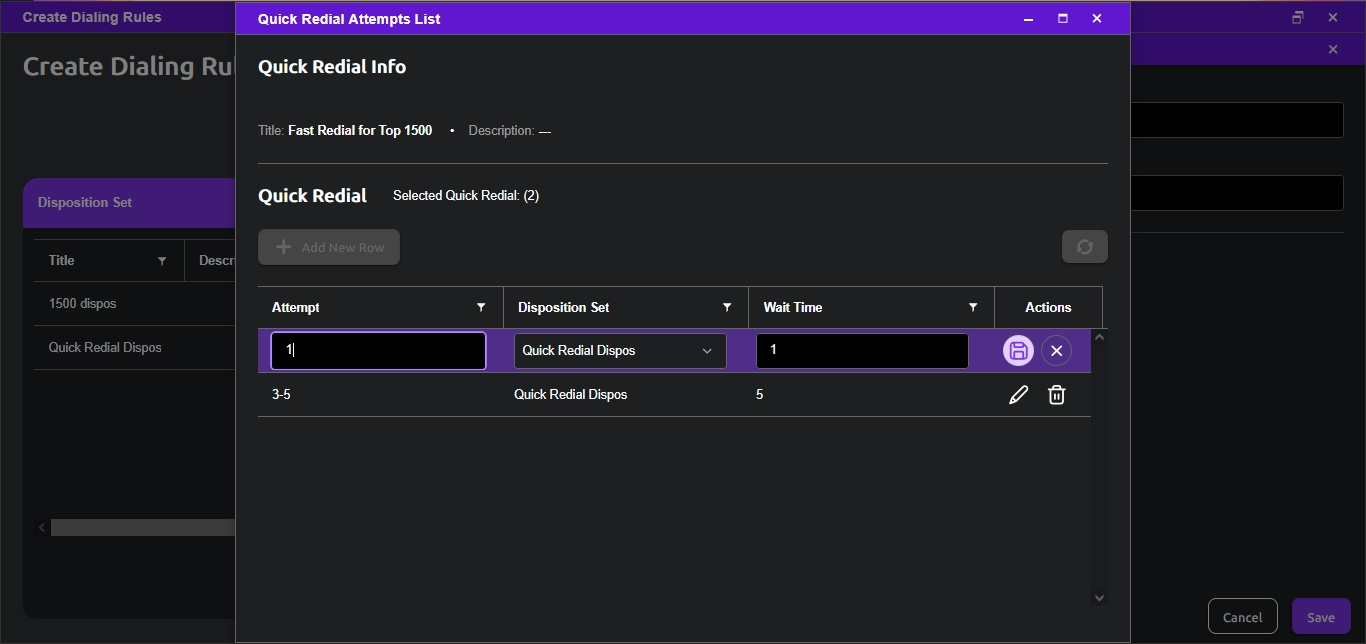
Now, let us move to Disposition Sets. This area lists all disposition sets available, which can be reviewed or edited by clicking on the desired one. This will open a new window with the title (name), description, and a link to all Dispositions included in this Disposition Set, whihc is accessed by clicking on the configuration icon.
A new Disposition can be added, deleted, or seleceted/deselected. Any system and non-system available disposition can be used in the set.
Refer to the following picture.
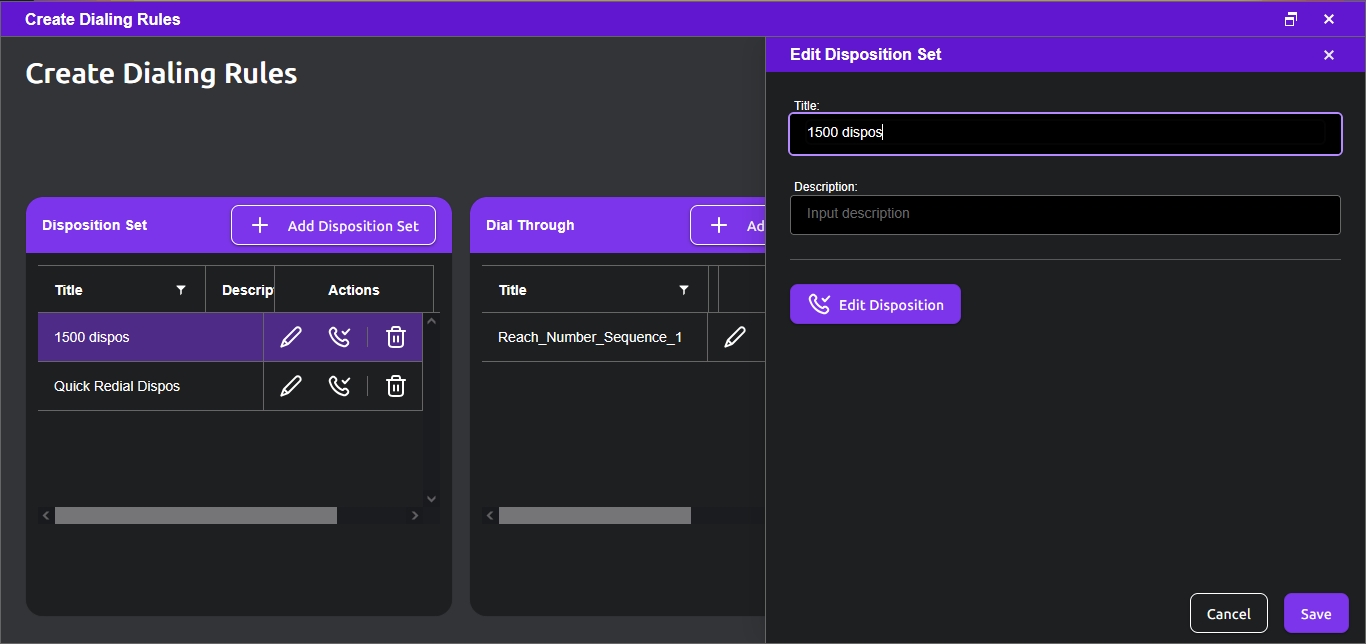
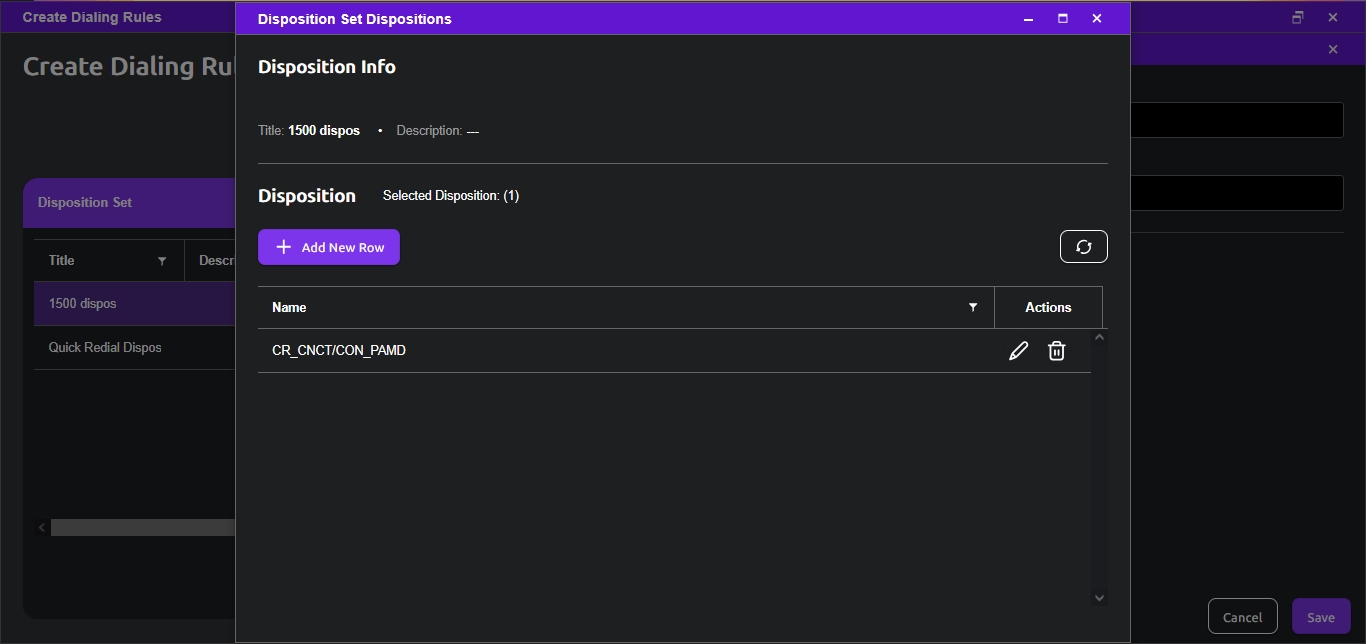
In summary, based on the examples in this article, the campaign User-Guide-Documentation has Fast Redial enabled using the fast redial test Fast Redial rule-set, which includes two Attempt Lists. One of those lists indicates that on attempts 1 through 3, if the resulting call disposition matches one in the fastredial Disposition Set, wait for 5 minutes and then redial the number (assuming there are no other conditions preventing it, like outside of dialing hours, contact is not callable, etc.).
So, for example, if a corresponding number is called for the first time, which is attempt #1, resulting in a disposition of CR_CNCT/CON_PAMD, the system will wait 5 minutes after which it will immediately redial the number (using the same Caller ID from attempt #1).
Outbound Call Management often requires recordings to be played to the called party, such as when leaving voice mail. These messages can be configured from an audio file (e.g. MP3 upload) or from a TTS audio script (previously defined Script).
To access the setup area, click on the Setup button on the right side of the top area of the GUI, which will disply the Setup menu. Find the Settings section and click on Voice Settings. Refer to the following pictures.
When the Voice Settings panel is displayed, click on the Outbound Voice Prompts tab and the list of voice prompts, if any, is displayed. To add a new one, click on Add Voice Prompt button, which will open a configuration panel. To upload an audio file, click on the Upload button; if instead TTS is to be used, use Audio Script under Audio Options and select a pre-defined script (refer to Scripts article). Then continue to the next fields to select the applicable Campaign, Sub-campaign, and Rep associated with this voice prompt. Next, under Audio Options, select what is the message going to be used for (multiple selections are possible); refer to the table that follows for a description of each option. Finally, use the Active switch to have the voice prompt enabled or disabled.
Refer to the following picture.
Voice Prompt Usage Options:
| Answering Machine Message | The message will be used for voicemail message actions |
|---|---|
| Hold Message | The message will be played when the called party is put on hold |
| Live Message | The message will be available for on-the-fly selection and playback by the agent |
| Abandoned Message | The message will be played when the system is about to drop the call, before disconnecting |
| Auto Play | The message will be played automatically when the call is connected to an agent. |
There are two special tone notifications that can be customized to utilize a user-provided recording; they are referred to as Custom Outbound Notifications, which are played to the agent when the applicable conditions apply. They are as follows:
_BEEP_ : This is a notification that is played to the agent when the system dials a call automatically (outbound, not including Progressive). The default beep can be modified by creating an Outbound Voice prompt, naming it _BEEP_ (file name of the custom recording)._HANGUP_ : This is a notification that is played to the agent when a call hangs up for any reason. The default beep can be modified by creating an Outbound Voice prompt, naming it _HANGUP_ (file name of the custom recording).For Outbound calling rules, such as Dial Priority, it is important to visualize the availability of Contacts, or Leads, for outbound dialing purposes. This is usually presented by the DialedIn solution by indicating three count types: Available, Available Today, and Available Now. Refer to the following picture.
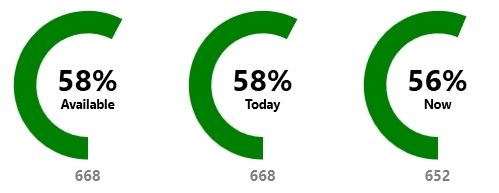
Refer to the following tables for definition of these Lead (Contact) Counts.
| Available | The Lead’s latest Call Status is a disposition that is defined as Callable |
|---|---|
| AND | |
| The Lead’s current Call Attempt Count is less than the Campaign’s Maximum Lifetime Call Attempts |
| Available Today | Is Available |
|---|---|
| AND | |
| The Lead’s current Call Attempt Count is less than the Campaign’s Maximum Daily Call Attempts | |
| AND | |
| {Now minus the Lead’s Last Call Time} is greater than the Campaign’s Redial Wait Time |
| Available Now | Is Available Today |
|---|---|
| AND | |
| Now is within the Campaign’s Dialing Hours, according to the Campaign’s Timezone | |
| AND | |
| The area code of Lead’s Primary Phone is NOT {included in the No Call States list AND associated to the Campaign} | |
| AND | |
| The Lead’s Primary Phone is NOT included in the DNC (Do Not Call) internal list. |
The purpose of the Inbound Contact Center is to be able to automatically and efficiently direct inbound calls to the right place, and for that we need to define appropriate rules and the corresponding greetings and call flows.
The main mechanism in DialedIn CCaaS to handle Inbound Calling is the . A Call Queue defines what to do with an Inbound call coming on a Source DID.
In its most basic form, a Call Queue is provisioned with a name (also referred to as Ring Group) to identify it, the Source DID that is receiving calls, the Agent Skills that are allowed to handle those calls, and the Campaign that defines the rules for that call.
To better understand it, if all we have is a Call Queue and a call is received on the Source DID:
A Call Flow is an optional mechanism to enhance the Call Queue behavior; it is a mechanism to define how to react to caller interactive responses (e.g. a digit pressed). During an inbound call, if the caller presses a digit, the system looks for a corresponding Call Flow.
A Call Flow has:
Refer to the following pictures.
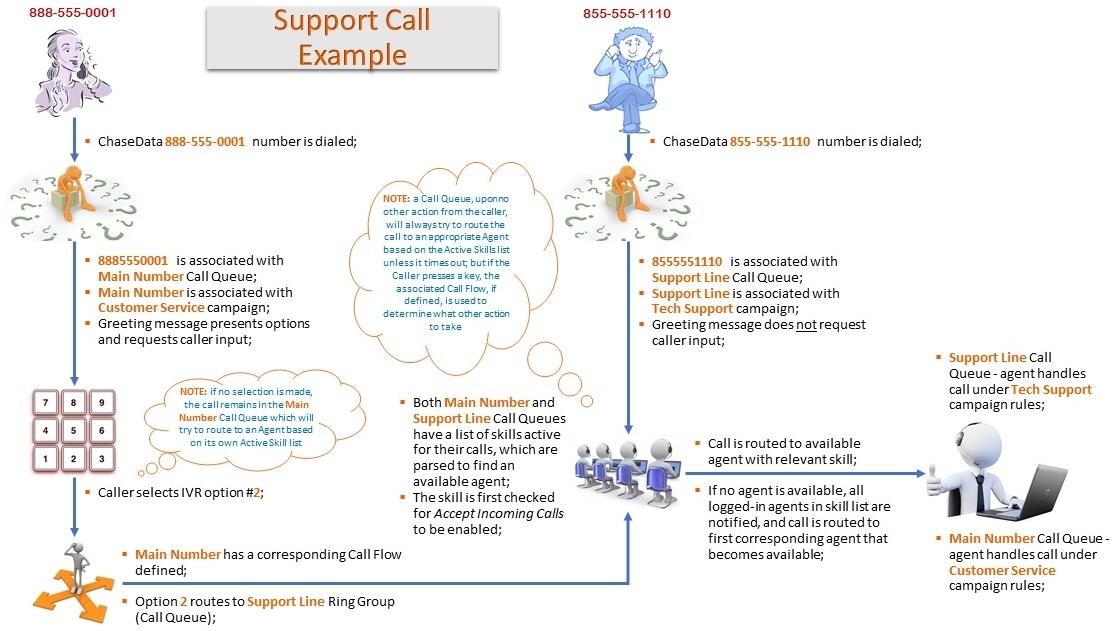
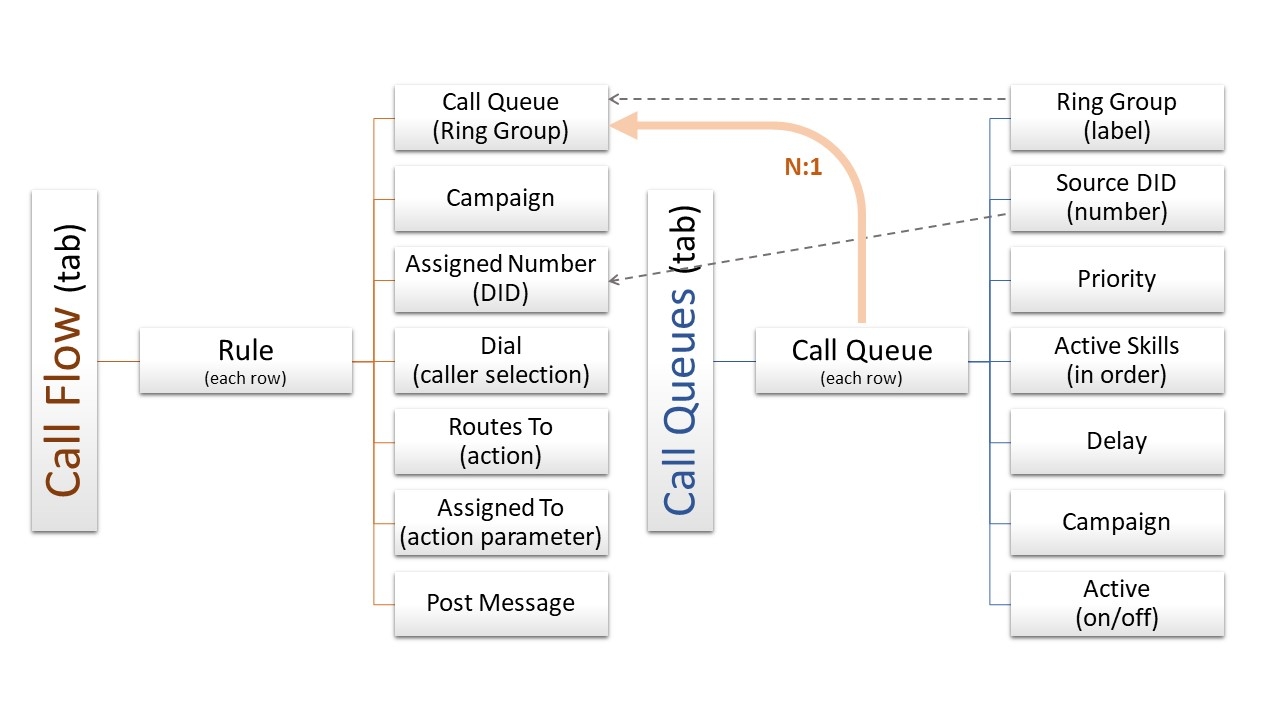
The DialedIn CCaaS system also adds a bypass mechanism with the use of Route by Call Source. On top of that, Greetings and Announcements & Call Routing can be configured to support the navigation of the caller into the Call Center using customized messages.
It should be noted that a DID (Direct Inward Dialing) number can only be provisioned by the Master System Administrator (DialedIn); after this happens, the DID is made available in Call Queues, as Source DID.
So, now let’s get to the GUI.
To perform the corresponding configuration tasks, go the main menu area on the left and click on Inbound Call Settings. On the right, click View in the selection box for either Greetings and Announcements & Call Routing, IVR Call Flows & Call Queues, or Route by Call Source, accordingly. Refer to the following picture.
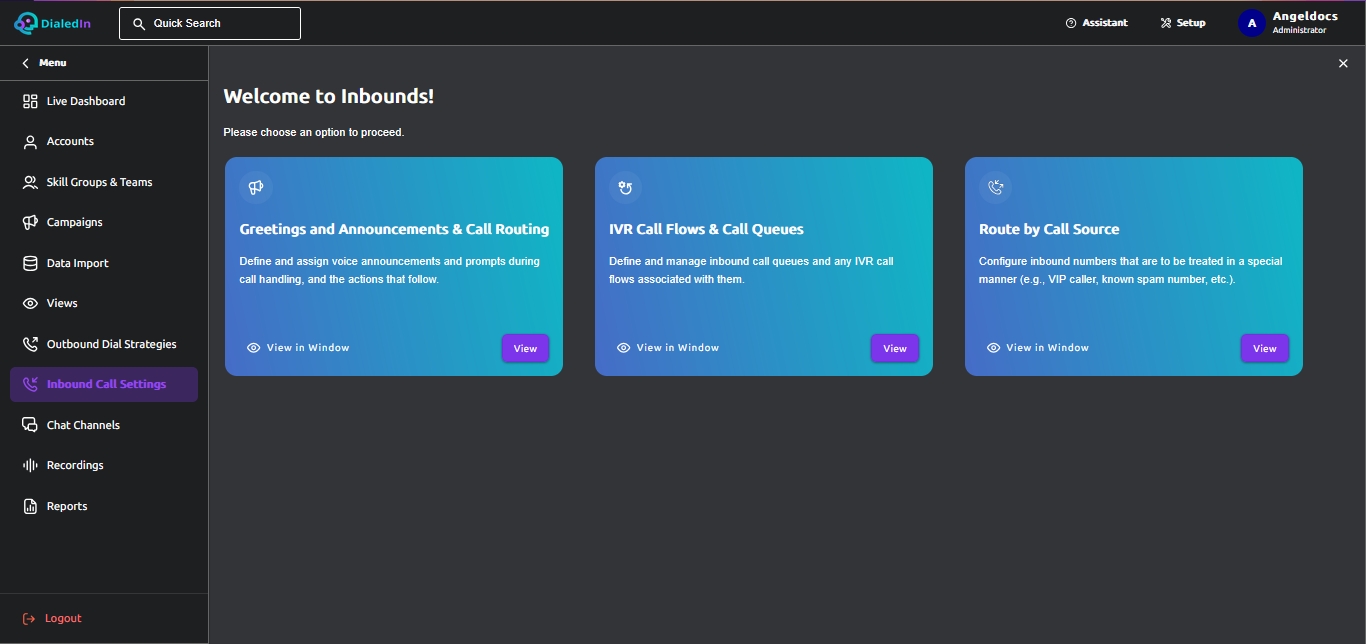
Taking into consideration that for inbound calls to be directed appropriately we may need to interact with the caller to determine the right path, we should configure voice messages for the corresponding greetings and announcements.
There are two groups of voice messages; Inbound Voice Prompts are triggered by an event (e.g. initial greeting when call is first connected) and may request an action from the caller (e.g. leave voicemail); IVR Prompts are played as response to a caller action or selection.
When you click View in the selection box for Greetings and Announcements & Call Routing, you are presented with two tabs, Inbound Voice Prompts (first in focus) and IVR Prompts.
Let’s first look at Inbound Voice Prompts; here we have the list of voice greetings/messages associated with a type of event (Event) and tied to either a campaign, ring group, extension, or skill (Assigned To). Refer to the following picture.
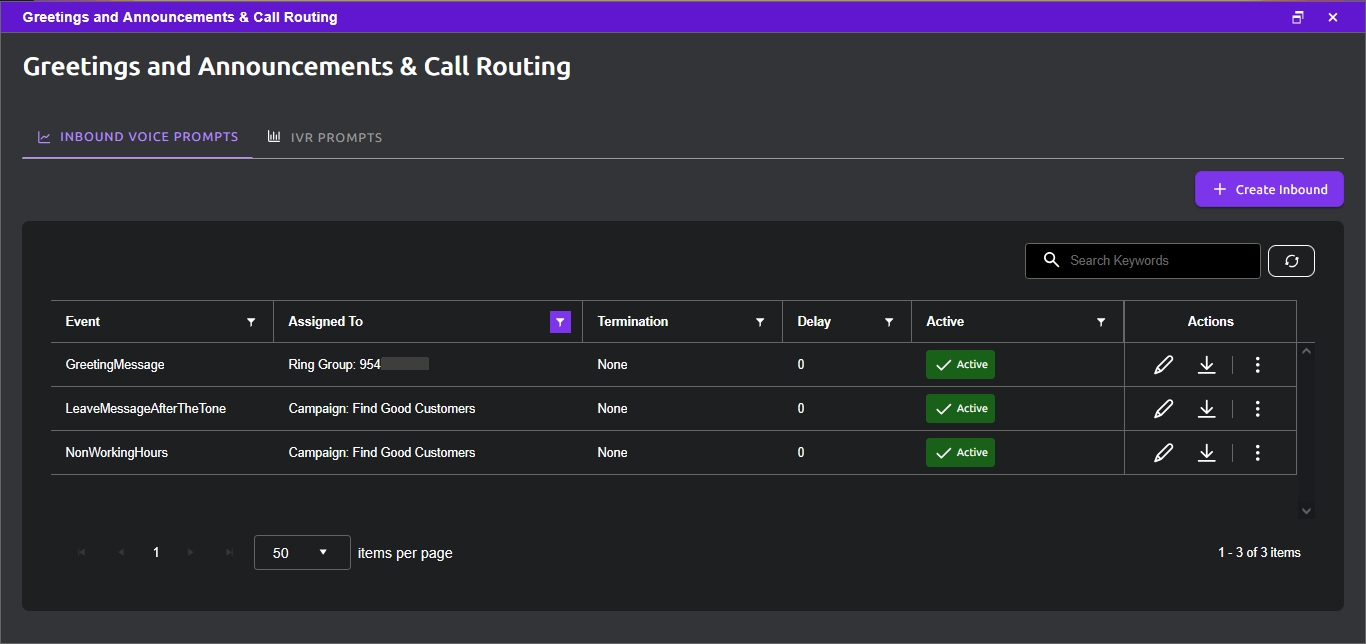
To add a new item, click on the Create Inbound button, which will open the configuration panel. Included is a pull-down menu to Choose Event Type, and options to either Upload an audio recording or to Choose Audio Script (for Text-To-Speech, or TTS). The Event Empty Recording switch allows you to define a rule that is triggered and proceeds to the Termination action without the need for a prompt. Refer to the following picture.
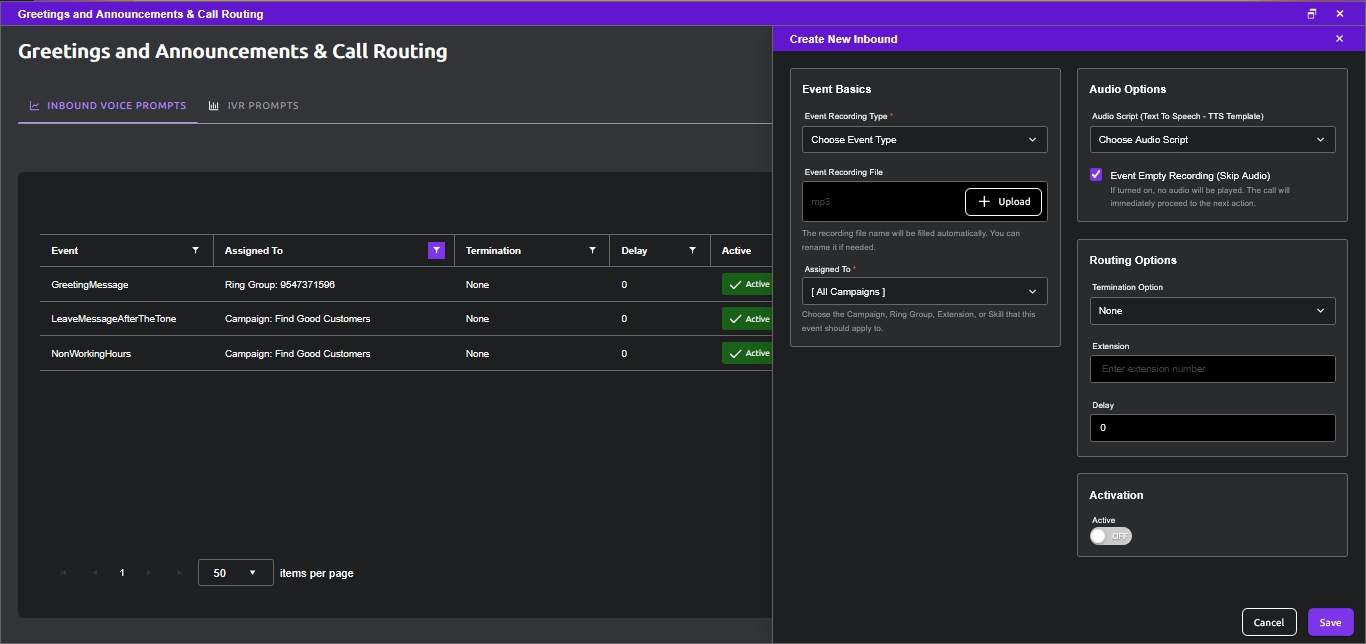
The Assigned To item provides a pull-down menu with all possible Campaigns, Ring Groups, and Skills, so you can associate the event to one of them. In other words, you are indicating to use this prompt when the associated action (e.g. routed to an Extension) takes place.
For example, a Call Queue may be associated with a Campaign, which may have a voice message assigned; but if during the call an action is taken to route to an Extension, the corresponding voice message associated with that Extension is played instead, if there’s one.
Routing Options specify what action to take (Termination Option and Extension) after the voice message for this event is played; Delay provides the time in seconds to wait before the termination action is taken.
The Active switch enables this voice prompt; it’s possible to just provision the message and save it for later without making it active.
Event TypesFollowing are the available IVR Event Types.
| GreetingMessage | This is the first audio message that would be presented to the caller; should include a presentation of the options for the caller to select (e.g., “press 1 for…”). The message will be played in its entirety without interruption even if an agent is available. The system does not include a default message for this event, so one is required, or nothing will be played. |
|---|---|
| WaitForOperator | This is the audio message that is played to the caller when it’s put into the inbound call queue and will be interrupted as soon as an agent becomes available; it loops (repeats) until the call is connected to an agent or another condition is triggered. A default message exists and will be played if a custom one is not configured. |
| NoAvailableOperators | This is the audio message that is played to the caller when there are no agents signed in (logged in); note that if an agent is on break (Busy), this event type does not apply, since the agent could take the call (see WaitForOperator). Typical use is for after-hours (office closed); message could offer to leave a message (would need to set Termination appropriately). |
| LeaveMessageAfterTheTone | This is the audio message that is played to the caller to invite caller to leave a message after an action for Voicemail is triggered; the Termination parameters should be set appropriately. |
| ErrorHasOccured | This is the audio message that is played to the caller if something unexpected has occurred (e.g., no response, wrong digit pressed). |
| Whisper Notification | This audio message is not a voice messages played to the caller, but rather to the agent to notify about the inbound call. |
| GoToOperator | This is the audio message that is played to the caller when the caller chooses the connect-to-operator option. |
| NonWorkingHours | This is the audio message that is played to the caller when the call comes outside of the defined Hours of Operation for the Campaign; the Termination parameters should be set appropriately. |
Following are the available Termination Options.
| None | Does not trigger an additional action to follow |
|---|---|
| Busy | Play a busy tone |
| Hangup | Just disconnect the call |
| Extension | Transfer to an extension or external number; requires to also specify an extension or 11-digit number |
| Voicemail | Transfer to voice mailbox; asks to also specify an extension, but can leave blank to use the campaign’s default |
| InboundSource | Transfer back to a Source DID; requires to also specify the number. |
Now let’s look at IVR Prompts; these are the response voice messages to play against inbound callers’ interactions. These IVR Prompts are assigned to Call Flows as Post Messages; typically, this message is only needed when a Call Flow response rule (a row representing a digit-pressed option) is not configured to route anywhere.
To configure, select the IVR Prompts tab.
To add a new item, click on Create IVR Prompt, which will open the details panel, where you can configure a message to be played, either using an Event Recording File or a Text-To-Speech (TTS) script. Either Upload an audio file (i.e. MP3 file) or select a pre-defined Audio Script (TTS) from the pull-down menu (refer to Scripts section). The Active switch allows you to enable or disable the message. Save to apply the update.
Refer to the following picture.
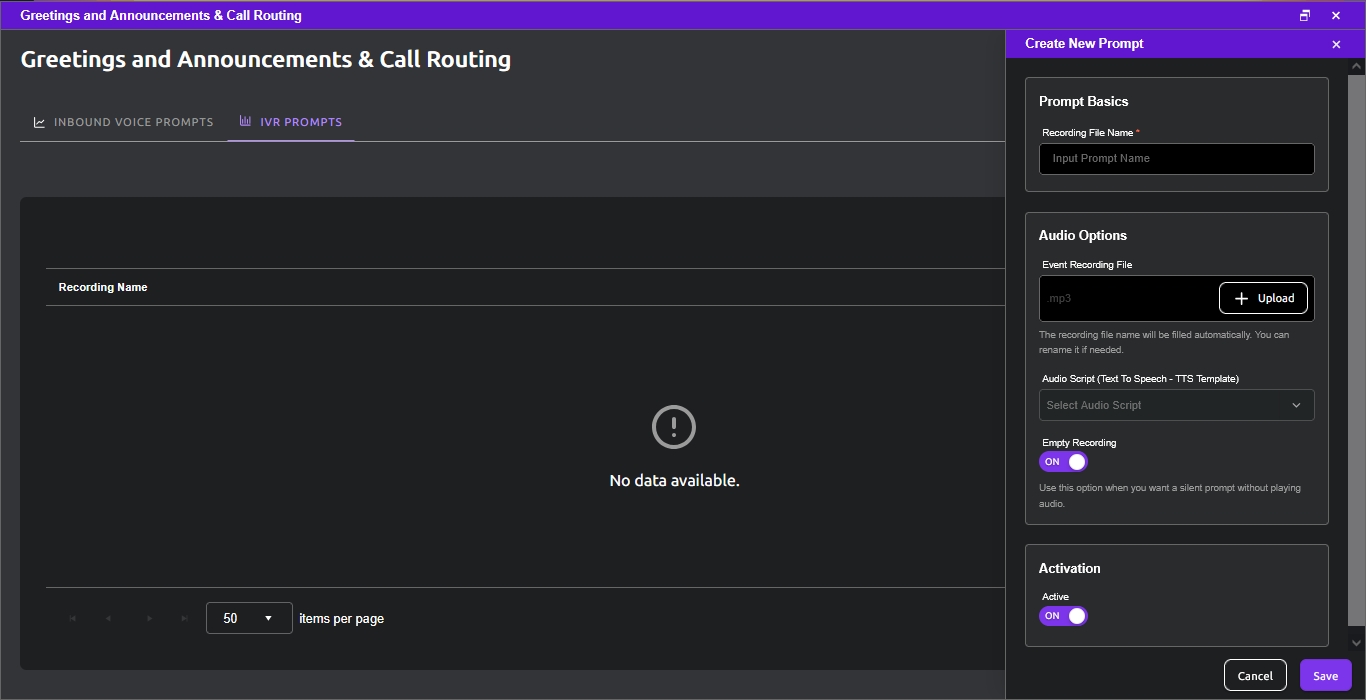
When you click View in the selection box for IVR Call Flows & Call Queues, you are presented with two tabs, Assign Queues and IVR-Call Flows.
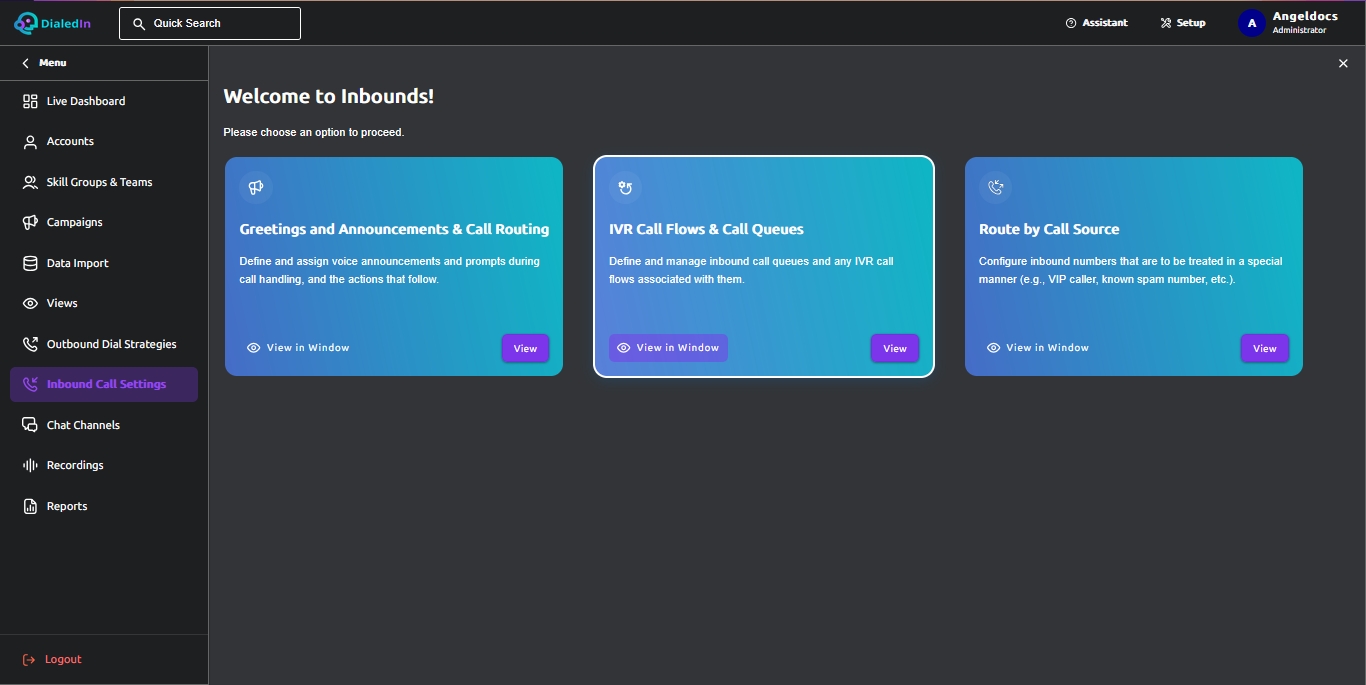
Let’s first look at Assign Queues (select that tab if not already in focus), where we have the list of pre-provisioned DIDs. Here, you define the Source DID as a Ring Group, giving it queue properties (Call Queue). Refer to the following picture.
The Parameters for each Call Queue are as follows.
| Ring Group | The name or label for the Ring Group / Call Queue that the Source DID represents |
|---|---|
| Source DID | The number that is dialed by the caller, which is associated with, and defines, this Call Queue |
| Priority | Each time that an Active Skill is selected via the Select Skill drop-down menu (top of window), a value can be entered here to define the order in the list for the Skill to be added; the larger the number, the higher the priority |
| Delay | The time that the system will wait before moving to the next Skill in the Active Skills set |
| Active | Indicates if this Call Queue / Ring Group is active, meaning that this Call Queue will be processed if a call comes in with this Source DID |
| Campaign | The Campaign that defines the behavior for handling calls with this Call Queue |
| Active Skills | The list of Skills of the Agents that can be connected to calls in this Call Queue; the system will parse the list in the order (Priority) set until it finds an available Agent; note that the Agent must also have Accept Incoming Calls set (see Agent Skills) to be selected |
Let's look at how the Priority definitions above work. When we first get to this list, no Skill has been selected, so on the upper-left we just see Select Skill in the pull-down menu.
Hence the Priority column does not give us much information. We will need to select a Skill to see if the Ring Group's Active status is ON for that Skill and, if so, what is the Priority for that Skill on that Ring Group. Do note that if no Skill is selected, the Active status refers to the Ring Group in general.
Let's select a Skill from the pull-down menu to review and update its Priority for each Ring Group.
When you select a Skill, Priority and Active status change to reflect their values for that Skill against each Ring Group listed.
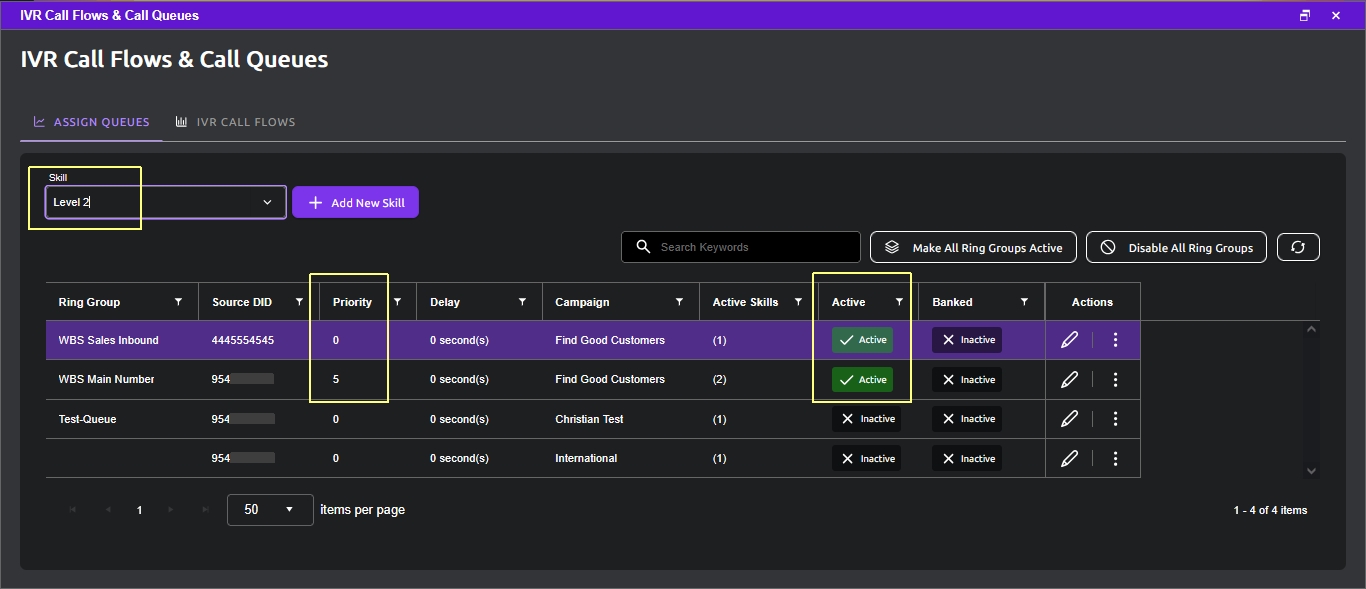
You can verify this by opening the Edit Panel for a Ring Group. There, Priority and Active status are shown again, and can be updated as needed..
In addition, Active Skills shows all Skills that have an ON Active status for this Ring Group, in their order of Priority (remember, higher Priority number is higher priority and listed first).
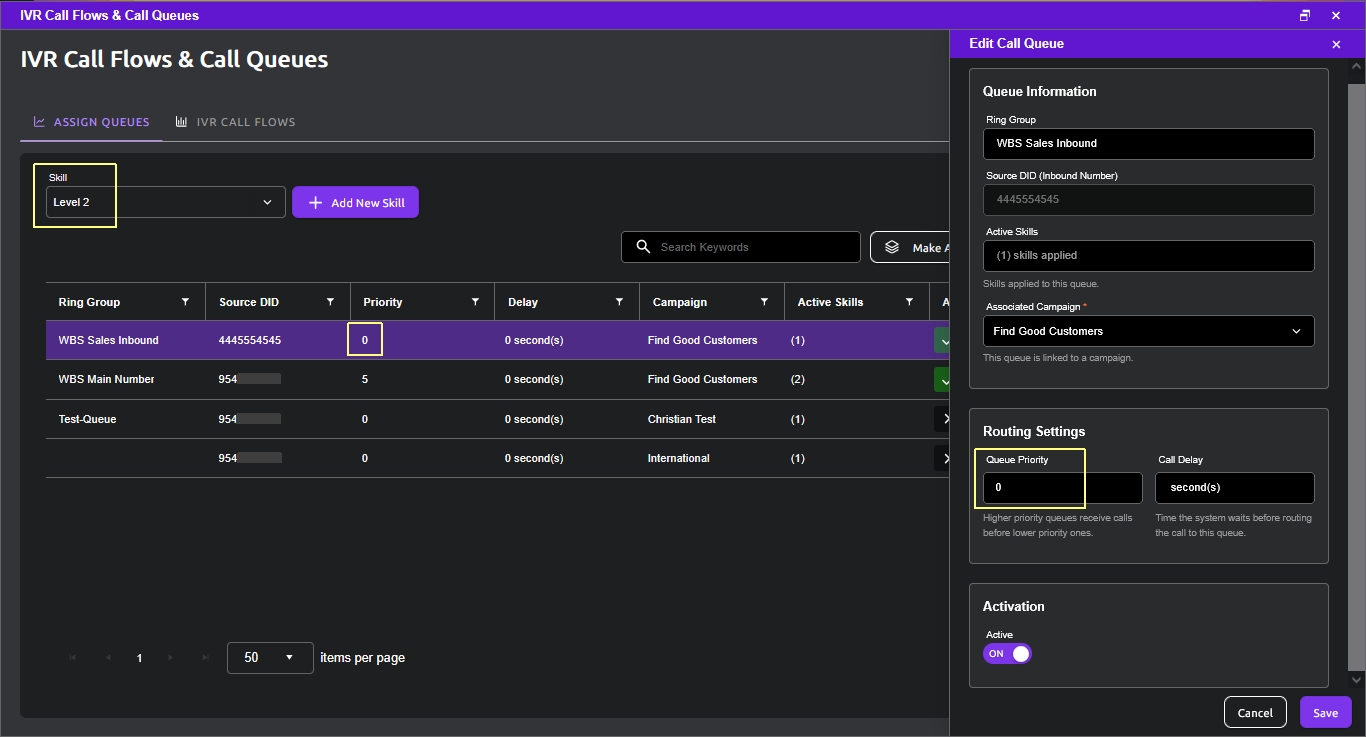
You can verify that by selecting the other Skill in that list.
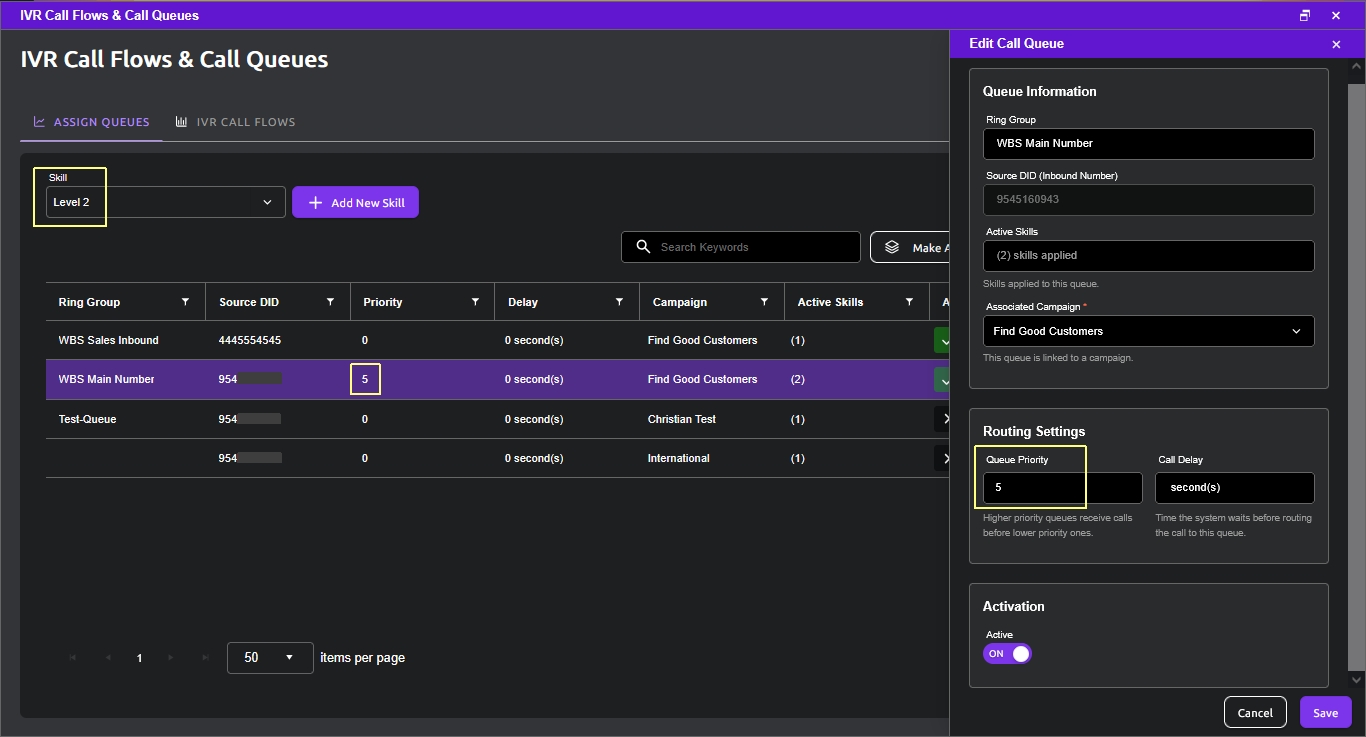
That is how you manage the priority of Skills within a Ring Group.
Let’s now look at IVR-Call Flows (select that tab if not already in focus); here we have the list of rules that apply to every desired combination of DID (Assigned Number) and caller response to the IVR options (Digit Pressed>), which is what triggers the rule. If we group the rules for one Assigned Number, we have the Call Flow for tat Assigned Number (DID). Refer to the following pictures.
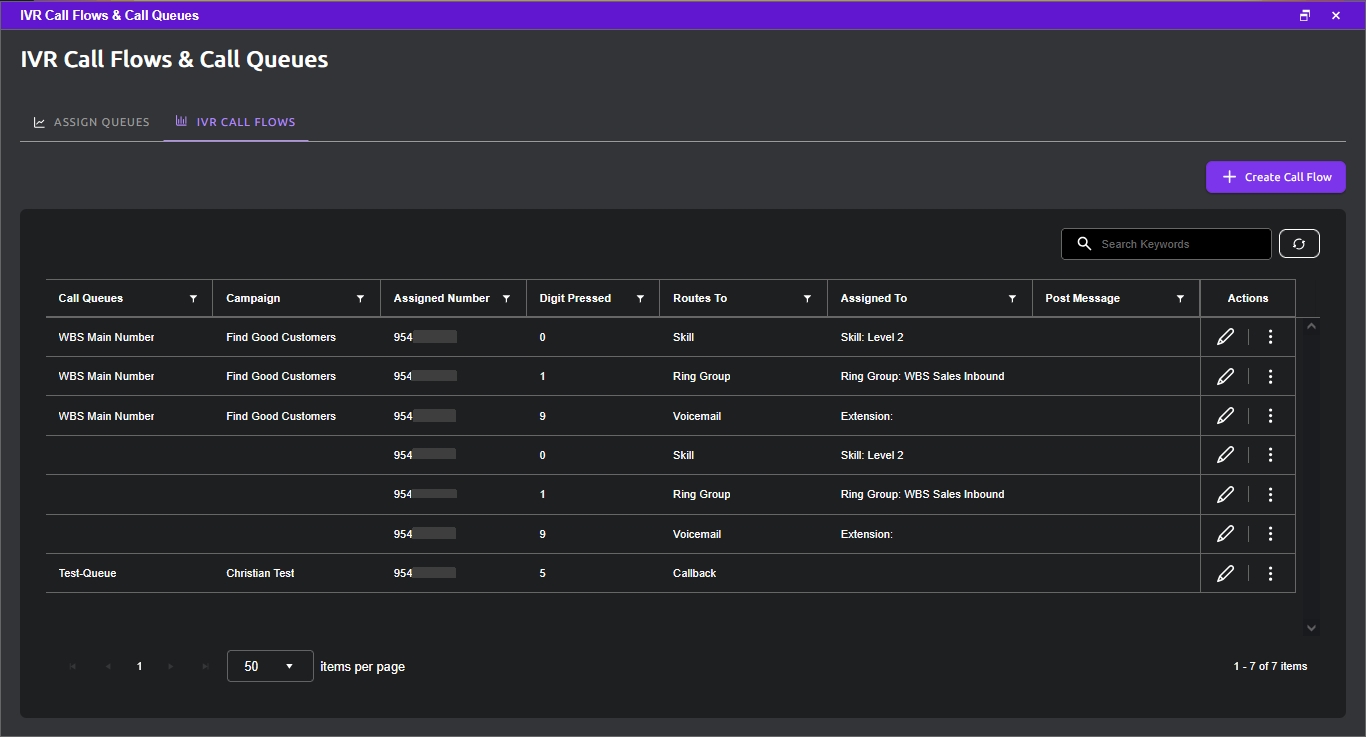
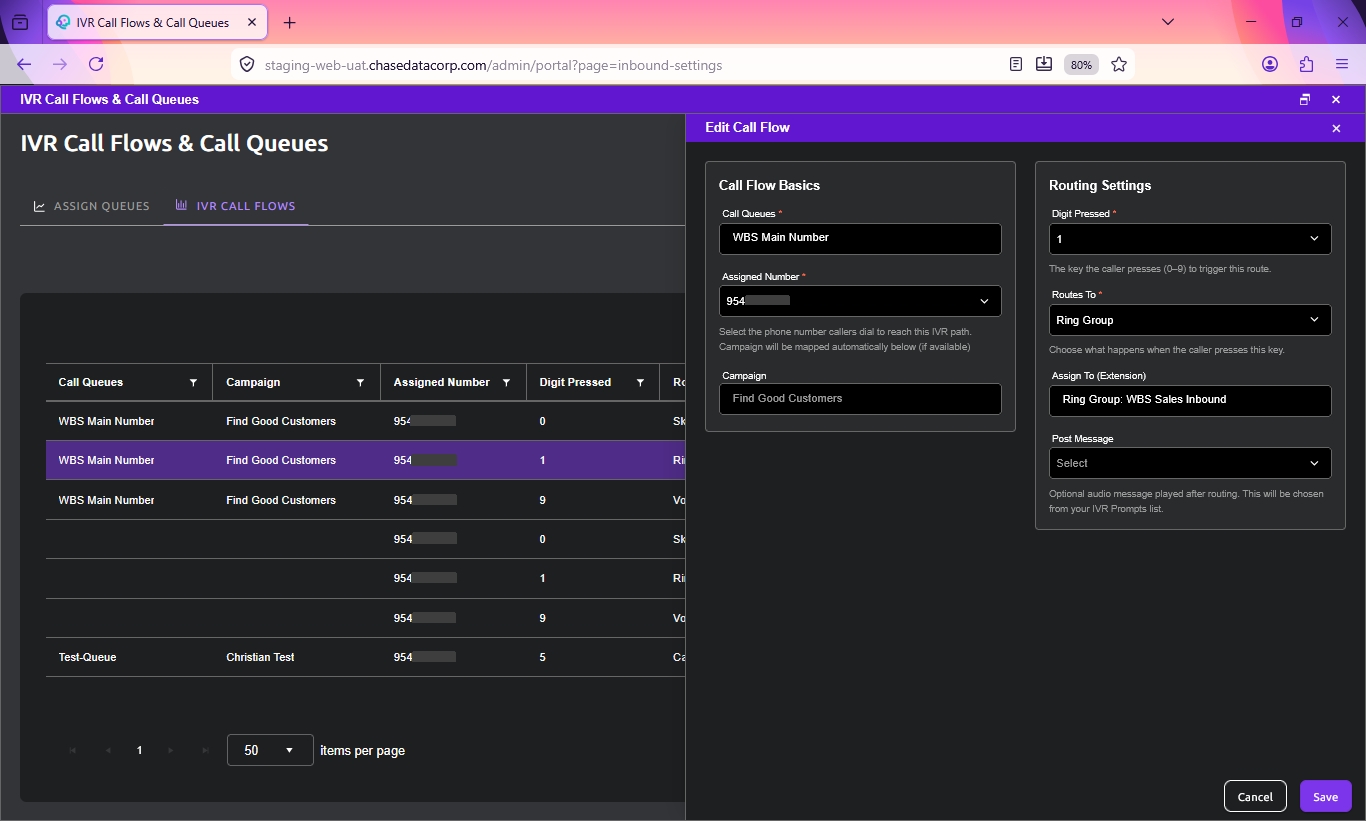
The Parameters for each Call Flow are as follows.
| Call Queue | The name/label for the Call Queue. It is populated from the Assign Queues tab; if it’s changed here, it will update it everywhere in IVR-Call Flows and Assign Queues. |
|---|---|
| Campaign | The Campaign that defines the Inbound Call Center behavior for this Call Queue. It is populated from the Call Queues tab, and it cannot be modified. |
| Assigned Number | The number to which this rule (and Call Queue as a group) is applied |
| Digit Pressed | The caller selection that triggers this rule |
| Routes To | The action to be taken; some actions are status setting actions, other are call routing actions (see the Routes To Actions table that follows) |
| Assign To | If applicable, parameters specific to the Routes To action (see the Routes To Action Parameters table that follows) |
| Post Message | The optional audio message to play to the caller before applying the actions defined for this rule; a typical case is when the action is to Route To Operator, first playing a message telling the caller to wait until he/she gets connected; the pull-down menu will show messages configured in the IVR Prompts tab of Greetings and Announcements. |
The Routes To Actions options are as follows.
| Voicemail | Route the caller to voice mail; if no Extension is specified in the Assign To parameter, it will be sent to the general mailbox |
|---|---|
| Operator | Route the caller to the operator; the system will try to route to an available Agent |
| Not Interested | Sets status of the inbound call to Not Interested; terminates the call and sets disposition/Wrap-Up Code accordingly |
| DNC | Sets status of the inbound call to a DNC disposition; terminates the call |
| Skill | Route the call to agent with the Skill as specified in the Assign To parameter |
| Extension | Route the call to an external number as specified in the Assign To parameter |
| Callback | Sets status of the inbound call to a Callback disposition; terminates the call |
| Agent Extension | Route the call to a specific agent Extension as specified in the Assign To parameter |
| Ring Group | Route the call to another Ring Group / Call Queue as specified in the Assign To parameter; useful when a main number is used to route to different department; care must be taken not to create infinite loops when each Call Queue routes to each other. |
The possible Routes To Action Parameters are as follows.
| Extension | Should enter a valid agent extension |
|---|---|
| Skill | Should enter a valid and compatible agent skill |
| Number | Should enter a valid telephone number |
| Ring Group | Should enter a valid Ring Group / Call Queue. |
When you click View in the selection box for Route by Call Source, we can configure inbound numbers to be treated in a special manner (e.g. hang up to a known spam number, direct a special customer to a specific agent or skill, etc.). To do so, we configure the rule based on the caller ID of the inbound call.
Note that a Campaign may be set to Ignore Route by Call Source, which will effectively turn off these rules.
Refer to the following pictures.
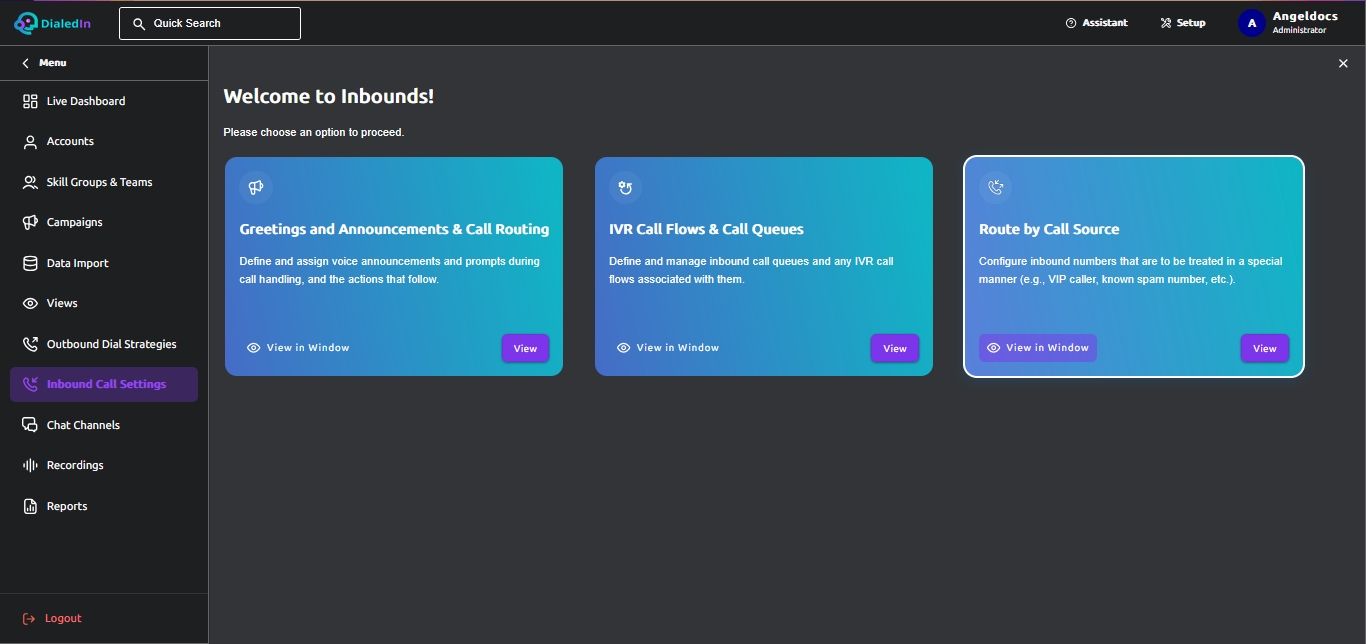
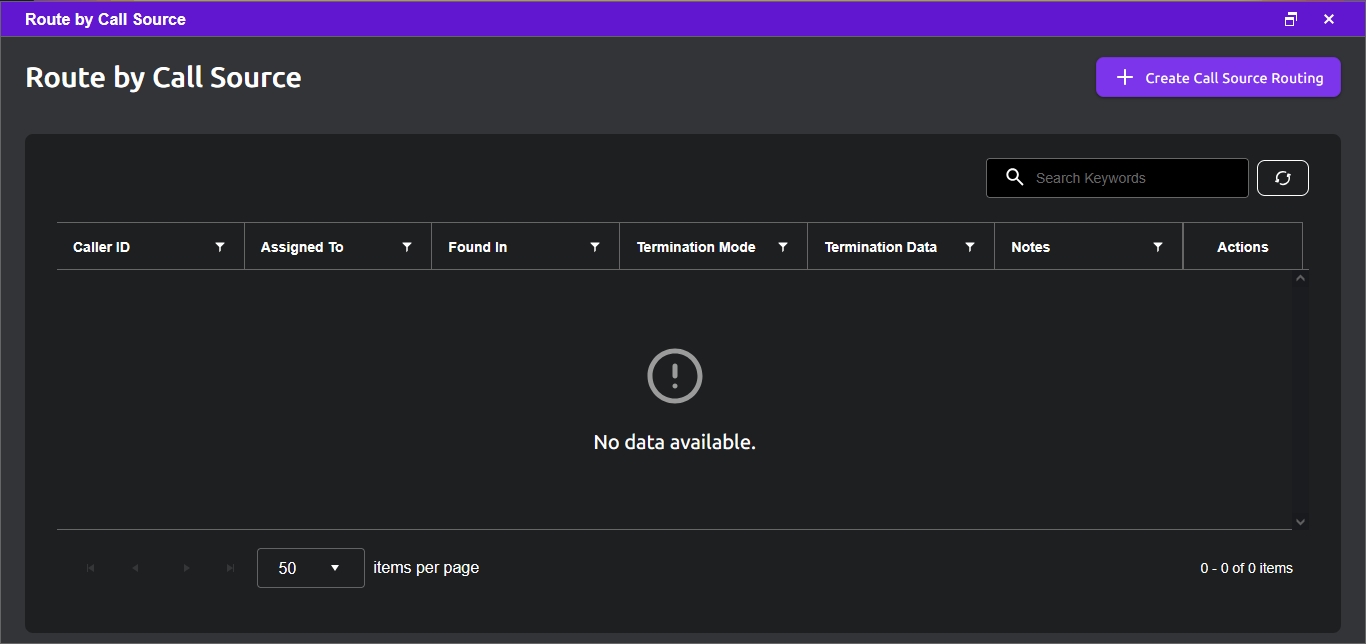
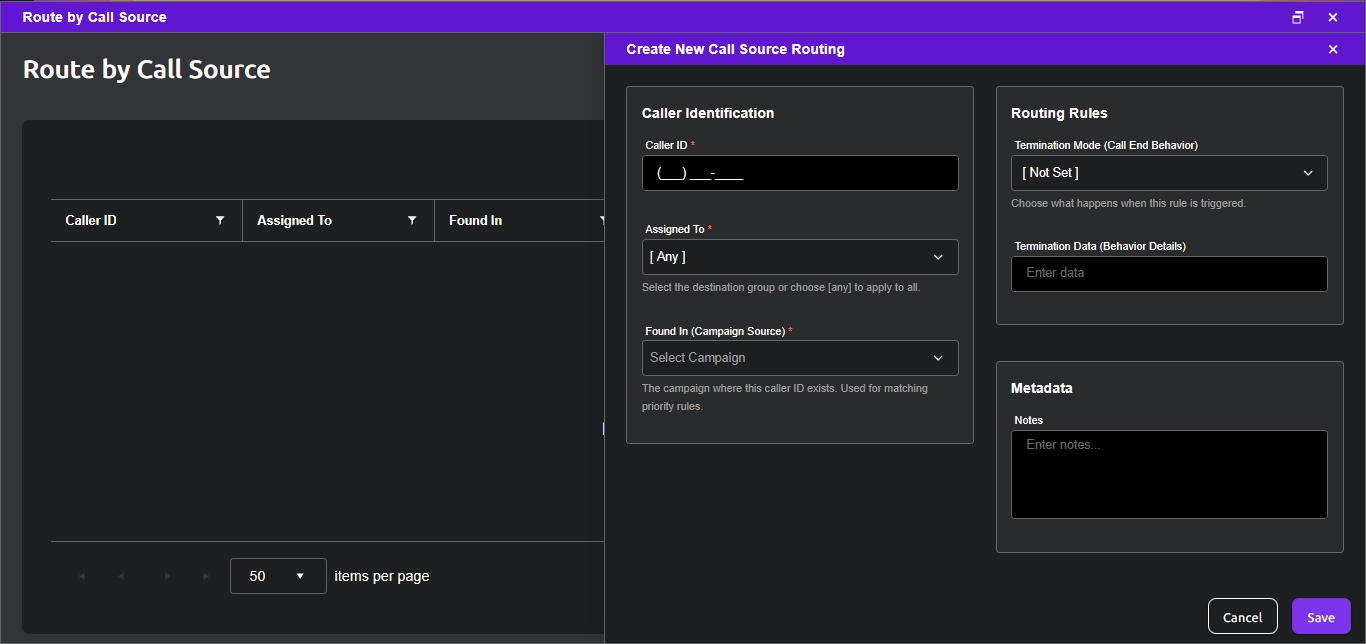
To put it into perspective, you may want to check that if you receive a call from a number with caller ID 555-111-0000, which corresponds to a lead (Contact) found in Campaign-A, and arrives on 888-555-4444, where 888-555-4444 is associated with Campaign-X, then send it to the specific agent Extension-N.
The Parameters for each rule are as follows.
| Caller Id | The number that identifies the call source |
|---|---|
| Assigned To | An optional Campaign or Ring Group (Call Queue) associated with the number where the call arrived |
| Found In | An optional Campaign with which the corresponding lead (Contact) is associated with |
| Termination Mode | How to handle the call (where to route it); see following table for description of the options |
| Termination Data | Parameter value for Termination Mode, if applicable |
| Notes | Free text comment |
The possible Termination Modes are as follows.
| Voicemail | Route the caller to voice mail; if no Extension is specified in the Termination Data parameter, it will be sent to the general mailbox |
|---|---|
| Skill | Route the call to an Agent with the Skill as specified in the Termination Data parameter |
| Extension | Route the call to an external number as specified in the Termination Data parameter |
| Agent Extension | Route the call to an agent Extension as specified in the Termination Data parameter |
| InboundSource | Re-route the call to a different inbound source (e.g. number) |
| Busy | Play a busy tone |
| Hangup | Just terminate the call. |
The possible Termination Data values are as follows.
| Extension | Should enter a valid agent extension |
|---|---|
| Skill | Should enter a valid and compatible agent skill |
| Number | Should enter a valid telephone number |
| Ring Group | Should enter a valid Ring Group / Call Queue |
| Source | Should enter a valid inbound source (e.g. number). |
In this section we go through lists of data that are to be created for use by other parts of the configuration, as well as tools that aide in configuration tasks.
Since DialedIn CCaaS deals with Campaigns associated with Outbound Calling and Inbound Contact Center, the collection and management of Contacts, or leads, is of essence. For that purpose, the system provides a minimum set of important contact data fields considered necessary for the effectiveness of the solution; but DialedIn understands that every business has its own additional data that needs collecting, maintaining, and making decisions upon, and therefore the DialedIn CCaaS solution provides the flexibility for defining additional fields that correspond to those needs. That is what Custom Data is about, expanding and customizing the solution with additional fields to collect data, store it, and act upon it.
Note that all system-provided and custom data can be referenced for agent displaying (Call Info screen), as well as for information gathering during inbound and outbound call handling activities; the custom data definitions, together with page scripts, define and enforce whether a field is to be displayed, required, read-only, list-selectable, etc.
Before defining Custom Data, it’s important to know first what fields have already been defined by the system, so not to create duplicates and the confusion it would cause. It’s also important to understand that these system-defined fields are permanent and non-replaceable; they should be used for what they represent in order to ensure proper behavior of the system.
System-Provided DataSo, following is the list of System-Provided Contact Fields available for every Campaign.
| FirstName | Should always be used as the contact's first name |
|---|---|
| LastName | Should always be used as the contact's last name |
| ClientId | Should always be used as the contact's identifier (e.g. customer number) |
| PrimaryPhone | Should always be used as the contact's main telephone number |
| Address | Should always be used as the contact's street address |
| City | Should always be used as the city of the contact's address |
| State | Should always be used as the state of the contact's address |
| ZipCode | Should always be used as the ZIP code of the contact's address |
| Notes | Can be used for general purpose notes and comments about a contact |
Custom Data is defined on its own in packages (tables) to make them available to any campaign (see Custom Table under Campaign Profile). To configure them, go to the main menu area on the left and click on Campaigns; on the right, click View in the selection box for Define Custom Data. Now, either select an item to modify, or click on the Create Table button to add new table, which will open the table details pane. Provide a Table Name and an optional description. After you Save and are back in the list of tables, you can click the corresponding icon for Advanced Table Fields, so you can Create Fields or update existing ones. Refer to the following pictures.
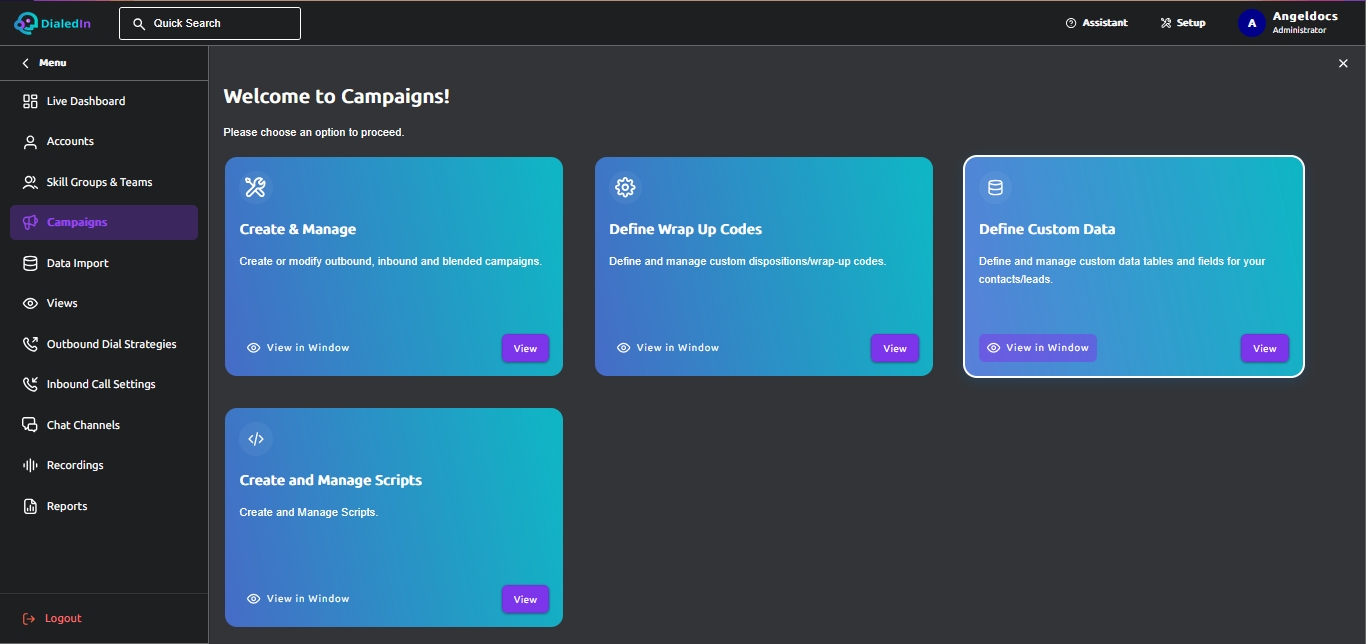
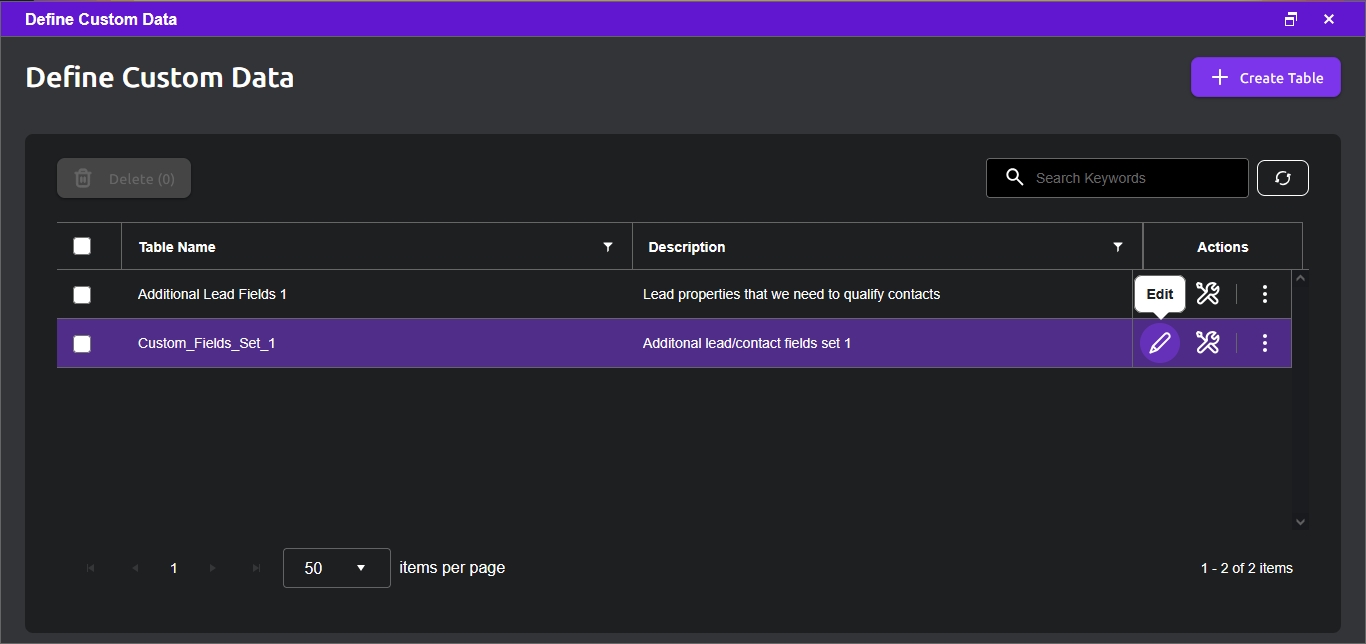
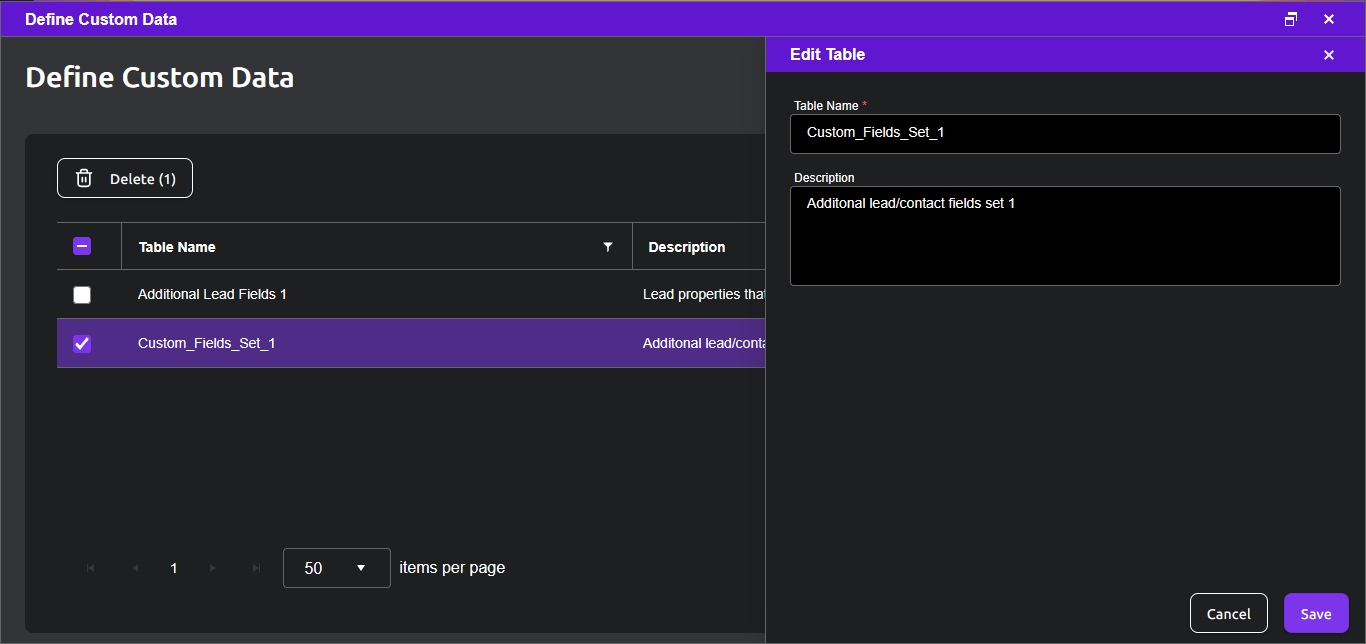
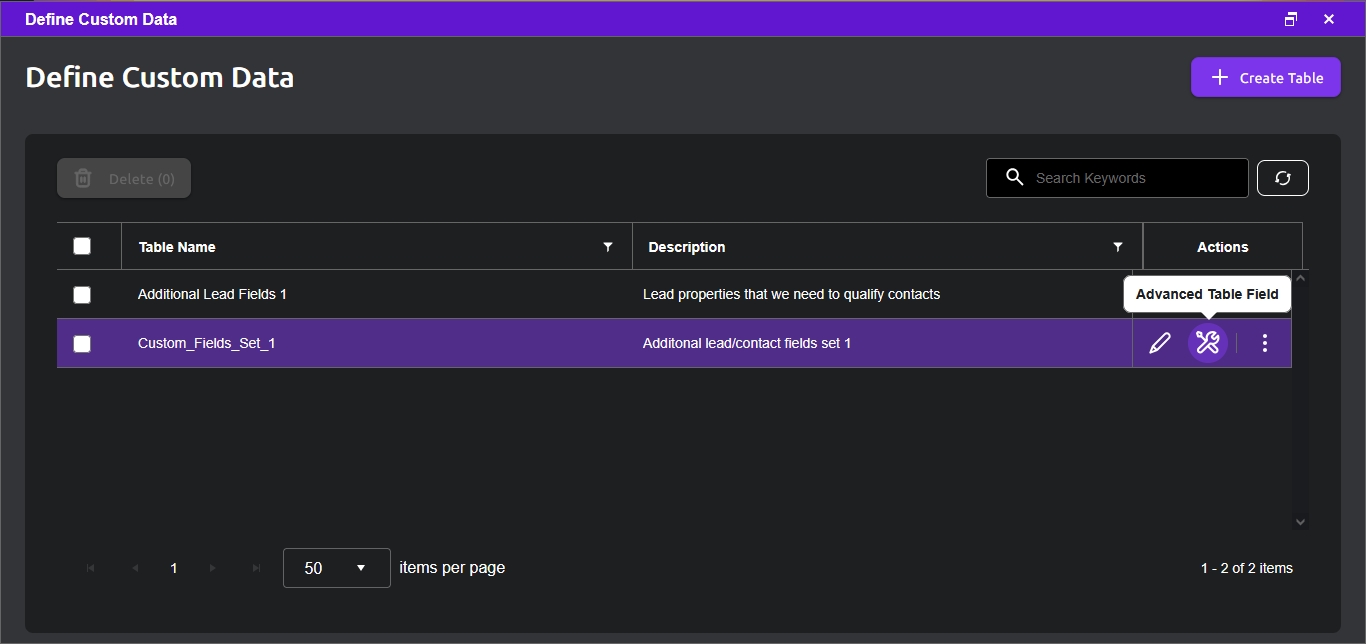
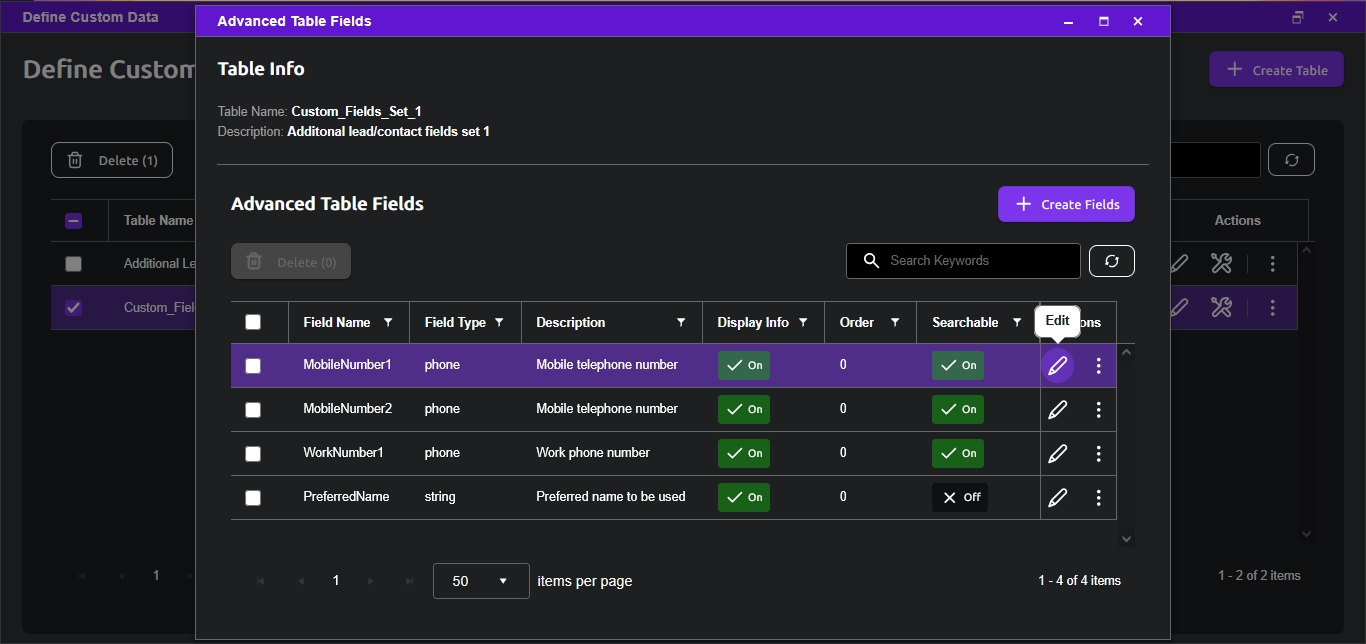
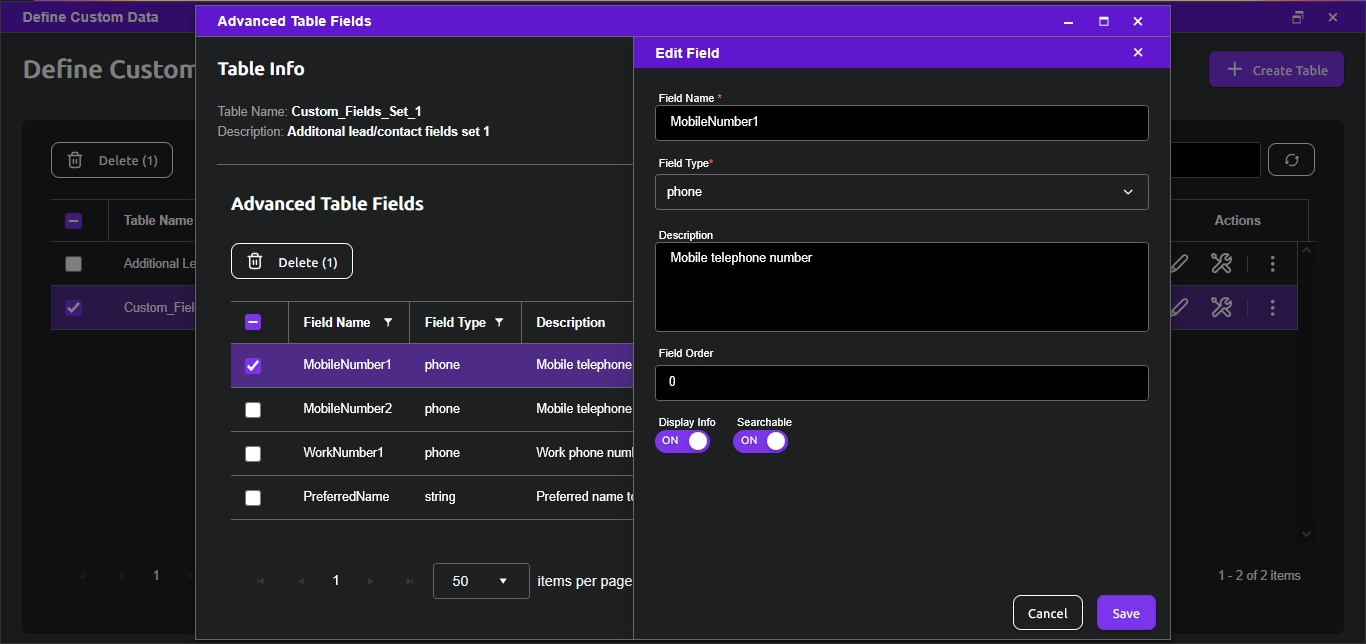
Following is the description of every column in Advanced Table Fields.
| Field Name | Name that identifies the field system-wide, including in the system default Call Info page, page and integration Scripts, Data Import, etc. |
|---|---|
| Field Type | The formatting type for the contents of the field, string, text, or phone; see Field Types |
| Description | Description of the type of information that the field is for |
| Display Info | Switch to enable the field to be displayed to the agent when using system Call Info pages; some fields may be for purposes other than Agent display/update, such as integrations |
| Searchable | Switch to enable system to allow this field to be used as a search key for the record |
| Field Order | Optional parameter to indicate in what order to display fields when using system Call Info pages; higher number indicates first in order, i.e., displayed or presented first or in a higher position in the list. |
Following are the Field Types available.
| string | Allows the use of any combination of alphabetic characters, numbers, and special characters; limited to 255 characters; this is the recommended field type for most non-telephone number fields |
|---|---|
| text | Only allows the use of alphabetic characters; an unlimited number of characters can be used |
| phone | Expects a proper telephone number; indicates to the system that this is a number that can be dialed; all fields intended to hold a telephone number should be of this type. |
After an Advanced Table (Custom Data) has been defined, it can be assigned to a Campaign (see Campaign Profile), corresponding contact records can be uploaded (see Data Import), and uploaded/updated records can be searched/viewed (see Lead and Call Records/Views).
Here we discuss Scripts, which allow extending information displaying and gathering with custom forms and fields (e.g. custom HTML pages during call handling), as well as integrations with external systems (e.g. data transfer with external CRMs), and Text-To-Speech (TTS) messages (audio scripts).
To access the setup area, click on Setup on the right side of the top area of the GUI, then click on Scripts. This will open its configuration window, showing the current list of (custom) Scripts available; you can either modify an existing Script by clicking on it, or add a new one by clicking on the Create Script icon. Refer to the following pictures.
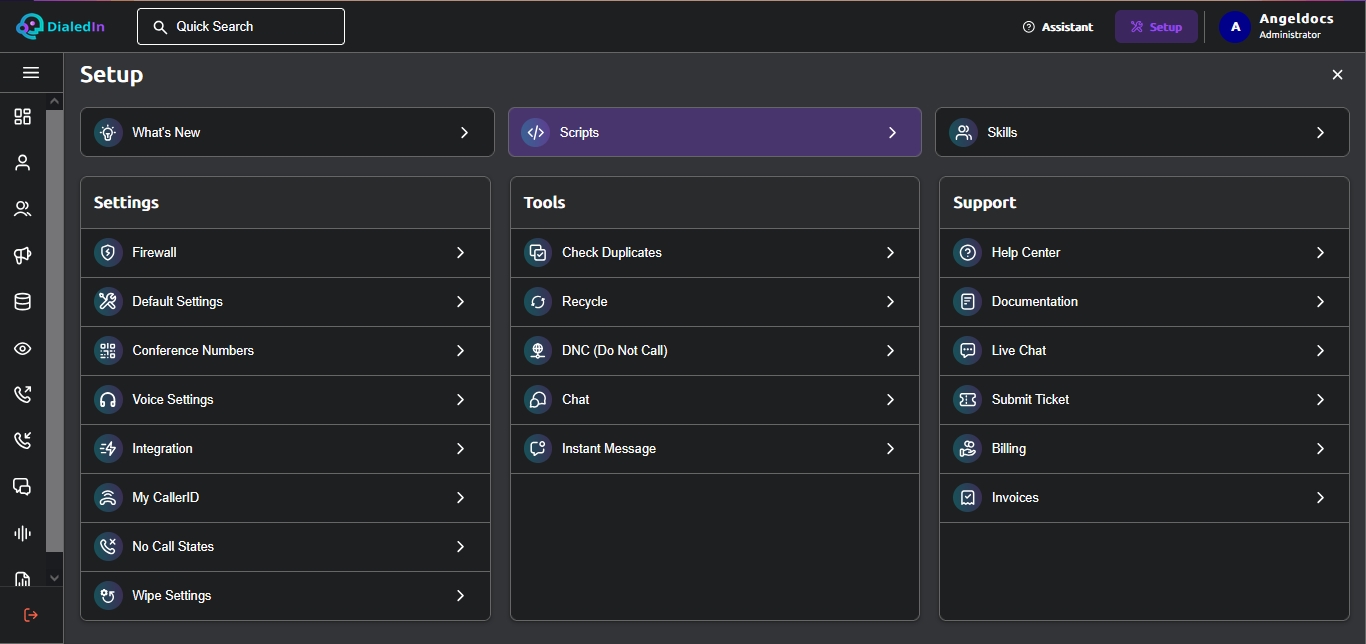
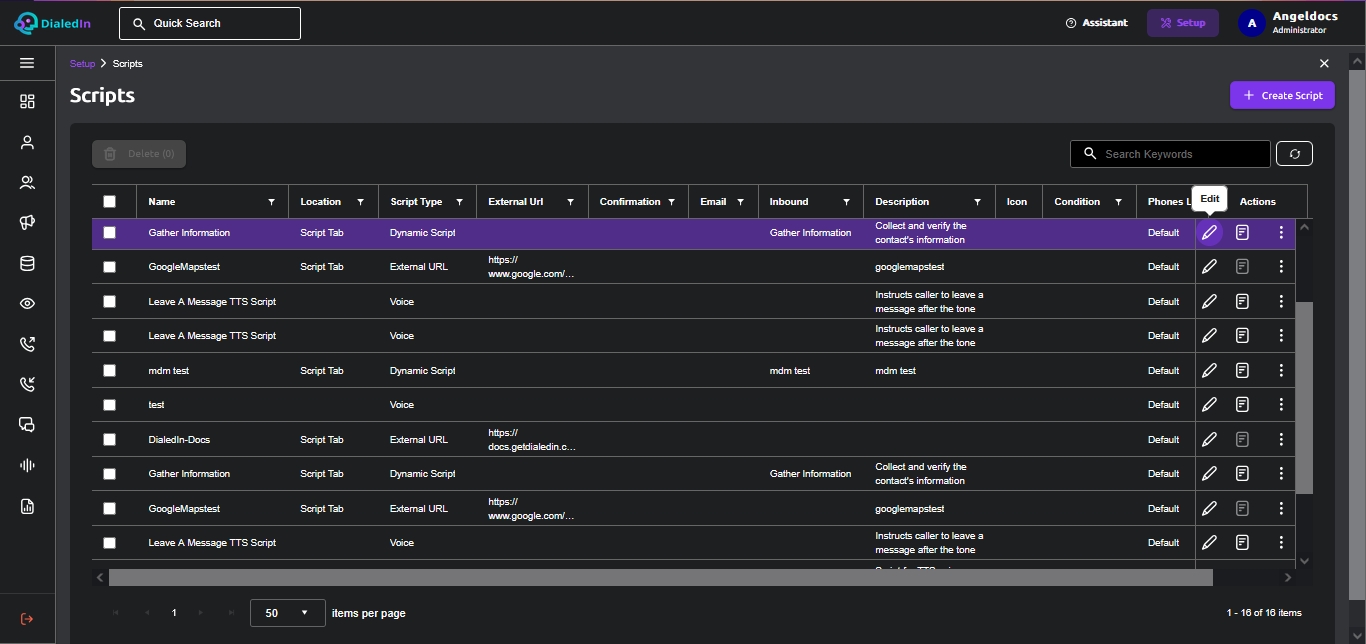
Following is the description of each parameter of a Script definition.
| Name | Name that identifies the Script, so it can be referred by Campaigns, etc. |
|---|---|
| Location | Pull‐down menu to identify where is this Script used; the options are Screen Tab and Custom App; refer to the Script Location table for descriptions |
| Script Type | Pull‐down menu to identify the type of script, with options being Dynamic Script, External URL, and Voice; refer to the Script Type table for descriptions |
| Description | This field can be used for general purpose description and comments |
| Icon | Icon to be displayed for the case of a Custom App |
| External URL | URL address of an external page or tool, when the Script Type is External URL |
| Confirmation | Pull‐down menu presenting the list of all current non-Voice Scripts; typically used to send a submit/response, e.g. an HTML POST message |
| Condition | Optional conditional statement to evaluate whether the script page should be displayed; e.g. subcampaign=”some_subcampaign" |
| Pull‐down menu presenting the list of all current non-Voice Scripts; helps identifying the script or template as one to be used for sending email | |
| Inbound | Pull‐down menu presenting the list of all current non-Voice Scripts; helps identifying the script as one to be presented during Inbound call handling (as opposed to a standard script, which is used on Manual/Preview/Outbound call handling); helpful also for Blended Campaigns (double-purpose script) |
| Phones Lookup | Pull-down menu to indicate whether the system should scan the script page for telephone numbers and replace them with clickable links/icons to execute a call; options are None, Default, and Outline Mode. |
Following are the possible Script Locations.
| Screen Tab | Typically used for custom scripting pages added as tabs on the Agent screen; when this is selected, a script editor is enabled for Script Content and External URL is disabled |
|---|---|
| Custom App | Typically used to link via URL to an external page; when this is selected, External URL is enabled and Script Content is disabled. |
Following are the possible Script Types.
| Dynamic Script | Web page (e.g. HTML) that can be displayed to the agent |
|---|---|
| External URL | URL link to an external page or application |
| Voice | Text that is to be converted to speech using a TTS engine. |
On top of system-generated codes (System Dispositions), application-specific dispositions (referred to as Wrap-Up Codes or Agent Dispositions) specific to your own business can be defined. A wrap-up code can then be assigned to one or more Campaigns, so when a call is handled the wrap-up code is made available to the agent to set the status of the lead/contact record.
The definition of Wrap-Up Codes should be planned carefully in order to not create confusing duplicates, while on the other not make codes available where they do not make sense. For example, we may decide that Not Interested should be common to all campaigns, while, say, Already Ticketed should only be applicable to, for example, a Summer Vacation campaign.
To configure Wrap-Up Codes, go to the main menu area on the left and click on Campaigns; on the right, click View in the selection box for Define Wrap Up Codes. You can either add a new one by clicking on the Create Code button, or modify an existing one by clicking on it. In both cases the Wrapup Code details panel will be presented. Refer to the following pictures.
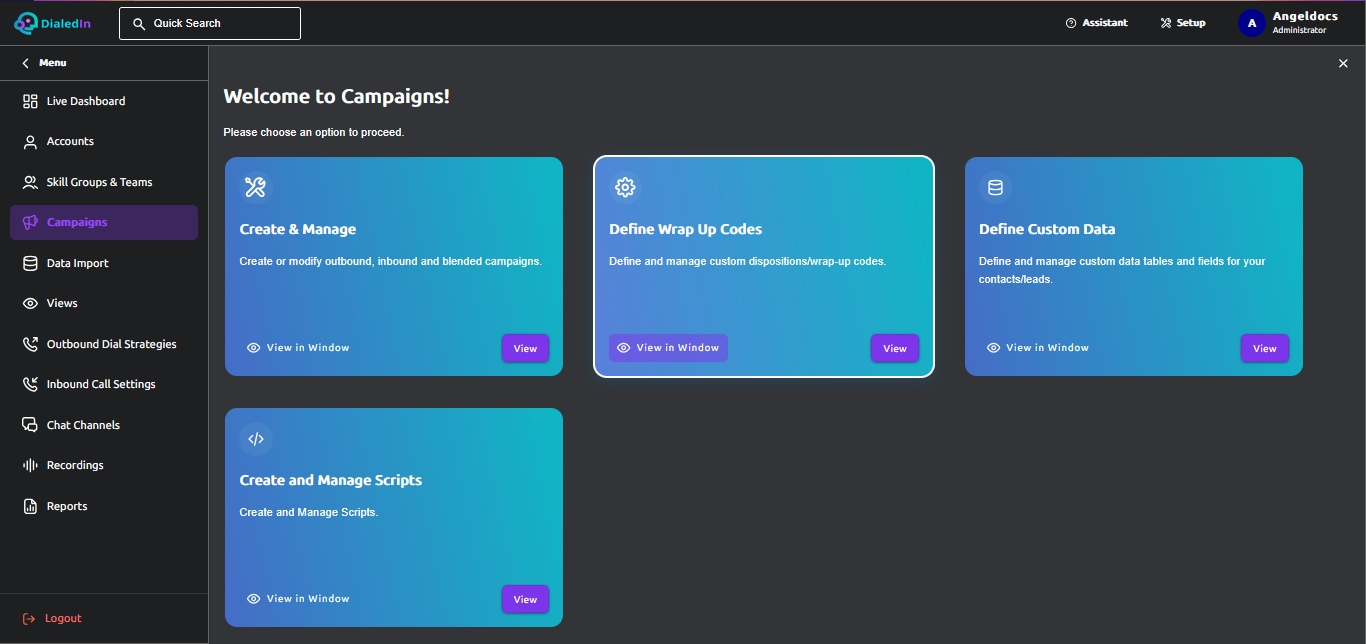
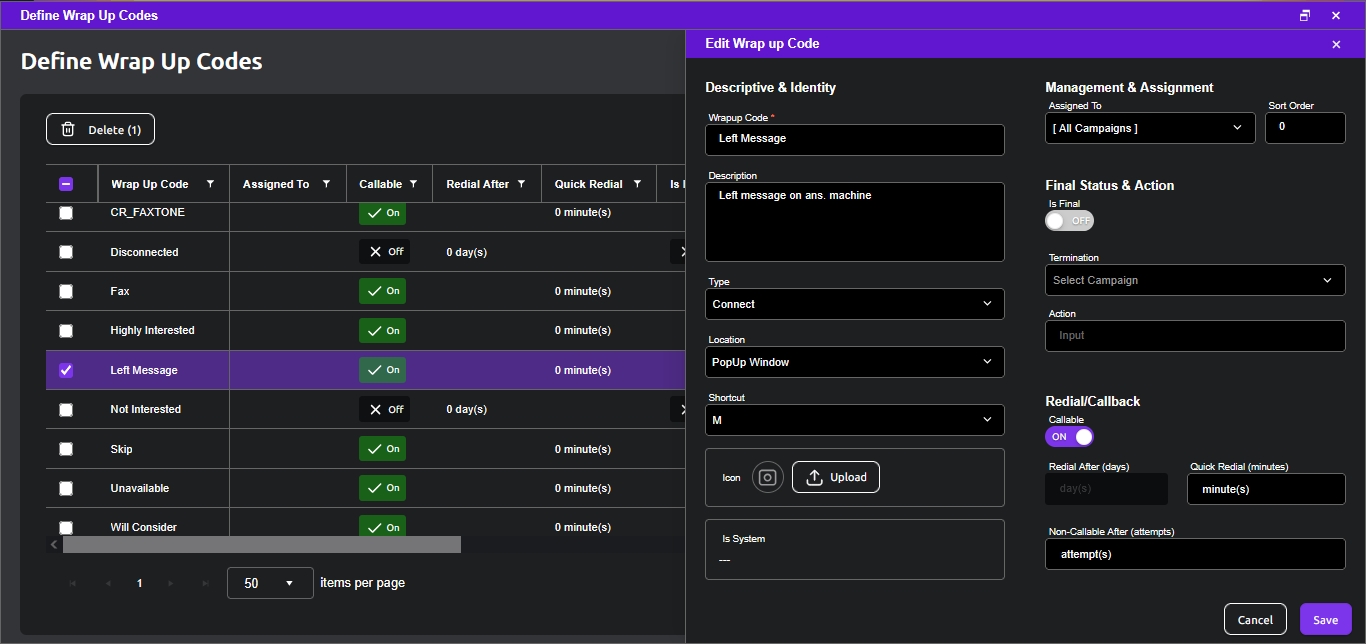
Following is the description of each parameter for Wrap-Up Codes.
| Wrap Up Code | Name to identify the Wrap-Up Code |
|---|---|
| Description | This field can be used for general purpose description and comments |
| Type | Pull‐down menu to select the type of call result that the wrap-up code represents; see the Wrap-Up Code Type table for a description of each option (notice that types are incremental in respect to call results) |
| Location | Pull‐down menu to select one or more places in the Agent App GUI from where the Wrap-Up Code can be set (refer to the Wrap-Up Code Location table); if none is selected, it will be hidden (and therefore the agent won’t be able to set the wrap-up code) |
| Shortcut | Pull-down menu with list of keyboard shortcuts that can be assigned to the Wrap-Up Code for a quick action; the actual shortcut would be SHIFT+‹selection› |
| Icon | Icon can be used when the Wrap-Up Code is presented in Left Menu; the icon picture must follow certain characteristic requirements (48x48 pixels, 100 DPI, PNG format and extension) |
| Is System | Flag to indicate that this is a system-generated disposition. |
| Assigned To | Pull‐down menu to select which Campaigns can use this Wrap-Up Code |
| Sort Order | Numeric value indicating the order in which the Wrap-Up Codes are presented on the GUI; higher number indicates first in order, i.e., displayed or presented first or in a higher position in the list |
| Is Final | Switch to indicate that a record with this disposition cannot be changed to another disposition; final dispositions should be used to indicate that a record has reached the end of its cycle |
| Termination | List of Campaigns to optionally (if one is selected) transfer the Contact to |
| Action | String that represents an action to take upon setting this Wrap-Up Code; typically, this is a URL string that corresponds to a POST action on an external system (see Integration) |
| Callable | Switch to indicate that a contact/lead (record) marked with this disposition (wrap up code) can be called again (added to call queues/lists) |
| Redial After | Number of days to wait before calling this contact/lead again (if it's Callable) |
| Quick Redial | Number of minutes to wait before re-dialing this contact/lead when the corresponding rule applies |
| Non-Callable After | Number of attempts (if different than 0) after which the Contact would become Non-Callable |
Following are the possible Wrap-Up Code Types.
| No Connect | The wrap-up code represents a call attempt that was not successful reaching a person or answering machine |
|---|---|
| Connect | The wrap-up code represents a call attempt that was successful reaching a person or answering machine |
| Contact | The wrap-up code represents a call attempt that was Connected and, in addition, the person answering was identified as the right Contact |
| Lead/Appt/Sale | The wrap-up code represents a call attempt that was Connected, the person answering was identified as the right Contact, and a positive action resulted from the call. |
Following are the possible Wrap-Up Code Locations.
| Popup Window | Default area; clicking on the disposition on main menu (left) will pop up a window that contains a pull-down menu with a list that includes this Wrap-Up Code |
|---|---|
| Left Menu | Clicking on the sub-button of the disposition icon on the main menu (left) will present a list that includes this Wrap-Up Code; in this case it will automatically hang up the call and set the wrap-up code (quick disposition) |
| Break Code | This is not a Wrap-Up Code, rather a custom option for the Busy status (and menu) of the Agent |
| Blind Transfer | Include this Wrap-Up Code in the disposition pull-down menu included in the Transfer Call window, Blind Transfer tab. |
In some cases, an Agent may want to conference another party (agent) during a call. To control who can be conferenced and under what conditions, the DialedIn CCaaS system provides the ability to designate Conference Numbers, optionally limited to a particular Campaign; that way, an Agent can select one of those third parties to conference in during a call, if needed. Additionally, the DialedIn CCaaS system can optionally enable a Conference Number to also accept Blind Transfers.
To access the setup area, click on Setup on the right side of the top area of the GUI, then click on Conference Numbers to open the list of conference numbers. Click on a number to edit, or click on the Add Conference Number button to create a new one; in both cases the Conference Number details pane will open.
Refer to the following pictures.
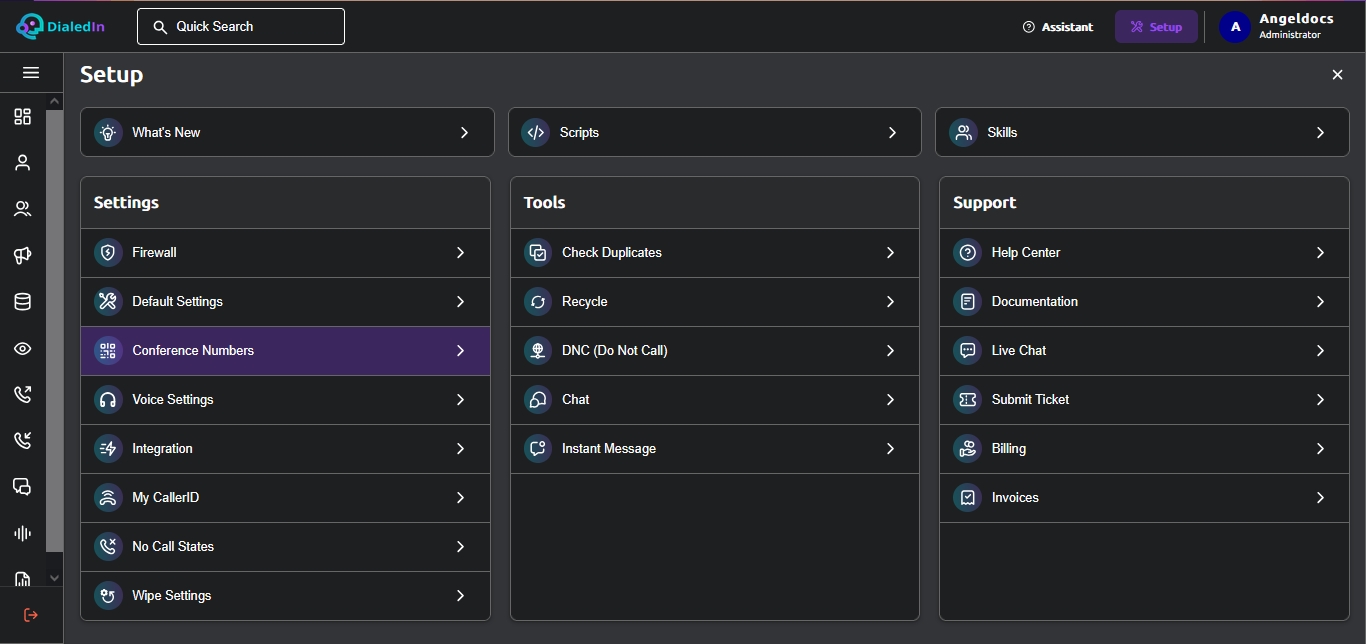
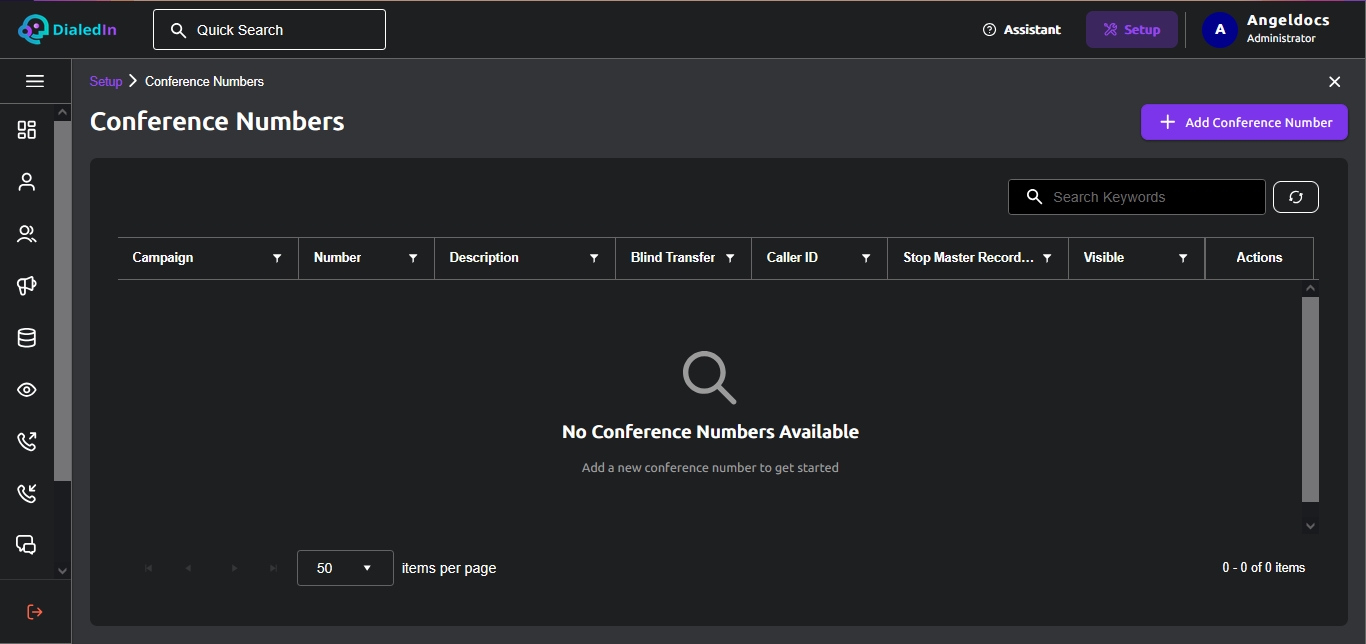
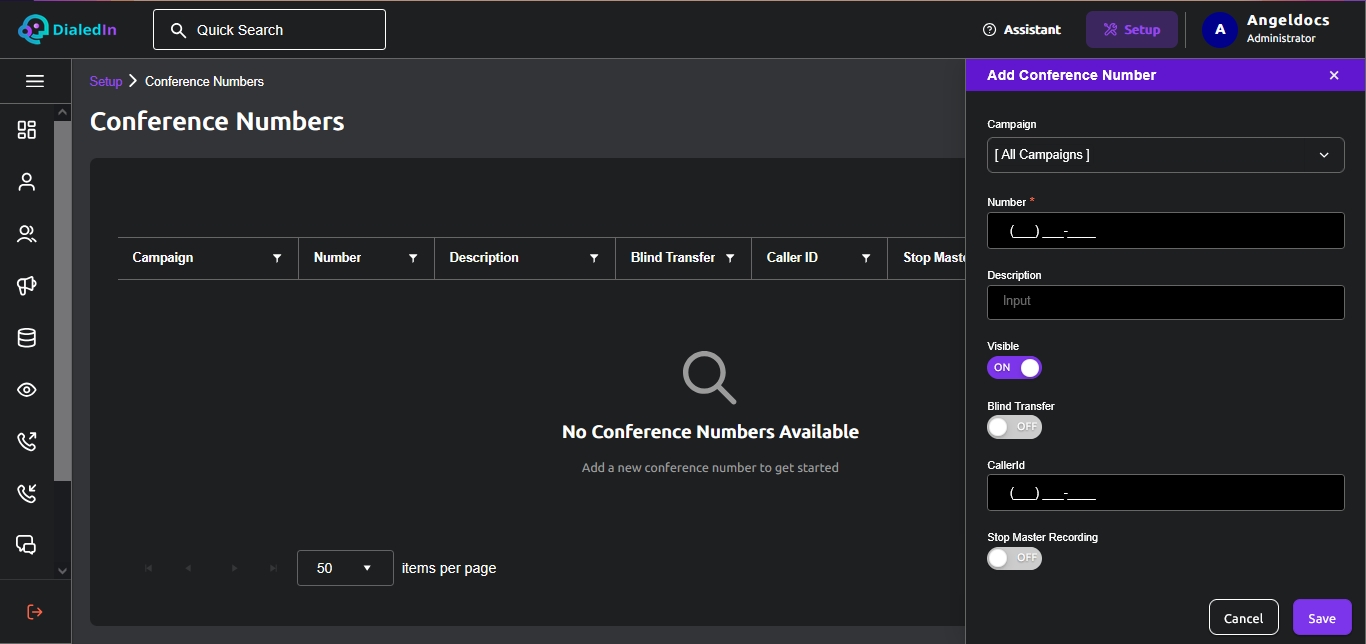
Following is the description of each parameter for Conference Numbers.
| Campaign | Pull‐down menu to restrict this the use of this number to a particular Campaign; otherwise, just select All CampaignS |
|---|---|
| Number | A valid phone number; usually the number of a supervisor, a higher tier, or another department, but could also be an external entity |
| Description | This field can be used for general purpose description and comments |
| Visible | Switch to enable visibility of the number in the appropriate Agent pop-up window/menu (i.e. make it available); unchecking this box allows a number to be disabled without deleting it |
| Blind Transfer | Switch to also enable the number to be used for blind transfers by an Agent |
| CallerId | Caller ID to be displayed to a called party |
| Stop Master Recording | For mono recording, no longer records the conferenced portion of the call (to apply to stereo recording, as well, DialedIn Support needs to be contacted). |
The DialedIn CCaaS system allows defining a specific Caller ID to be displayed to a called party during Outbound call handling. In most cases, this is the Default Caller ID defined in the Campaign Settings. Here we look at how to define a list of possible Caller IDs and setting certain conditions or restrictions on when they can be used (i.e. State, Campaign, Sub-campaign).
To access the setup area, click on Setup on the right side of the top area of the GUI, then go to the Settings section and click on My CallerID, which opens the list of caller IDs to view or edit.
Refer to the following pictures.
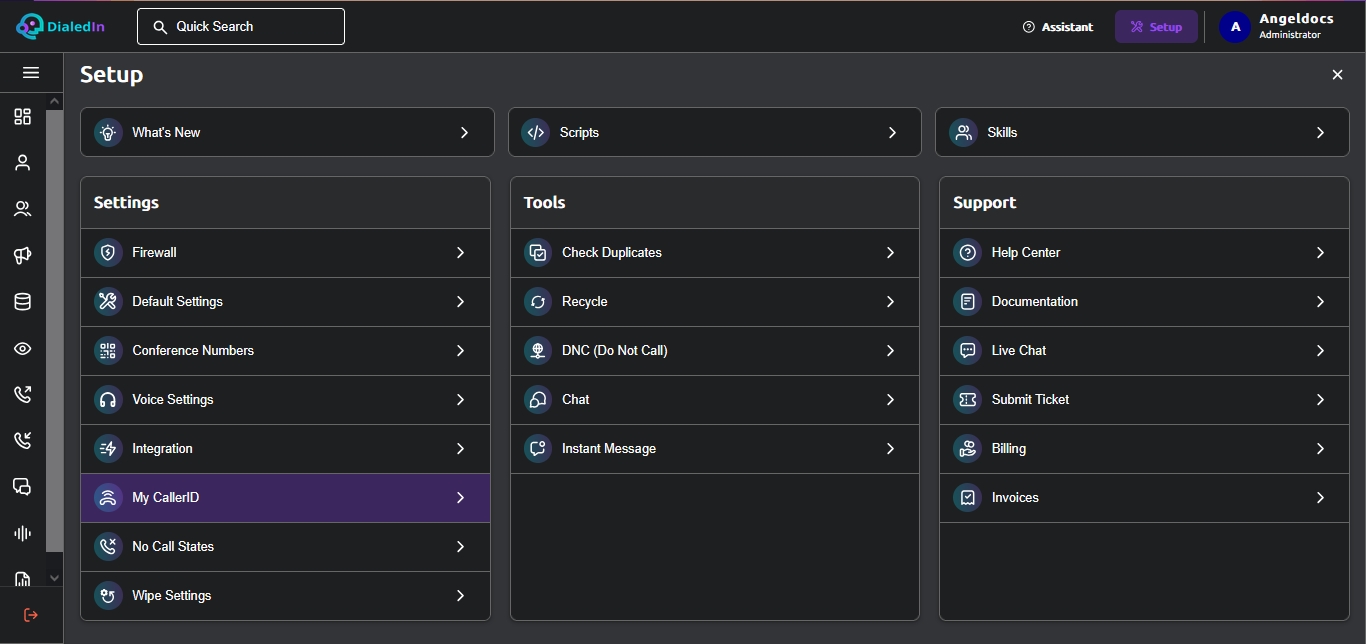
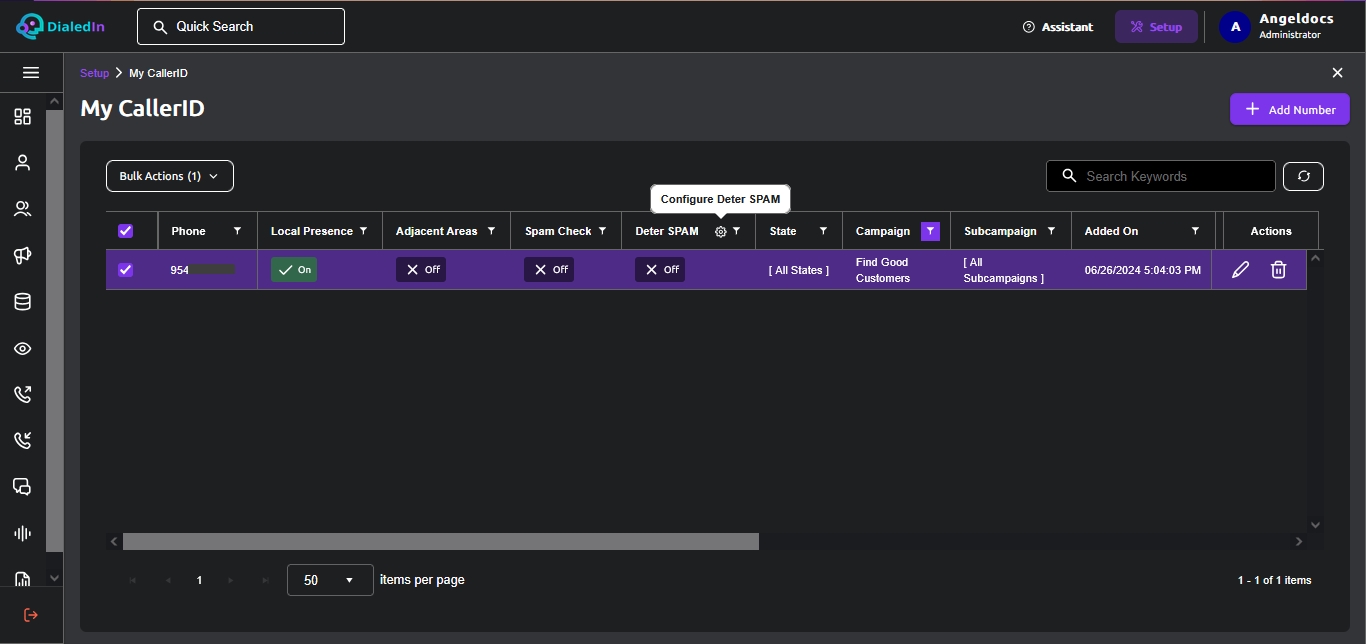
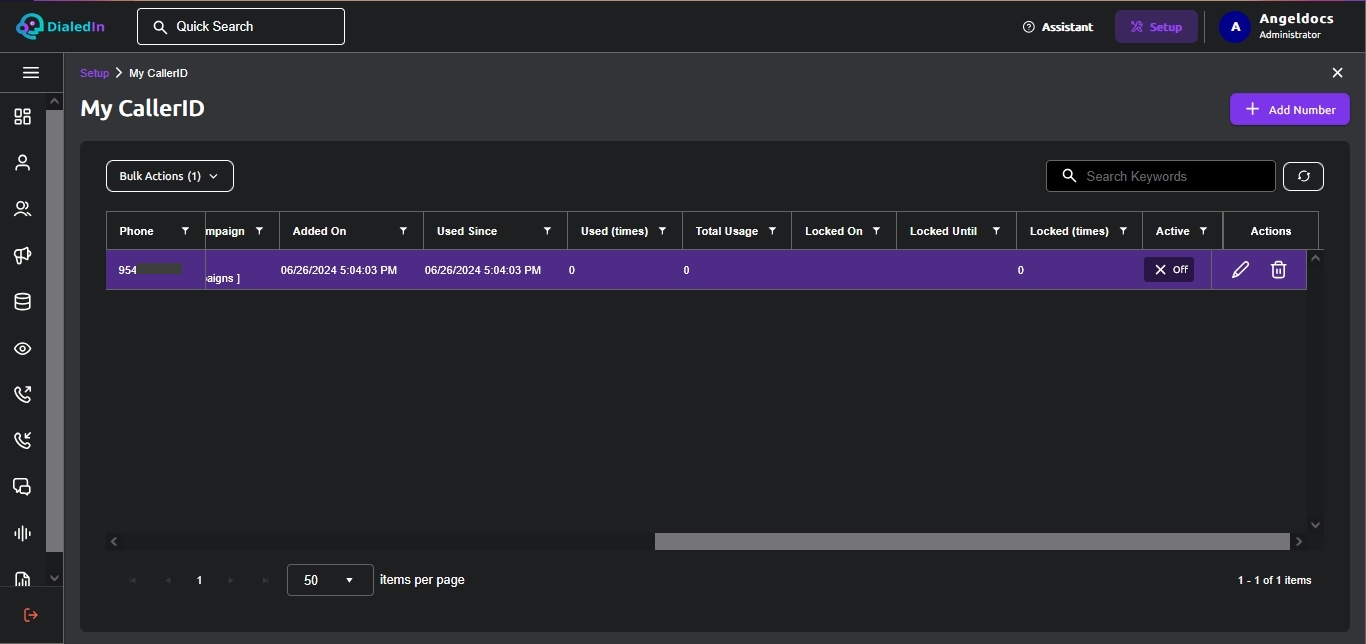
Following is the description of each parameter for My CallerID.
| Phone | Number that will be used to display as Caller ID |
|---|---|
| Local Presence | Switch that indicates whether this number is available to be used as Caller ID for numbers-to-be-called with the same area code (NPA) |
| Adjacent Areas | Indicates whether this number is available to be used as Caller ID for numbers-to-be-called that are in areas nearby. It is similar to State, but it uses a geographical determination; an adjacent area is considered one that geographically borders with it. |
| Spam Check | Switch that indicates number should be included in Automatic DID Swaps, which replaces number with another one in the same or neighboring area code, if an indication is obtained that it was flagged (by an external entity). This feature is currently turned OFF (at time of print). |
| Deter SPAM | Switch that indicates whether this number is to be considered under Deter SPAM rules and conditions. Campaigns that are enabled with Deter SPAM can only use as Caller ID a number with this switch set to ON; Campaigns that are not enabled with Deter SPAM can only use as Caller ID a number with this switch set to OFF. |
| State | Indicates whether this number is available to be used as Caller ID for numbers-to-be-called that are in the same State. The determination of State is done internally by the system and is based on NPAs (area codes); one or more NPAs are part of a State. If this field is set to All States, then the number can be used as Caller ID for a number-to-be-called from any State. |
| Campaign | Indicates whether this number is available to be used as Caller ID for numbers-to-be-called that are in the specified Campaign. If this field is set to All Campaigns, then the number can be used as Caller ID for a number-to-be-called from any Campaign. |
| Subcampaign | Indicates whether this number is available to be used as Caller ID for numbers-to-be-called that are in the specified Sub-Campaign. If this field is set to All Subcampaigns, then the number can be used as Caller ID for a number-to-be-called from any Sub-Campaign. |
| Added On | Date and time when this record was added |
| Used Since | Indicates the date-time when the number was used as Caller ID in the current cycle; a cycle starts when the number is used the first time, and again after the number was locked and is available again. |
| Used (times) | Indicates the number of times that the number has been used as Caller ID in the current cycle; a cycle starts when the number is used the first time, and again after the number was locked and is available again. |
| Total Usage | Indicates the cumulative number of times that the number has been used as Caller ID in all relevant cycles. |
| Locked On | When Deter SPAM is ON, this indicates the date and time when this number started being disallowed to be used as Caller ID, i.e. the start of the lock period. It is cleared when the lock period ends; it is also cleared when Deter SPAM is set to OFF. |
| Locked Until | When Deter SPAM is ON, this indicates the future date and time when this number is to go back to being allowed to be used as Caller ID, i.e. the end of the lock period. It is cleared when the lock period ends; it is also cleared when Deter SPAM is set to OFF. |
| Locked (times) | When Deter SPAM is ON, this provides the number of times (count) that this number has gone into a lock period, i.e. being disallowed to be used as Caller ID. It is cleared when Deter SPAM is set to OFF. |
| Active | Switch that indicates whether this number is available at all as Caller ID. |
Due to the nature of their business, DialedIn customers legitimately generate large volumes of calls in the attempt to qualify their leads and follow up; this level of activity may cause spam filters to confuse these legitimate efforts with actual spam and flag the involved telephone numbers. To help alleviate this side effect, the DialedIn solution is provides a feature that limits the use of Caller ID numbers in terms of occurrence and time periods; it’s called Deter SPAM.
When this feature is not used, a Caller ID number is selected for a call without consideration to how often it is used. With this feature, the usage of Caller ID numbers is taken into account under a number of conditions to reduce the probability of the number being confused with spam.
Without the Deter SPAM feature, the system selects the Caller ID to be displayed, as follows:
The following picture provides a graphical representation of the decision logic.
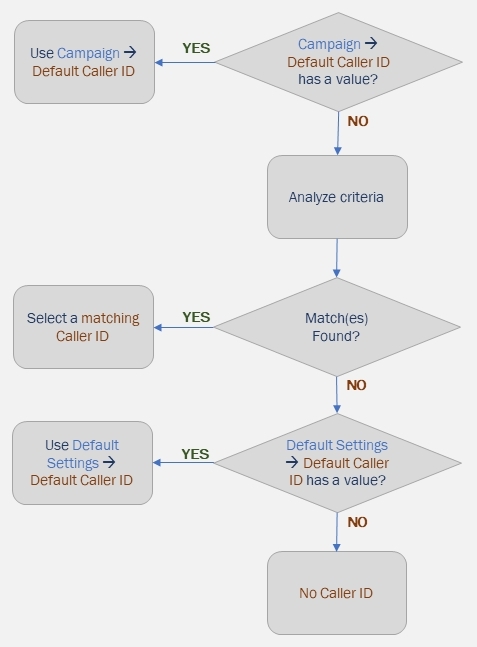
When we use Deter SPAM, we enable it at two levels:
As a result:
When we use Deter SPAM, we effectively filter the My CallerID list before we apply the matching criteria.
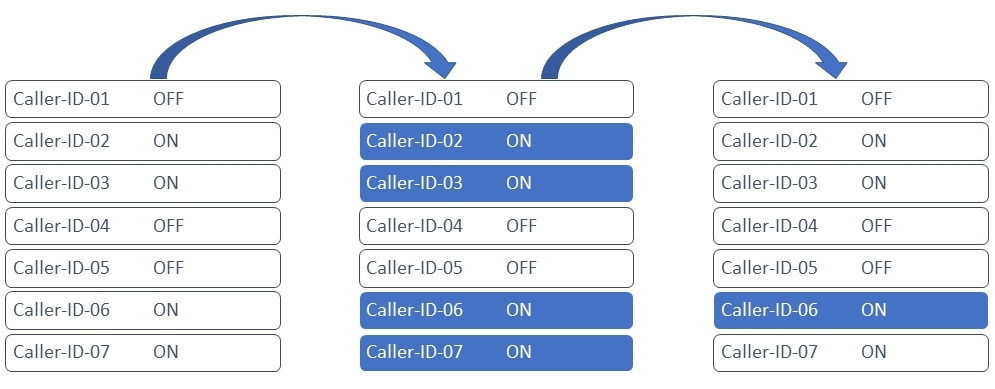
The process starts when a call is to be made (dial out), at which time the Campaign determines what entries (caller ID records) in My CallerID are to be parsed to find one that best meets all conditions and criteria; if the Campaign has Deter SPAM enabled (ON), then only those entries (caller ID records) in My CallerID that also have Deter SPAM turned ON, if any, will be considered as the caller ID for the call; conversely, if the Campaign has Deter SPAM disabled (OFF), then only those entries (caller ID records) in My CallerID that also have Deter SPAM turned OFF, if any, will be considered as the caller ID for the call. So, basically, at this first step we (conceptually) divide My CallerID in two sets and pick the one that interests us.
When we have our set, we compare every entry (caller ID record) against an ordered matching criterion set, which we will represent in this document as a Matching Criteria Table, and assign each caller ID record to one row of that table; the row assigned is the best match, which is the first row, from top to bottom, that matches.
Then, for each set of caller IDs that match the same row in the Matching Criteria Table, which we will call Matching ROW, we select only one by applying a priority rule (if Deter SPAM is ON) or randomly (if Deter SPAM is OFF). At this point we should have one or more Matching ROWs with a single entry (caller ID record) each; if it is more than one row, we apply an additional priority rule if Deter SPAM is ON.
The steps are as follows:
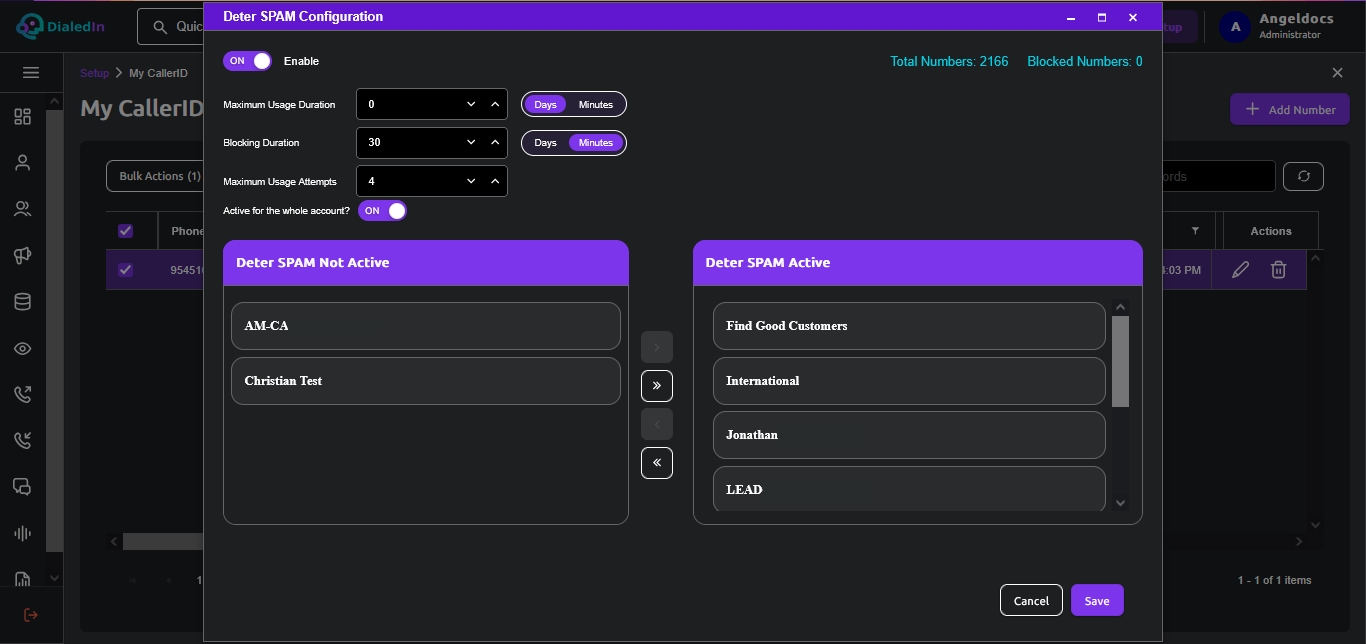
The following pictures provide a couple of basic graphical examples of the decision logic.
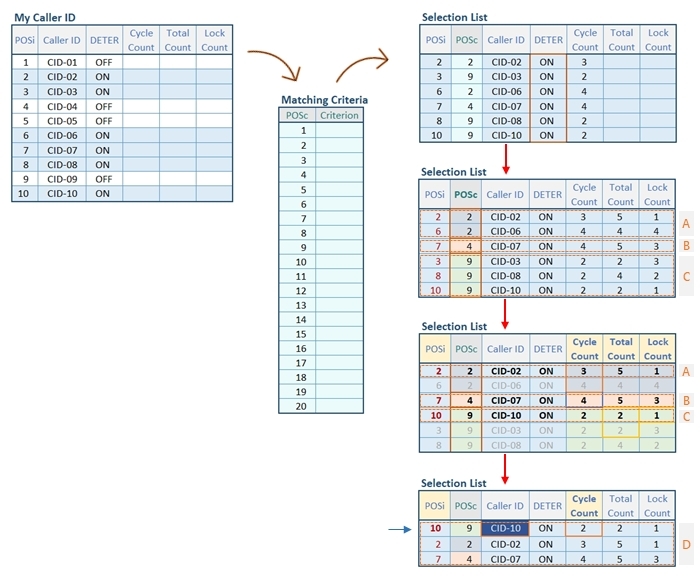
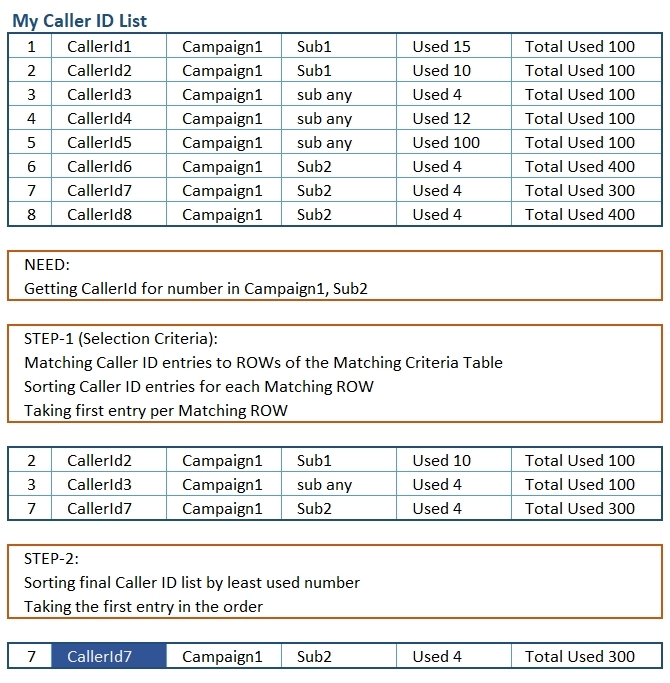
It is important to emphasize that if Deter SPAM is enabled as a feature, but there are no numbers in My CallerID also enabled with Deter SPAM, there will be no match and therefore no Caller ID available. Conversely, if Deter SPAM is not enabled as a feature, but all numbers in My CallerID are enabled with Deter SPAM, there will be no match and therefore no Caller ID available.
As we previously stated, before Deter SPAM is to be taken into consideration, each number in My CallerID is first analyzed against the number-to-be-called to determine which numbers, if any, meet a criterion to be considered as Caller ID for the number-to-be-called. The following list provides an ordered list of criteria, which is applied from first (1) to last (20) until one criterion is met.
Following is the Matching Criteria Table
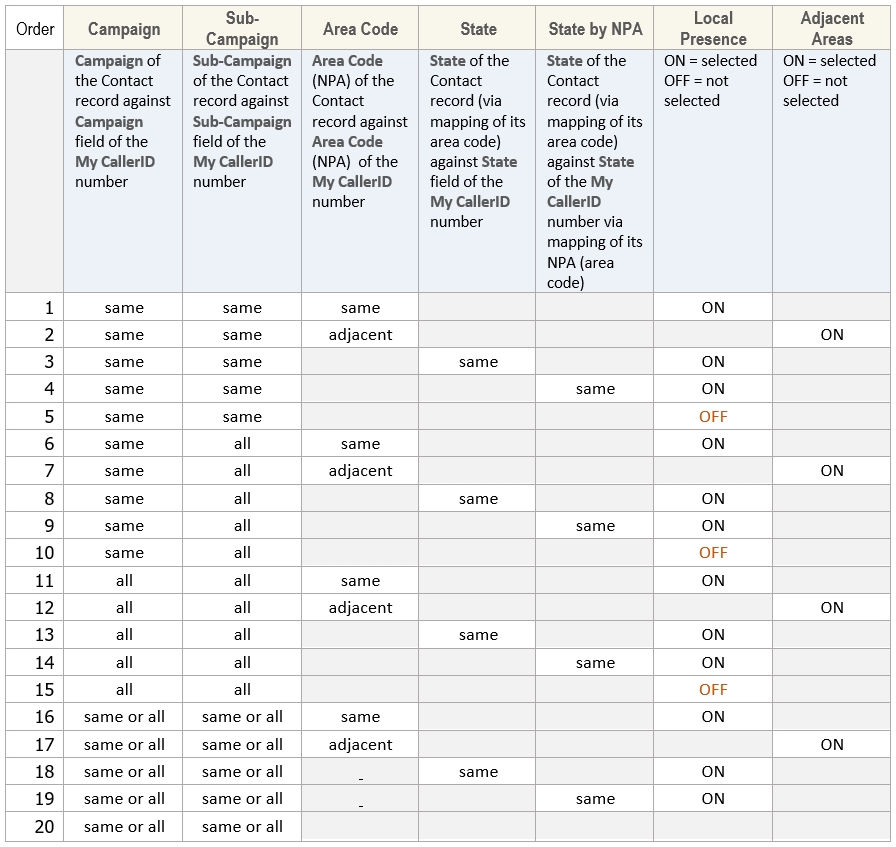
The previous paragraphs describe how numbers are selected from My CallerID to be used as the Caller ID for a call, but we also mentioned that we need to enable Deter SPAM as a feature, as well, so those numbers in My CallerID that are enabled for Deter SPAM get treated accordingly.
To access the Deter SPAM feature configuration we click on the configuration/settings icon next to the Deter SPAM column in My CallerID. Refer to the following picture.
This pops up a new window with the following Deter SPAM Configuration options.
| Enable/Disable switch | Turns the feature ON and OFF |
|---|---|
| Maximum Usage Duration | The time in minutes after which a number in My CallerID that has Deter SPAM enabled and is being used as Caller ID, is Locked (not allowed to be used anymore as a Caller ID); this duration is absolute (time runs independent of whether a pause in calls occurs) |
| Days/Minutes | The Days/Minutes selector switch for Maximum Usage Duration indicates the unit of time to be utilized. Refer to explanation and examples below for how Days and Minutes are counted. |
| Blocking Duration | The number of days that a number in My CallerID that has Deter SPAM enabled and has been Locked, stays in the Locked state. |
| Days/Minutes | The Days/Minutes selector switch for Blocking Duration indicates the unit of time to be utilized. Refer to explanation and examples below for how Days and Minutes are counted. |
| Maximum Usage Attempts | The number of times that a number in My CallerID that has Deter SPAM enabled can be used as Caller ID, after which it is Locked (not allowed to be used again as a Caller ID until unlocked again); this is compared to the number's Usage (times) field. |
| Active for the whole account | Indicates whether to enable Deter SPAM for all Campaigns; when Whole Account is disabled, only those Campaigns manually selected (moved to the Active List, see below) are enabled for Deter SPAM; when Whole Account is enabled, all Campaigns are moved automatically to the Active List. |
| Campaign lists (not-active and active) | Two Campaign lists side by side; the one on the left (Not Active List) lists all available Campaigns in the system that are not enabled for Deter SPAM; the one on the right (Active List) lists all Campaigns that are enabled for Deter SPAM. |
It is important to understand how Days or Minutes are counted when used for Maximum Usage Duration and Blocking Duration. The important considerations being the following.
The following example use cases demonstrate how Days are used when selected as the option for Maximum Usage Duration and Blocking Duration:
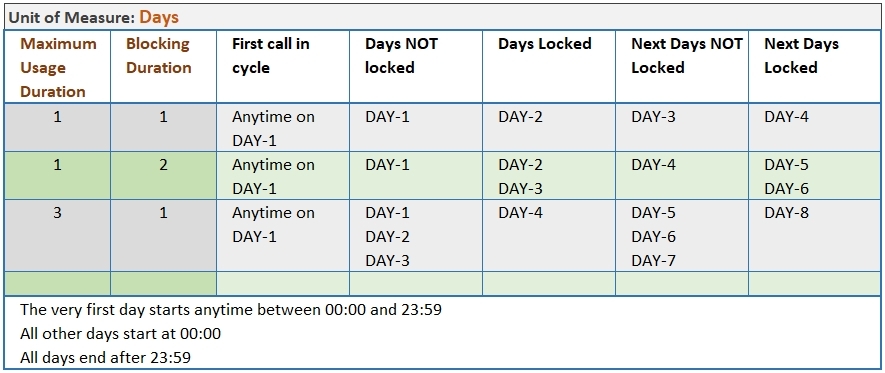
The following example use cases demonstrate how Minutes are used when selected as the option for Maximum Usage Duration and Blocking Duration:
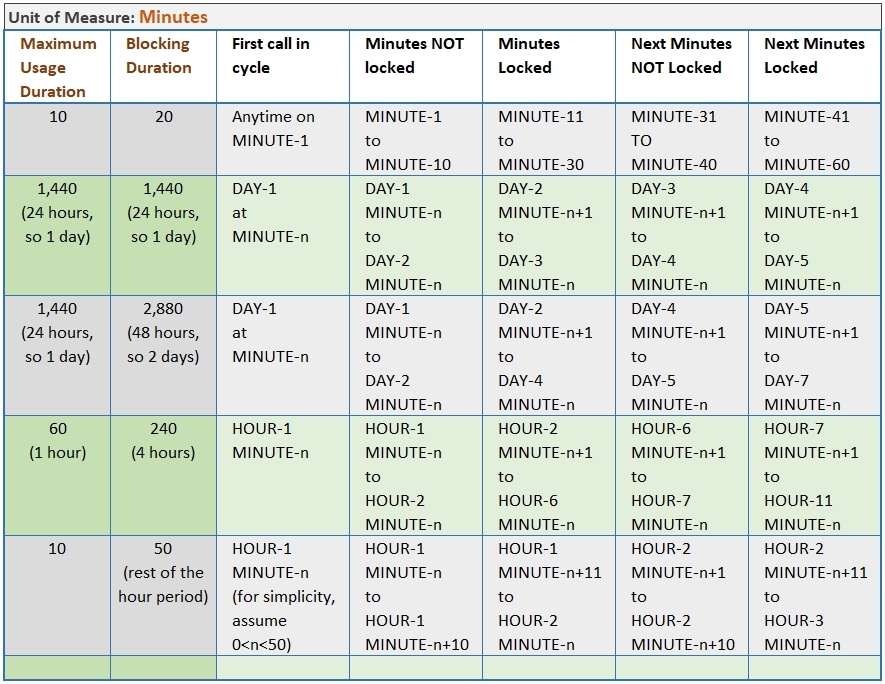
The DialedIn CCaaS system can be configured to disallow calls to certain states and/or area codes for all Campaigns or for certain Campaigns. This can be enabled when data is loaded into the system, so not to import leads that match the restriction; or it can be enabled just when calls are made, so allowing to import the leads, but not allowing to make calls on those leads.
To access the setup area, click on Setup on the right side of the top area of the GUI, then go to the Settings section and click on No Call States, which opens the list of areas to view or edit.
Click on an item to edit, or click on the Add Call State button to create a new one; in both cases the Call State details pane will open.
Refer to the following pictures.
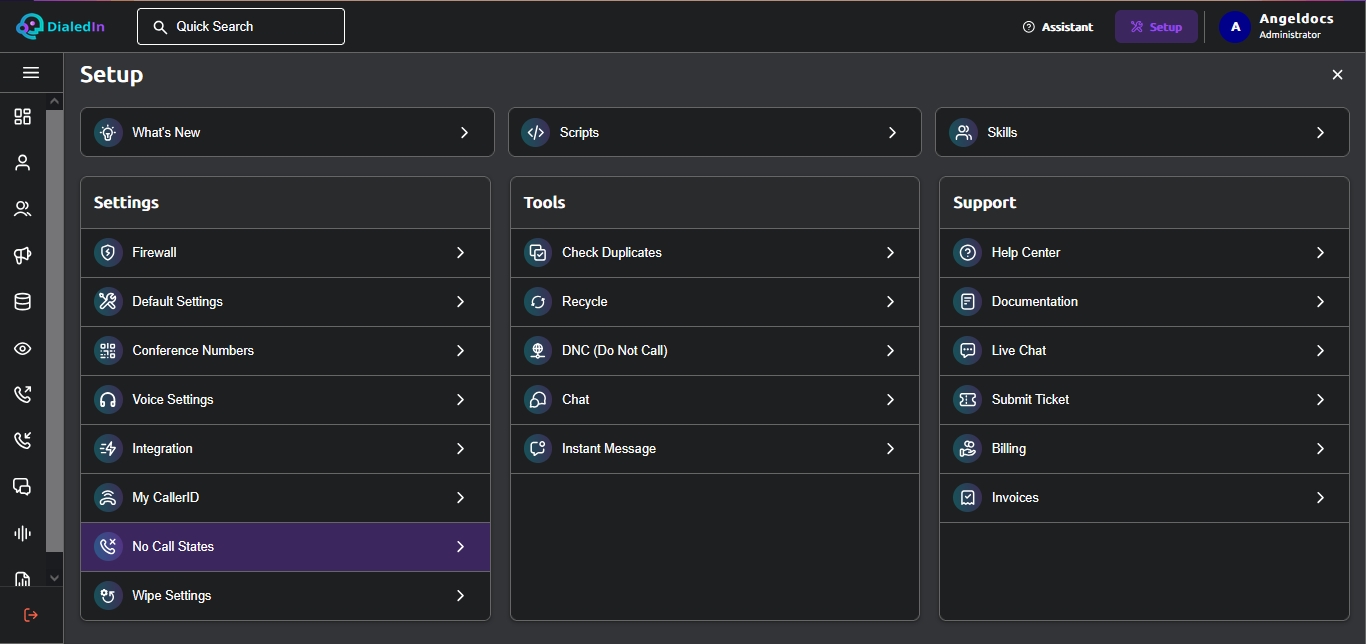
Following is the description of each parameter for No Call States.
| Area Code | Pull‐down menu to select a telephone area code to be set to no-call. |
|---|---|
| State | Pull‐down menu to select a state to be set to no-call. |
| Campaign | Pull‐down menu of Campaigns for which the no-call directive applies; if left blank, the rule applies to All Campaigns. |
| Active During Import | Switch to indicate the system to ignore (i.e. not import) leads that match the no-call rule setting. |
| Active on Outbound Calls | Switch to indicate the system to not dial leads that match the no-call rule setting |
The DialedIn CCaaS system provides a rich set of integration possibilities, but in this section we’ll focus on setting the parameters needed (e.g. login info) for the system to be able to communicate with some of the typical external systems.
In general, it is advised that DialedIn is consulted to determine the specifics of your integration needs and help you with them.
To access the setup area, click on Setup on the right side of the top area of the GUI, then go to the Settings section and click on Integration. Refer to the following picture.
The first integration point we look into is a mail system; for this case we need to tell the system how to connect to the mail system, including the email account. This provides the sender email account details used when sending emails from the DialedIn CCaaS system; e.g. a right-click on a lead (Contact) may present an option to email the lead details.
To configure the sender email account, click in the Email tab to display the corresponding setup window; enter the information as provided by your email provider. Refer to the following picture.
Now we look into Google Docs; for this case we just need the login information. Click in the Google Docs tab to display the corresponding setup window; enter the corresponding login information. Refer to the following picture.
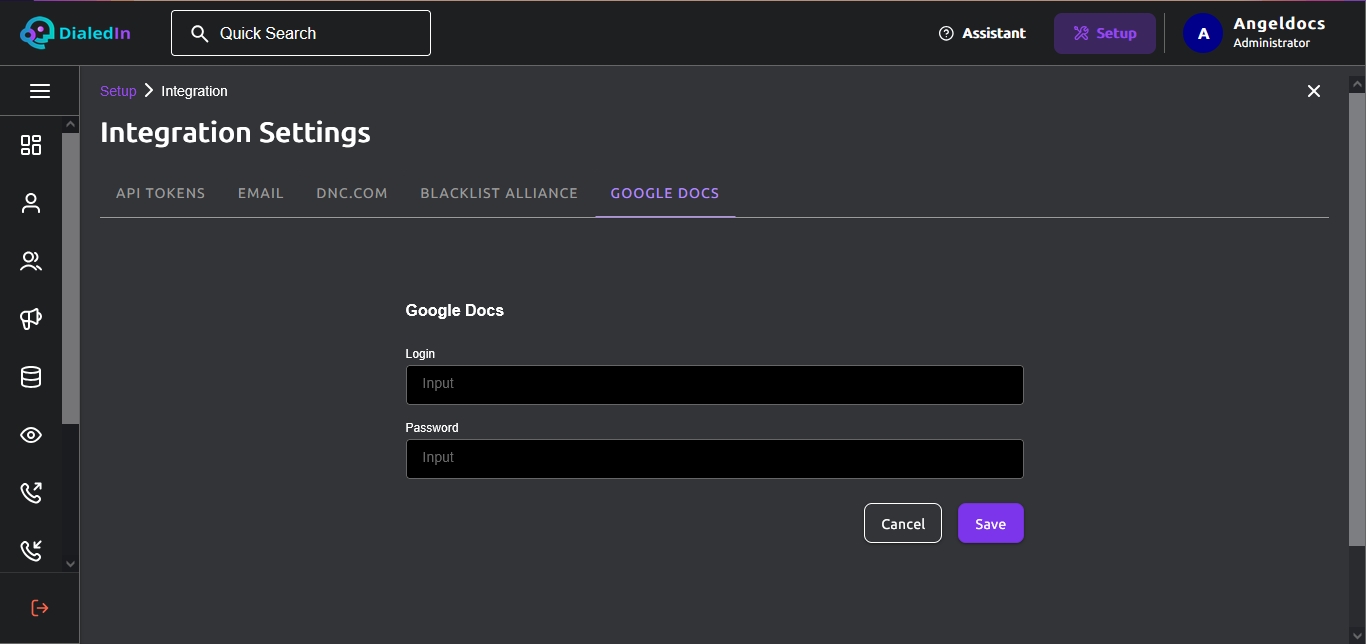
Next is configuration of the API key for Blacklist Alliance integration. Click in the Blacklist Alliance tab to display the corresponding setup window, then enter your API key and save. Refer to the following picture.
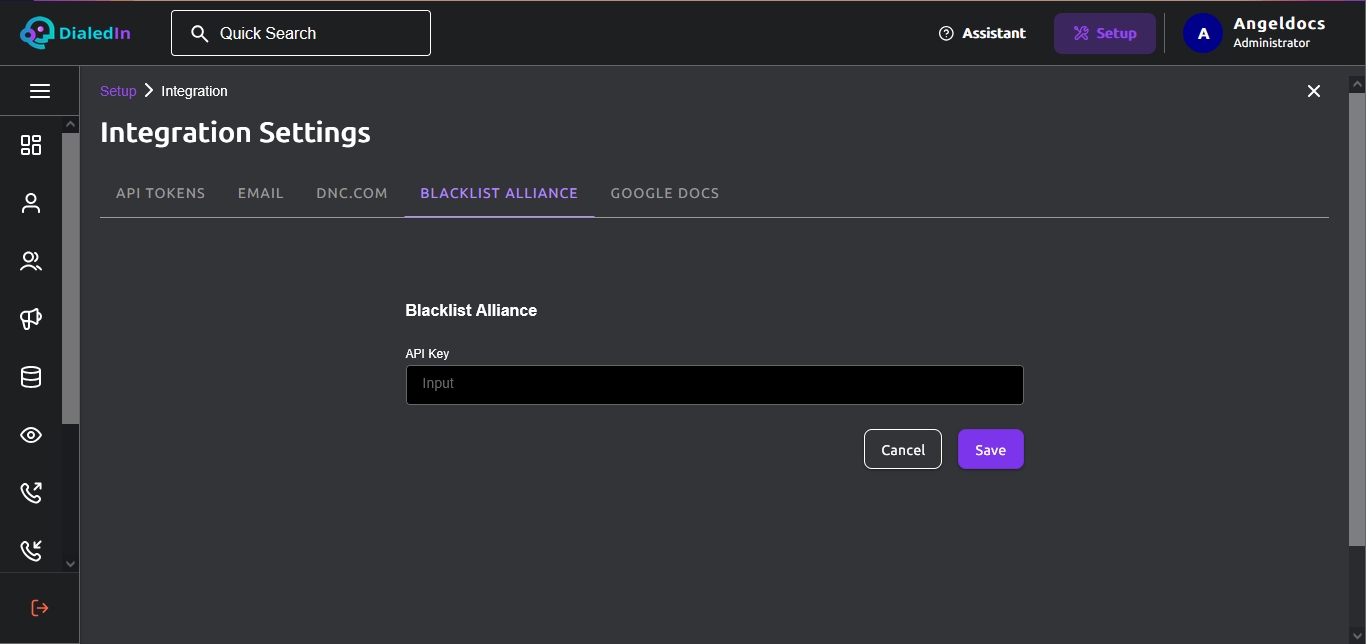
After the proper API KEY is saved, the corresponding Campaign settings area becomes enabled (up to that point it was hidden) in Campaign Settings.
When the DialedIn CCaaS system is properly integrated with the Blacklist Alliance, and the check against it is positive, the number is scrubbed accordingly.
If the corresponding telephone number is scrubbed through this process, the DialedIn CCaaS system updates the corresponding Contact record with a disposition that conforms to the following format:
FTC DNC (‹code›)
The following tables list the possible values for ‹code›, which the DialedIn CCaaS system determines based on the information obtained from Blacklist Alliance.
| C | Callable |
|---|---|
| W | Wireless number |
| D | Do Not Call database match; Details field in Call History provides additional details, if available |
| L | Wireless number in a US state that does not allow telemarketing to wireless numbers even if manually dialed; Details field in Call History provides additional details, if available |
| B | Blocked |
| T | Do Not Call Today |
And now we look at how to access the Do-Not-Call system (DNC.com); for this case we just need the login information.
Click in the DNC.com tab to display the corresponding setup window; enter the corresponding login information. Refer to the following picture.
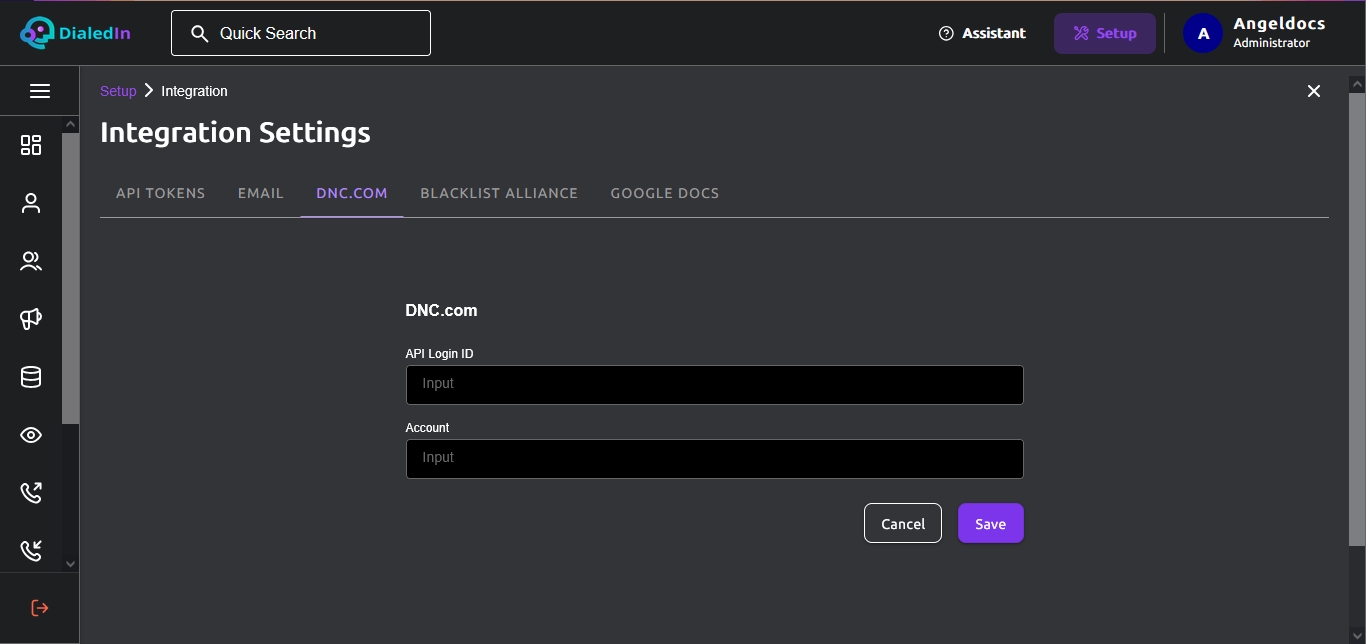
After the proper login and account information is saved, and effectively have been synchronized with DNC.com, the corresponding Campaign Settings become enabled (up to that point they were hidden) in Campaign Settings.
When the DialedIn CCaaS system is properly integrated with the Do-Not-Call system (DNC.com), it checks against the DNC database when a call is to be attempted in Predictive and Progressive dialing modes; if the result is positive, the number is scrubbed accordingly.
If the corresponding telephone number is scrubbed through this process, the DialedIn CCaaS system updates the corresponding Contact record with a DNC disposition that conforms to the following format:
FTC DNC (‹code›)
The following tables list the possible values for ‹code›, which the DialedIn CCaaS system determines based on the information obtained from DNC.com, the DialedIn Campaign settings, and other logic.
First, those Allowed When It's a Manual Call.
| W | US Wireless number – number is not in any DNC database (or it is but has been overridden by an industry exemption) but it cannot be called from a predictive dialer. |
|---|---|
| G | Valid EBR and US Wireless Number or VoIP Number, not on any DNC – still cannot be called from a predictive dialer as EBRs do not constitute an exemption to those rules. |
| H | US Wireless Number or VoIP Number that is also a Valid EBR overriding an otherwise DNC number – still cannot be called from a predictive dialer as EBRs do not constitute an exemption to those rules. |
| F | Valid EBR and Wireless number in a US state that does not allow telemarketing to wireless numbers even if manually dialed (see W for more details); not on any DNC list. |
| V | Valid EBR overriding otherwise DNC number that is also a Wireless number in a US state that does not allow telemarketing to wireless numbers even if manually dialed (these states are WY, NJ, TX, LA, and AZ). |
Now, those Non-Callable.
| L | Wireless number in a US state that does not allow telemarketing to wireless numbers even if manually dialed (see W for more details); not on any DNC list; not an EBR. |
|---|---|
| I | Invalid (area code not active or reserved/special use phone number pattern, i.e. 555-5555). |
| M | Malformed (number is not 10 digits, etc.). |
| B | Blocked (number is in an area code not covered by the National Subscription on this project or is in a configured no-call area code or no exemption was available in a pre-recorded call campaign). |
| P | Project DNC or DNF database match; no further checks are performed; the choice to scrub against DNC vs. DNF (Do Not Fax) needs to be made previously at the DNC.com Campaign level. |
| D | Do Not Call database match; Details field in Call History provides additional details (see Call Detail report). |
| T | Do Not Call Today |
Please refer to DNC.com to determine what constitutes an Existing Business Relationship (EBR), and other important rules; DialedIn provides tools that help you comply with regulations, but it is your sole responsibility to configure, verify and operate your setup in a compliant manner.
Also note that when we refer to DNC database, we’re referring to all applicable DNC lists as a whole. There are several types of DNC lists; there are state lists (several states have DNC lists). There’s a Federal list, referred to as the National DNC registry; and there’s a DMA (Direct Marketing Association) list.
There is also an Internal (in-house) list; the Telephone Consumer Protection Act (TCPA) requires each company engaged in telemarketing to maintain a list of numbers for persons who explicitly ask a company not to call them.
API tokens are needed for authentication of HTTP GET Methods, as well as determining the corresponding subdomain.
The DialedIn solution provides the ability to import or update information using HTTP GET Methods. They can be used as wrappers for FORM actions, for example, when integration using PHP is not viable.
These methods are accessed via https://api.chasedatacorp.com/HttpImport/ and are explained under Integration.
The DialedIn solution allows you to create multiple tokens for the case when you need a different one for each of your vendors, for example, when you have them injecting leads independently. To create an API Token, select the API Tokens tab.
To add a new one, click on Click here to add new item on the grey bar on top of the list, under Token. This allows you to provide a Description or label for your token. Save your change and the new Token with its Description and corresponding dates are shown. Refer to the following pictures.
Keep in mind that when using a GET method, in addition to the API Token, you are required to provide the accid, which corresponds to the FQDN prefix (e.g. if customer/vendor FQDN is test.chasedatacorp.com, accid = test); refer to the integration section.
The DialedIn CCaaS makes it possible for users of the system (e.g. Agents) to communicate with each other using built-in communication channels, which we will show how to configure in this section.
To configure chat groups go to the main menu area on the left and click on Chat Channels.
First thing is to either select an existing Chat Channel configuration using the pull-down menu on the top-left, or create a new one by clicking on ‘New Channel’. Refer to the following picture.
The Chat configuration panel will show four areas split into two pairs, Participants and Visible For; each pair has a set from where you select from, and a set for already selected or assigned ones.
You can move Possible Participants to Assigned Participants, and viceversa. Similarly, you can move Can Be Visible For to Will Be Visible For, and viceversa. You can assign/move individual agents or agents that belong to a group or have a common characteristic like, for example, skill set, campaign, and more; the interface allows you to expand items to see and/or select from them.
Every business will have its own needs and requirements depending on type of business, size and structure of business, types of activities, number of agent roles, etc. Some businesses will require more complex rules and configurations than others, but all can follow a tiered approach to defining them. With that in mind, we will first look into how to put together a basic configuration, then how to build from that base; that way we don’t get overwhelmed with complexity and can get started quickly. The DialedIn CCaaS system allows such a gradual buildup.
Do note that this approach does not prevent good advanced planning, which is highly recommended; it just provides a quick start with gradual buildup, which allows, among other things, verification of the mapping of business rules to system configuration, in stages.
There are many things that could be configured, but the first things we need to do is determine what we want to accomplish, at least for the initial get-up-to-speed phase. Following are some of the things that we need to take into consideration for basic system operation.
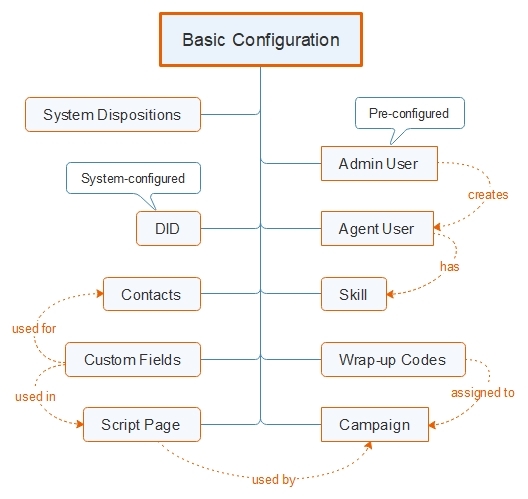
As we can see from the diagram above, there are some dependencies that should be addressed in a sensible order. To be exact, some items are not strictly required, like Custom Fields, Skill, and Wrap-up codes, but a practical scenario seldom makes sense without them; similarly, the DialedIn CCaaS system provides a default Script Page, but it will just display the default contact fields (as well as custom fields), while most practical situations go beyond that.
You want to determine what an Agent will be capable/allowed to do before creating the Agent account; therefore, you should create a corresponding Skill first.
Refer to Setup Flow for more details.